In photography there are always trade-offs. Modern DSLRs try to balance the trade-offs to give you the perfectly exposed photo.
When it comes to shooting mode, I’m an Aperture kinda girl. I love the control I have over the DOF (Depth of Field). WIthout thinking I can spin that adjustment dial until the image is bright enough and the subject is isolated to my satisfaction. I developed my love of the Aperture Mode over the course of years of shooting things that don’t move a lot, like flowers and rusty things. When I started shooting birds, I started in Auto to see what the camera would choose for the situation. I noted the shutter speeds seemed to be between 200-350. Moving to Aperture mode, I kept that number in mind. Since I hate noise (grainy-ness) and love bokeh (the cool blurry swirly backgrounds in photos that make the subjects pop), I kept the ISO low and the Aperture pretty close to wide open. That is my comfort zone. Unless I am shooting in a studio under a light kit I keep to that formula.
That brings us to the trade-offs. What I give up for my love of a shallow DOF and lots of creamy bokeh is the ability to stop action unless there is a ton of light. Sometimes I have gotten pretty lucky, but not nearly as often as I would like. I see in focus action shots of wildlife all the time, I see them taken with mirrorless cameras too – there has to be a way. Trying a new mode would prove to be part of the answer. It’s time to leave my comfort zone and tread out into the wilderness that is Shutter Mode! After reading some articles I have decided that since this whole bird obsession thing is an exercise aimed at becoming a better photographer, I owe it to myself to try this long neglected mode on my camera.
This weekend I was pretty much house bound with a nasty bug courtesy of a tick bite acquired on a recent hike, so I read a few articles about shooting birds. Something I had never considered was increasing the ISO – for me the low ISO has been like a treasured idol in my toolbox of predictable outcomes, even though my camera has one of the highest ratings for performing at higher ISO settings. Another thing I had to give up was the image review feature – the more I shoot the more I have seen how that third-of-a-second image in my viewfinder has robbed me of shots, losing my subject as the image flashed onscreen. By Sunday I resolved that I was ready to take off the training wheels and try this out.
I decided to start a quest to understand the structure of a hummingbird’s wings. I have shot lots of hummers in the last year and have always focused on their eyes whenever possible. I still did that, but I did a few things to increase my odds of getting a good shot. First, I made my focus point as small as possible so that I did not have to pre-focus on the feeder first and hope to get a focus on the bird. Next, I chose certain feeders to focus on – ones that were in bright sunlight. Finally, I deleted all shots of birds not in motion – I have hundreds of clean focused shots of birds sitting still – I want to see motion. I also deleted shots where the wings were not definable. I took some test shots at different shutter speeds – 500, 640, 800, and 1000 – each of these settings required a change in ISO to produce an image bright enough to use. I used to work with ISOs from 200-800 – now I would work as high as 2500. Beyond that I was just not happy with the grainy nature of the test shots in the available light on that day. This required me to change settings as the light changed – it was a partly cloudy day so I got lots of practice.
The shots that follow are not great, but I am seeing that it is possible for me to get closer to capturing or potentially stopping movement. Stopping a hummingbird’s wing is an unrealistic challenge – but I do think that I understand the structure better now.
I started with some of my better shots in my old mode taken in the last week – usually in pretty good light to begin with.

f6.7 1/250 sec ISO 1000
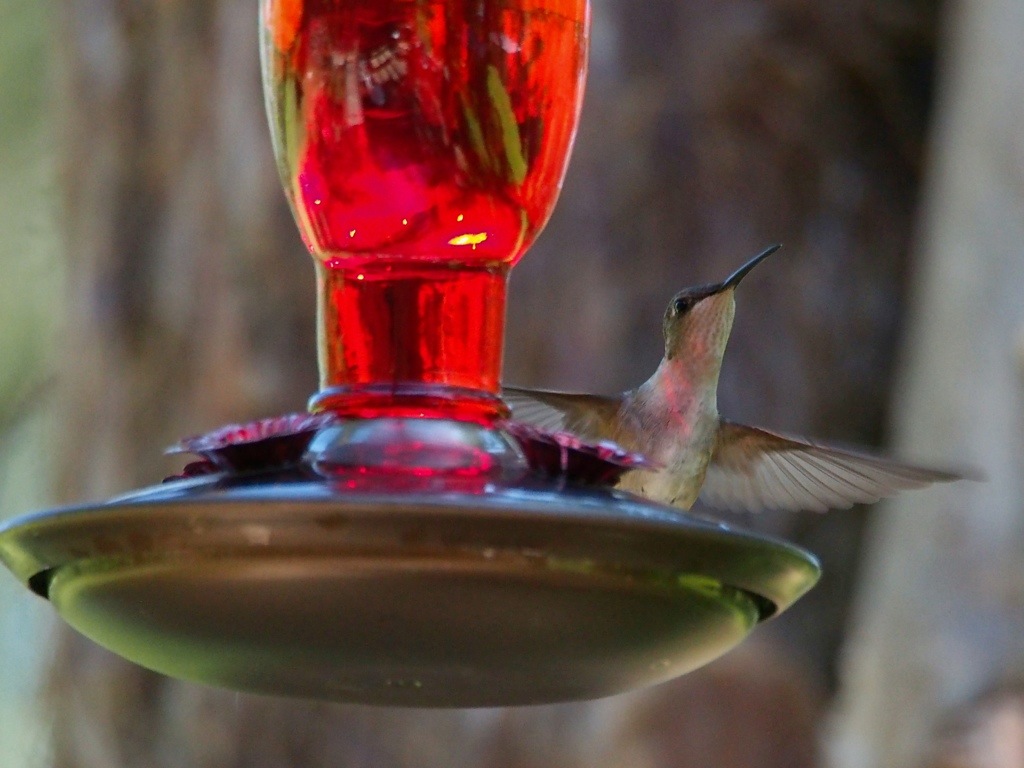
This is one of my better efforts in Aperture Mode

f6.7 1/250 sec ISO 1600
This is a shot where I just increased the ISO – the light was almost perfect so even in Aperture Mode I got a sense of the feathers.

F5.9 1/250 sec ISO 1000
Still in Aperture Mode and bumping up the ISO first – still wonderful light

f6.7 1.250 sec ISO 250
Starting to lose the light – but because the feeder was close it still worked – I can almost make out some of the structure of the feathers – last shot in Aperture Mode.
Now onto Shutter Mode – these shots were all taken yesterday.

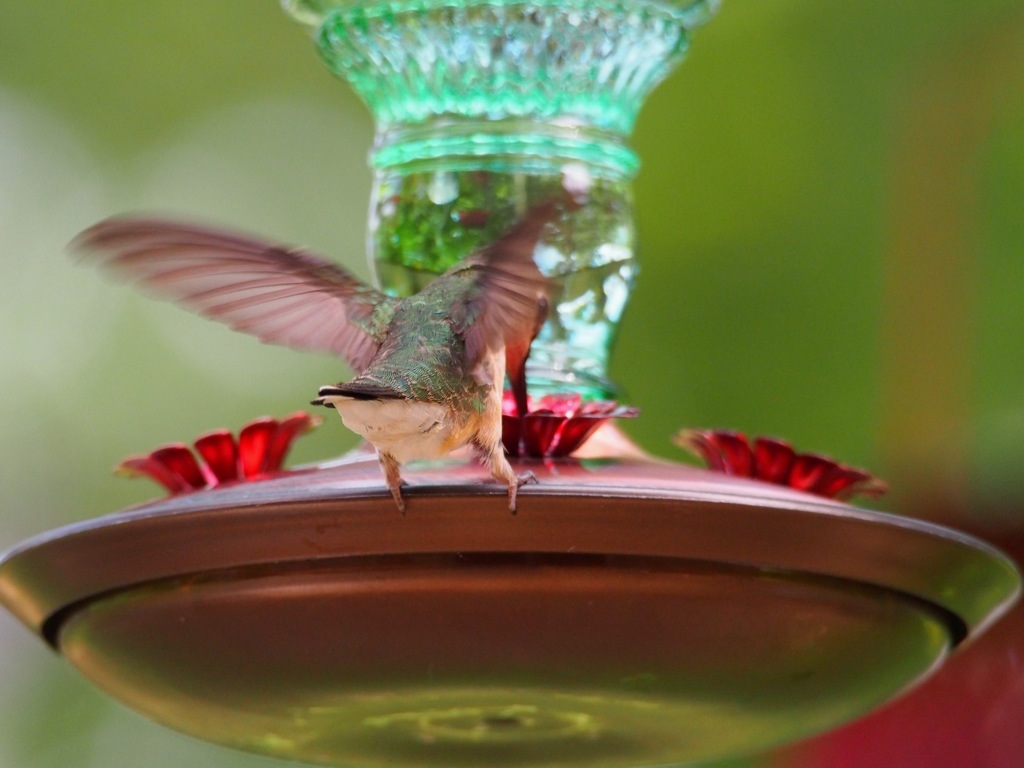
f6.1 1/250 sec ISO 1600
After a short rain shower I start a new day in Shutter Mode – kept the speed low and pushed the ISO a bit. I focused on the closer bird and can begin to see definition in her feathers.

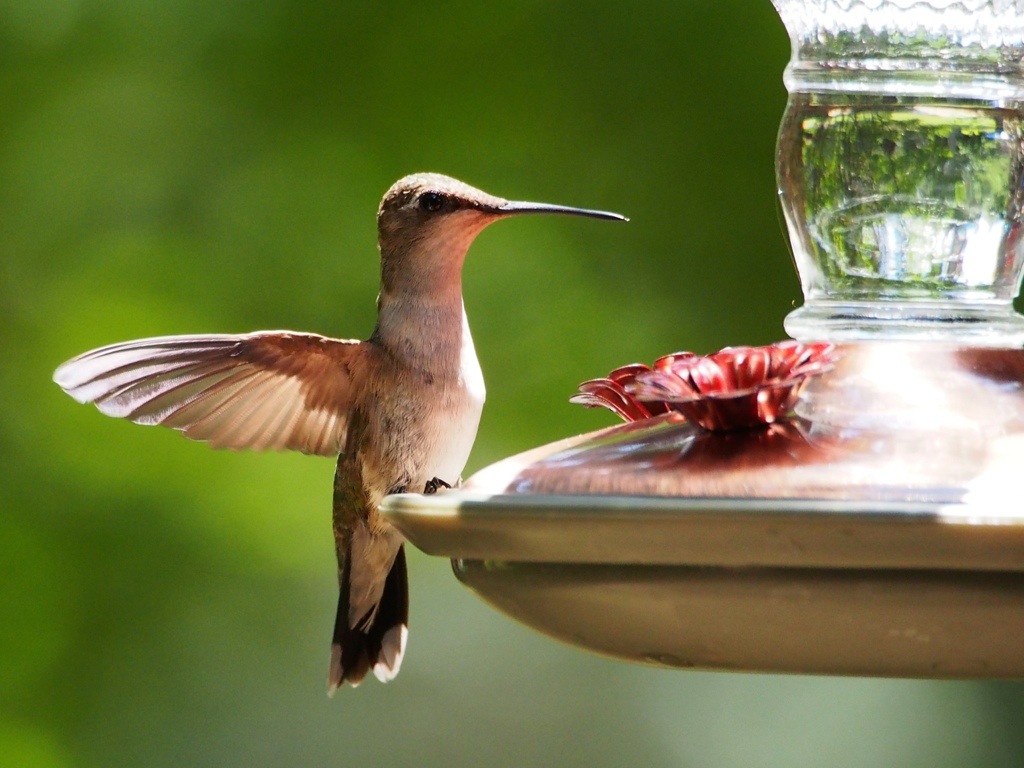
f6.1 1/250 sec 1250 ISO
The same bird moves to the other side of the feeder – you can clearly see the layers of feathers that I have previously been unable to capture. The ISO is making a difference. I only got this shot because I disabled the preview feature. With no image to review I can keep shooting.

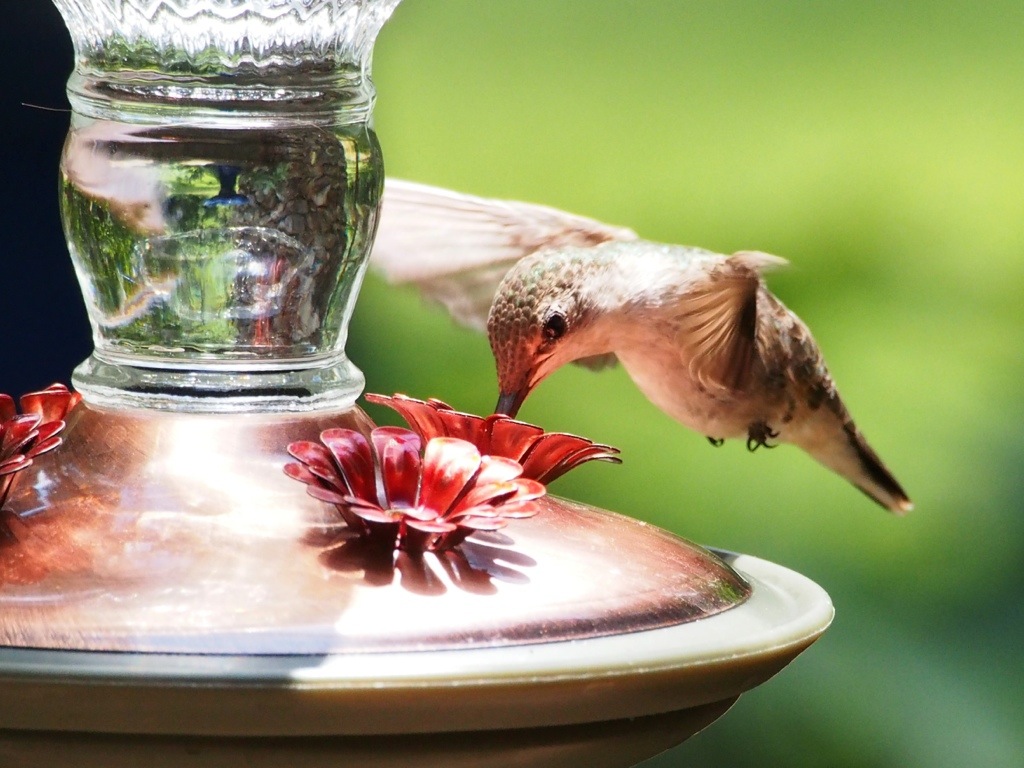
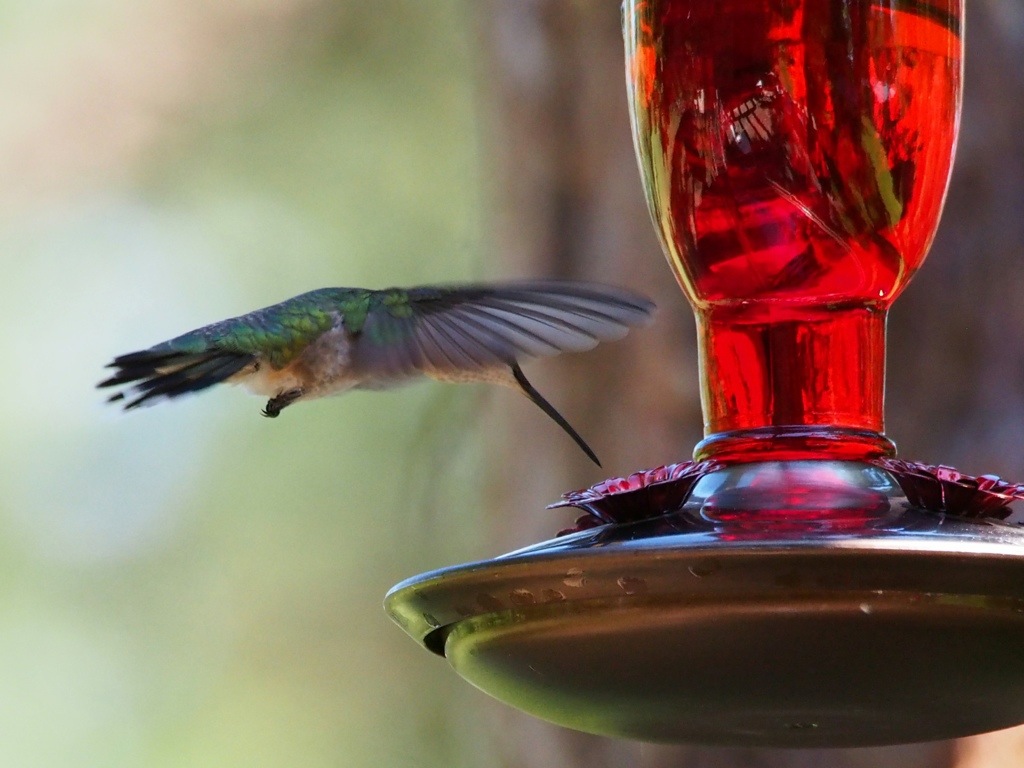
f6.7 1/640 sec ISO 2000
The bird is scratching in flight – in Aperture Mode this shot is a goner, it would have been a blurry mess. In Shutter Mode it is fairly clear and you can see the underside of his wing, plus it stopped the action of his foot.

f8 1/800 sec ISO 2000
A bit too much sunlight, but this shot captures the recoil motion of a wing flap. The smaller Aperture setting has slightly reduced DOF – just a bit deeper focus on the bird and feeder. Personally I like the inverted image of my pergola in the feeder too.

f6.7 1/800 sec ISO 2000
This is more detail than I have ever seen on a wing – the sunlight was pretty intense, blowing out a couple of areas, but the grain is OK so far.

f6.7 1/640 sec ISO 2000
It’s clouding up and I’m losing light. More grain than I like but I am still seeing feather structure – managing ISO is the crucial.

f6.7 1/640 sec ISO 2500
Same bird – another shot I would have missed if I hadn’t turned off the preview feature and an angle I rarely capture because the movement is the closest thing making focusing a crap shoot. I I’m still seeing feather structures even in this lower light.

f6.7 1/500 sec ISO 2500
The sun peaks back out and I get a shot with a bit lower speed – you can see how much feather detail is lost by moving below 1/640 second.
So to sum up – speed + ISO + good lighting = better ability to stopping action, but the trade-off can be grain in your image unless the light is really great. My camera has a huge ISO range and I just need to push it to see how far it can go on a good sunny day. This probably seems like old hat to most wildlife photogs, I was probably doing things the hard way and I clearly was not making use of my camera’s capabilities. I have been resistant to trying to shoot fast-moving things like sports events because I have limited myself by staying in that comfort zone – it’s time for me to break things loose.