The Second Rule of Photography

If the first rule of photography is to always have your camera with you, then the second rule must be about light. Light is everything to a photographer, without it there is no color, without enough of it you lose detail and sharpness.

Of course you can add light by using a flash, but that can create other issues – it can add too much light or create unwanted reflections. It’s essential to make some shots, but I wouldn’t use it just because your camera has one.

There is one kind of light that is almost magical – it is warm and soft and almost without glare. It’s that lovely light at the beginning or at the very end of the day – the golden hour. I’m not a morning person, so I prefer that soft light that starts about a half hour before the sun sets.

Over the course of the last week I have been practicing shooting sunsets at a local lookout point. On the way I travel through a residential neighborhood where the deer feed in the hollows and lots between houses. I find these local whitetails to be lovely and curious creatures. They are all about their dining, but any noise or movement from me gets them to look up at me. Sometimes they hold their gaze for several shots. They rarely flee.

Click through to see how expressive these whitetail can be:

After my first shot at these deer I began to give myself 10-15 minutes on my way to the lookout and I am never disappointed in these characters. In truth, it’s the light that makes these shots so intimate, you get a sense of the golden glow in their eyes, they emerge from the noisy backgrounds because there is enough light to get good focus. The details are mostly sharp because there is enough light for my camera to do the job I want it to do.

Shutterbug Notes:

I have found that your vehicle can be a good blind sometimes. Animals are often less threatened by a big box than they are of you approaching in spots where there is no place for cover. I have found that deer and antelope are naturally curious so sometimes a little movement makes them make eye contact with you – waving a bandana out the window or making clicking noises will often do the trick. When I do approach on foot I always respect the lines they set – if they huff or raise their tails I stop moving towards them. I want them to be curious and not frightened of me. 

The First Rule of Photography

Always take your camera!

I know I say this a lot. I take my camera everywhere. It is in my car when I go to the store. I carry it to work everyday. It is always by my side.

The case has been made that the best camera is the one that you have with you. In this day when there is an iPhone or Galaxy in almost every pocket, most of us always have a camera for those spontaneous shots. But if you have a good camera, a real camera, why settle for serviceable when you can have amazing. Your iPhone can’t stop a hummingbird in mid-flight or reveal the inverted image in a water drop. It can’t show you the structure of a snowflake. There are a few rare shutterbugs (like Allan) that squeeze every once of performance out of that phone, but the truth is that what most of us capture with our iPhones could best be classified as “snapshots”. You spent good money on that camera – why let it gather dust waiting for that next excursion. If you don’t shoot it often you are likely to miss the big shot because you are trying to remember how to use it.

Sometimes it’s not the rare creature or amazing sunset, sometimes the beauty in the mundane calls out to me. When you see something that clicks, you need to be ready to click.

I was ready to click earlier this week at the car wash…

As I sat in the carwash, I was frustrated that I had lost the connection to my satellite radio. I started to check my Facebook feed and looked up to see a sea of foam rubber orange and yellow sponges with soap engulfing me. I took a shot with my iPhone – it was in my hand after all, but the shot was noisy and couldn’t capture what I was seeing. I grabbed my fast 50 and started shooting. I did no color correction on these shots – you are seeing what I saw. The color of a sunset out my driver’s side window.

Shutterbug Notes:

For a split second I considered getting out the flash, but decided that the window would just bounce the light back at me. I shot in aperture mode and opened the shutter all the way. I had to turn off the focus assist to keep from getting a red reflection on the glass. I focused on the bubbles and hoped for the best. I only took 7 shots. All but one were keepers. Because I was very familiar with my camera I could make quick changes to capture something spontaneous without having to pay for a second run through the car wash.  

Paper or Ice? Maybe We Got it Right in Kindergarten.

I grew up in the desert. I saw snow in a measurable amount about once a decade. Even so, making paper snowflakes was one of my favorite projects in school. Over the years I made them out of various types of paper – tissue paper, construction paper, my report card…you get the idea. I still love to make them – here’s one I made with my power bill that just arrived…

Seems pretty appropriate, given the winter we have had so far. I think I will only pay the parts I can read...

Seems pretty appropriate, given the winter we have had so far. I think I will only pay the portions I can read.

I still love to make snowflakes and have taught dozens of children how to get the open and airy feel over the years. What never occurred to me was the idea that my desert-born imaginings of snowflakes might not be so far off the mark.

A couple of weeks ago we were pummeled with about a foot of show on a Sunday afternoon. People were stranded getting home from church, the grocery store was out of milk and bread, and I had been busy shooting cardinals and other birds as they flocked to the feeders.

I stepped outside and noticed that the snow was really fluffy and wondered what it would look like shot through my macro lens. I knew I needed contrast so I looked for the smoothest flat black objects I could find to capture the flakes. I tried a microfiber cloth, a crock pot, a frying pan – ultimately I ended up turning a black t-shirt inside out. In the weather at the angles I was trying to focus at, a tripod was out of the question, so all of these images are handheld shots. Click through for your very own micro snowstorm:

So, I guess my power bill really doesn’t compare to the complexity and beauty of something so delicate and perfect, but I think that my classmates and I got closer than we could have imagined.

Shutterbug Notes:

Shooting macro handheld is easier if you use some breathing techniques. It’s kind of like firing a rifle – take aim, exhale, fire the shutter. Exhaling eliminates some movement. It also helps to pull your elbows into your body to make yourself into a tripod.  I prefer to shoot macro from a tripod because it’s easier to focus and play with aperture and shutter settings. the challenge is always to get the depth of field right. When snow is falling you have to move fairly quickly because the flakes you are shooting are covered pretty quickly. 

Out on a Limb

Winter Storm Cleon has moved east and it’s finally possible to get out of the Stone House and get back to work. It’s still unseasonably cold, and today I got my first mail delivery in almost a week. During the storm I worked from home and stayed warm and mostly dry by the fire. By day two the symptoms of cabin fever were starting to set in. I was getting up every thirty minutes and walking up and down my hallway several times. I constantly stocked the indoor firewood pile. I starting to feel restless and cooped up. I decided that to clear my head that I would take a walk outside over my “lunch hour”.

I put on my Carharts and tucked my weatherproof camera and lens inside my jacket. The activity around the house was extraordinary. Cardinals were hanging onto the branches of the crepe myrtle for dear life. A fallen tree limb over the pergola was a lifeline to a small woodpecker as winds blew snow almost sideways. Birds that typically dart away held fast in hopes of spotting fallen seed below on the patio.

I came in almost soaked through and freezing, but invigorated and ready to focus – on work.

Shutterbug notes:

Shooting birds in the snow can be tricky. Your camera’s autofocus wants to focus on the nearest object in your field of view – I found that if I made my focus point as small as possible and tried to get it to lock onto a bird’s eyes or beak that I could eventually get a focus between flakes. I took all of these shots in shutter mode at 1/400 second and an ISO of 1000. The white of the snow added ambient light that made a moderate ISO setting sufficient. A slower shutter speed would make the flakes look more like streaks – a faster one would require a higher ISO and would create unnecessary noise in a limited light situation.

Frozen Flora – the Season of the Frost Flower

The hills of the Ozarks are a wet place. Rain water becomes spring water or ground water as it passes through our limestone karst topography. As it gets colder out the bluffs leach out this water in the form of icicles. On the ground below the bluffs the water trapped inside the stalks of tall plants expands. This ice takes on amazing forms – frost flowers appear at the bases of these plants. They appear on mornings where the temps are below freezing and disappear as the temperature rises.

It’s been unseasonably cold for a few days. I have been lighting a fire most evenings to warm up the old Stonehouse. This kind of sustained cold is more common in January or February. This morning when I took a look at the forecast I thought that even though it’s a couple of months early, the conditions were right. I packed up my macro lens and hit the highway. I had to slog through some semi frozen mud, but is it was worth it. Fields and fields of frosty blossoms.

I used a macro light on the super close-ups and a flash on a couple of shots. I wish I had taken the tripod, but the white light of an overcast day let me shoot fast enough to get away without it.

Click through and get a sense of the flower and the intricate shapes that make them up. I’m off to the kitchen to make some hot apple cider. Stay warm.

A Tilt-shift View of Eureka Springs

I have written a couple of posts about using my tilt-shift lens set up recently. I wrote about using the technique to give motion and focus to a country road, and used it to take some portraits of an old friend. I thought I would do a post how tilt-shift is typically used. The tilt-shift lens can be angled so that it is not parallel to your camera’s sensor – this gives you a slice of focus and changes the perspective of your shot slightly. It is mostly used to give a feel of miniaturized cityscapes. I don’t live in a city so I went to a scenic overlook in town. It’s a tree covered area that is about midway between the bottom of the hollow that is Main Street and the top of the ridge where the Crescent Hotel sits. Shooting through trees makes it tougher than the shots you typically see – classic tilt-shift is shot from high above and focuses on the tiny details below. It’s all manual – you tilt then focus by hand. You can set the shutter speed and ISO in camera, but the rest is all done by the photographer.

Here’s a little tour of the city I call home at just past the peak colors of autumn – Eureka Springs, Arkansas, one of America’s favorite SMALL towns. All of these shots were taken from the East Mountain Overlook, facing west.

So what do you think of tilt-shift photography – is it interesting or does it make you dizzy?

Chasing the Sunset

I love a colorful sunset. I live about 15 miles west of my place of employment. It’s a winding country drive. On a few special evenings a year I spot some color and chase it down as I drive westward towards home.

Standard Time sure limits my opportunities though. Late last week – on October 31st – I got the chance to capture the last sunset of October. It will likely be the last one I catch on my drive home until spring.

I shot these with my fast 50 portrait lens. I end to close down the aperture a bit shooting sunsets – I am not looking for blur or bokeh. I want color. These were all shot between f4-f6.3. Shutter speeds are slowed down a bit for detail around 1/60 sec – ISO at 200 except for the shot of the Crescent – it was at 800 because I was losing light fast.

Country Roads – a Tilt-shift View of Autumn in the Ozarks

My bird lens is on the fritz, 9 days at Olympus for repairs and counting. Arrrrgh! Peak fall color hit about 10 days ago so I have not been able to get my leaf shots – it’s something I look forward to all year. The last two weeks have been rainy off and on so shooting days are few and far between anyway. Last weekend a kind of panic hit me – shoot now or miss the whole season. I started by taking a couple of snaps on local roads with my portrait lens – not my favorite for these kinds of shots – but serviceable.

Shooting down roads has always been a mixed bag for me. I tend to shoot things that I can isolate like birds or leaves or objects. A scene can take me in, but capturing it effectively can often elude me. I had been playing around with a tilt-shift set up and wondered if I could use it to look into the distance on these country roads – to use it in a way that would help the viewer to get a better sense of what I feel when I am driving down one of these roads – crisp air, crunching swirling leaves, filtered sunlight. Can I take a photo that makes you feel these things?

I know I have explained this before, but just in case – a tilt-shift lens lets you move the lens at an angle so that the plane of focus is not parallel to the camera’s sensor – it gives you a “slice of focus” and lets you hone in on certain objects that you want to highlight. It is often used to distort an image to give it the feel of miniaturization.

Shooting gear that you are not completely comfortable with is often a good thing – it gives you a new perspective – it pushes you to try new things. Sometimes the distortion is unsettling, sometimes it’s almost painterly. For me, many of these shots give a better sense of the feel of the roads in the autumn.

These shots were all taken in the last few days, some from the same locations as the earlier shots.

OK – so no skyward leaves or birds amidst the color for me this year. Not having my favorite lens should limit me – but instead it’s forcing me outside of my happy place – and that’s a good thing.

An Old Friend and a Camera Lens

I recently saw an impressive tilt-shift image posted by a friend on Facebook. It was a long shot of the autumn color here in the Ozarks. It made me think about my neglected tilt-shift set up. Languishing in the old camera bag, I hadn’t touched it in over a year. Frankly, it intimidated me. I used it a couple of times and got 2-3 images that I liked – but it took more work. It was less intuitive. Getting good color was not as easy since the set-up only works in manual – you can set your shutter speed and ISO – but the rest is all you. I wrote briefly about using it ages ago in one of my early posts, and I got one shot from that afternoon that I regularly sell prints of.

This is an image I took last year with the tilt-shift lens at a local lake. The tilt lets me focus on a small portion of the image and lets the rest blur. It takes a boring angled shot of a dock and makes it pretty interesting to investigate visually.

This is an image I took last year with the tilt-shift lens at a local lake. The tilt lets me focus on a small portion of the image and lets the rest blur. It takes a boring angled shot of a dock and makes it pretty interesting to investigate visually.

Here’s how tilt-shift works – the lens is offset at an angle from the sensor – so your plane of focus is not parallel. That angle lets you selectively focus on a single portion of the image and lets the rest blur. If you have seen images of city shots where the people and cars look like dioramas – those images are tilt shift. That plane of focus shifts the perspective creating the illusion that things are smaller than they really are in proportion to the overall image. The gear it takes to do this is pretty cool. It kind of looks like a mix between Frankenstein and Steampunk –

This is my tilt-shift set up - note the aperture ring in the center - its a coated metal disc held in place by magnets. To change the aperture you change out the ring. f22 is like a pinhole. f1.4 is no ring at all.

This is my tilt-shift set up – note the aperture ring in the center – its a coated metal disc held in place by magnets. To change the aperture you change out the ring. f22 is like a pinhole. f1.4 is no ring at all.

A side view of the tilt-shift set up on my tripod. Each of the threaded rods help you to fine tune the shift. For the shots in this post I went with a more casual approach - point, focus, shoot, try again.

A side view of the tilt-shift set up on my tripod. Each of the threaded rods help you to fine tune the shift. For the shots in this post I went with a more casual approach – point, focus, shoot, try again.

You compress the outer ring towards the camera body at an angle until you see something that you think is interesting. Once you get a sense of the image you lock that ring and then you can focus using a slide on the ring. I find that it works best to find a sweet spot and then look for things to focus on within your field of vision. At this point it becomes more intuitive.

I’ve been shooting some landscapes this way and will probably write a post about them soon, but last night on my way home from work I had a chance meeting on my road – an old friend approached me as I was checking my mail box. All of the shots that follow were taken shortly after sunset. I removed the aperture ring altogether to let in as much light as possible.

My road at sunset - by choosing that one spot of brighter color in the distance to bring into focus, I make your eye look down the road and into the photo.

My road at sunset – by choosing that one spot of brighter color in the distance to bring into focus, I make your eye look down the road and into the photo.

Ben is a wonderful old friend. Every time I see him at the mail box I roll down the window and say hi. At first he was much more interested in some petting than in being the subject of a blog post, but he rolled with it. The wonderful thing about tilt-shift is that it lets you look at something you see all the time and see it with new eyes – a fresh perspective.As I shot I thought about his noble look, his curious and kind eyes, his friendly posture. It’s always good to look at an old friend with new eyes.

June on Film Roll #5 – 1974 Olympus Om-1n

I am attempting to shoot a roll of film a month this year – I’m about a month behind, but I’m catching up. My niece, Laura, came for a visit at the end of June. She is an avid shutterbug and has been interested in learning to operate a film camera. She picked up a Pentax kit and brought it with her on her trip. Once we got the pieces out and looked them over I found that my mother’s Vivitar Cosina from the late 70s was also a Pentax mount. Score! I was able to add a doubler, a fast 50, and a telephoto to her kit. More importantly, I was able to hook her up with a very cool vintage strap…

Couple of shutterbugs – Jasper, Arkansas

In preparation for her visit I had purchased us each a roll of T-Max 400 and a roll of 100 speed film. We covered the basics and she was off and shooting in no time. I started with the 400 – that’s what this roll is. Having Laura here got me out and about, so most of these shots are taken away from the house and I shot very few still lives. I actually only had a couple of chances to shoot indoors at all. I shot exclusively with the 50mm 1.4. This gave me a very shallow DOF, but also allowed some areas of sky to blow out.

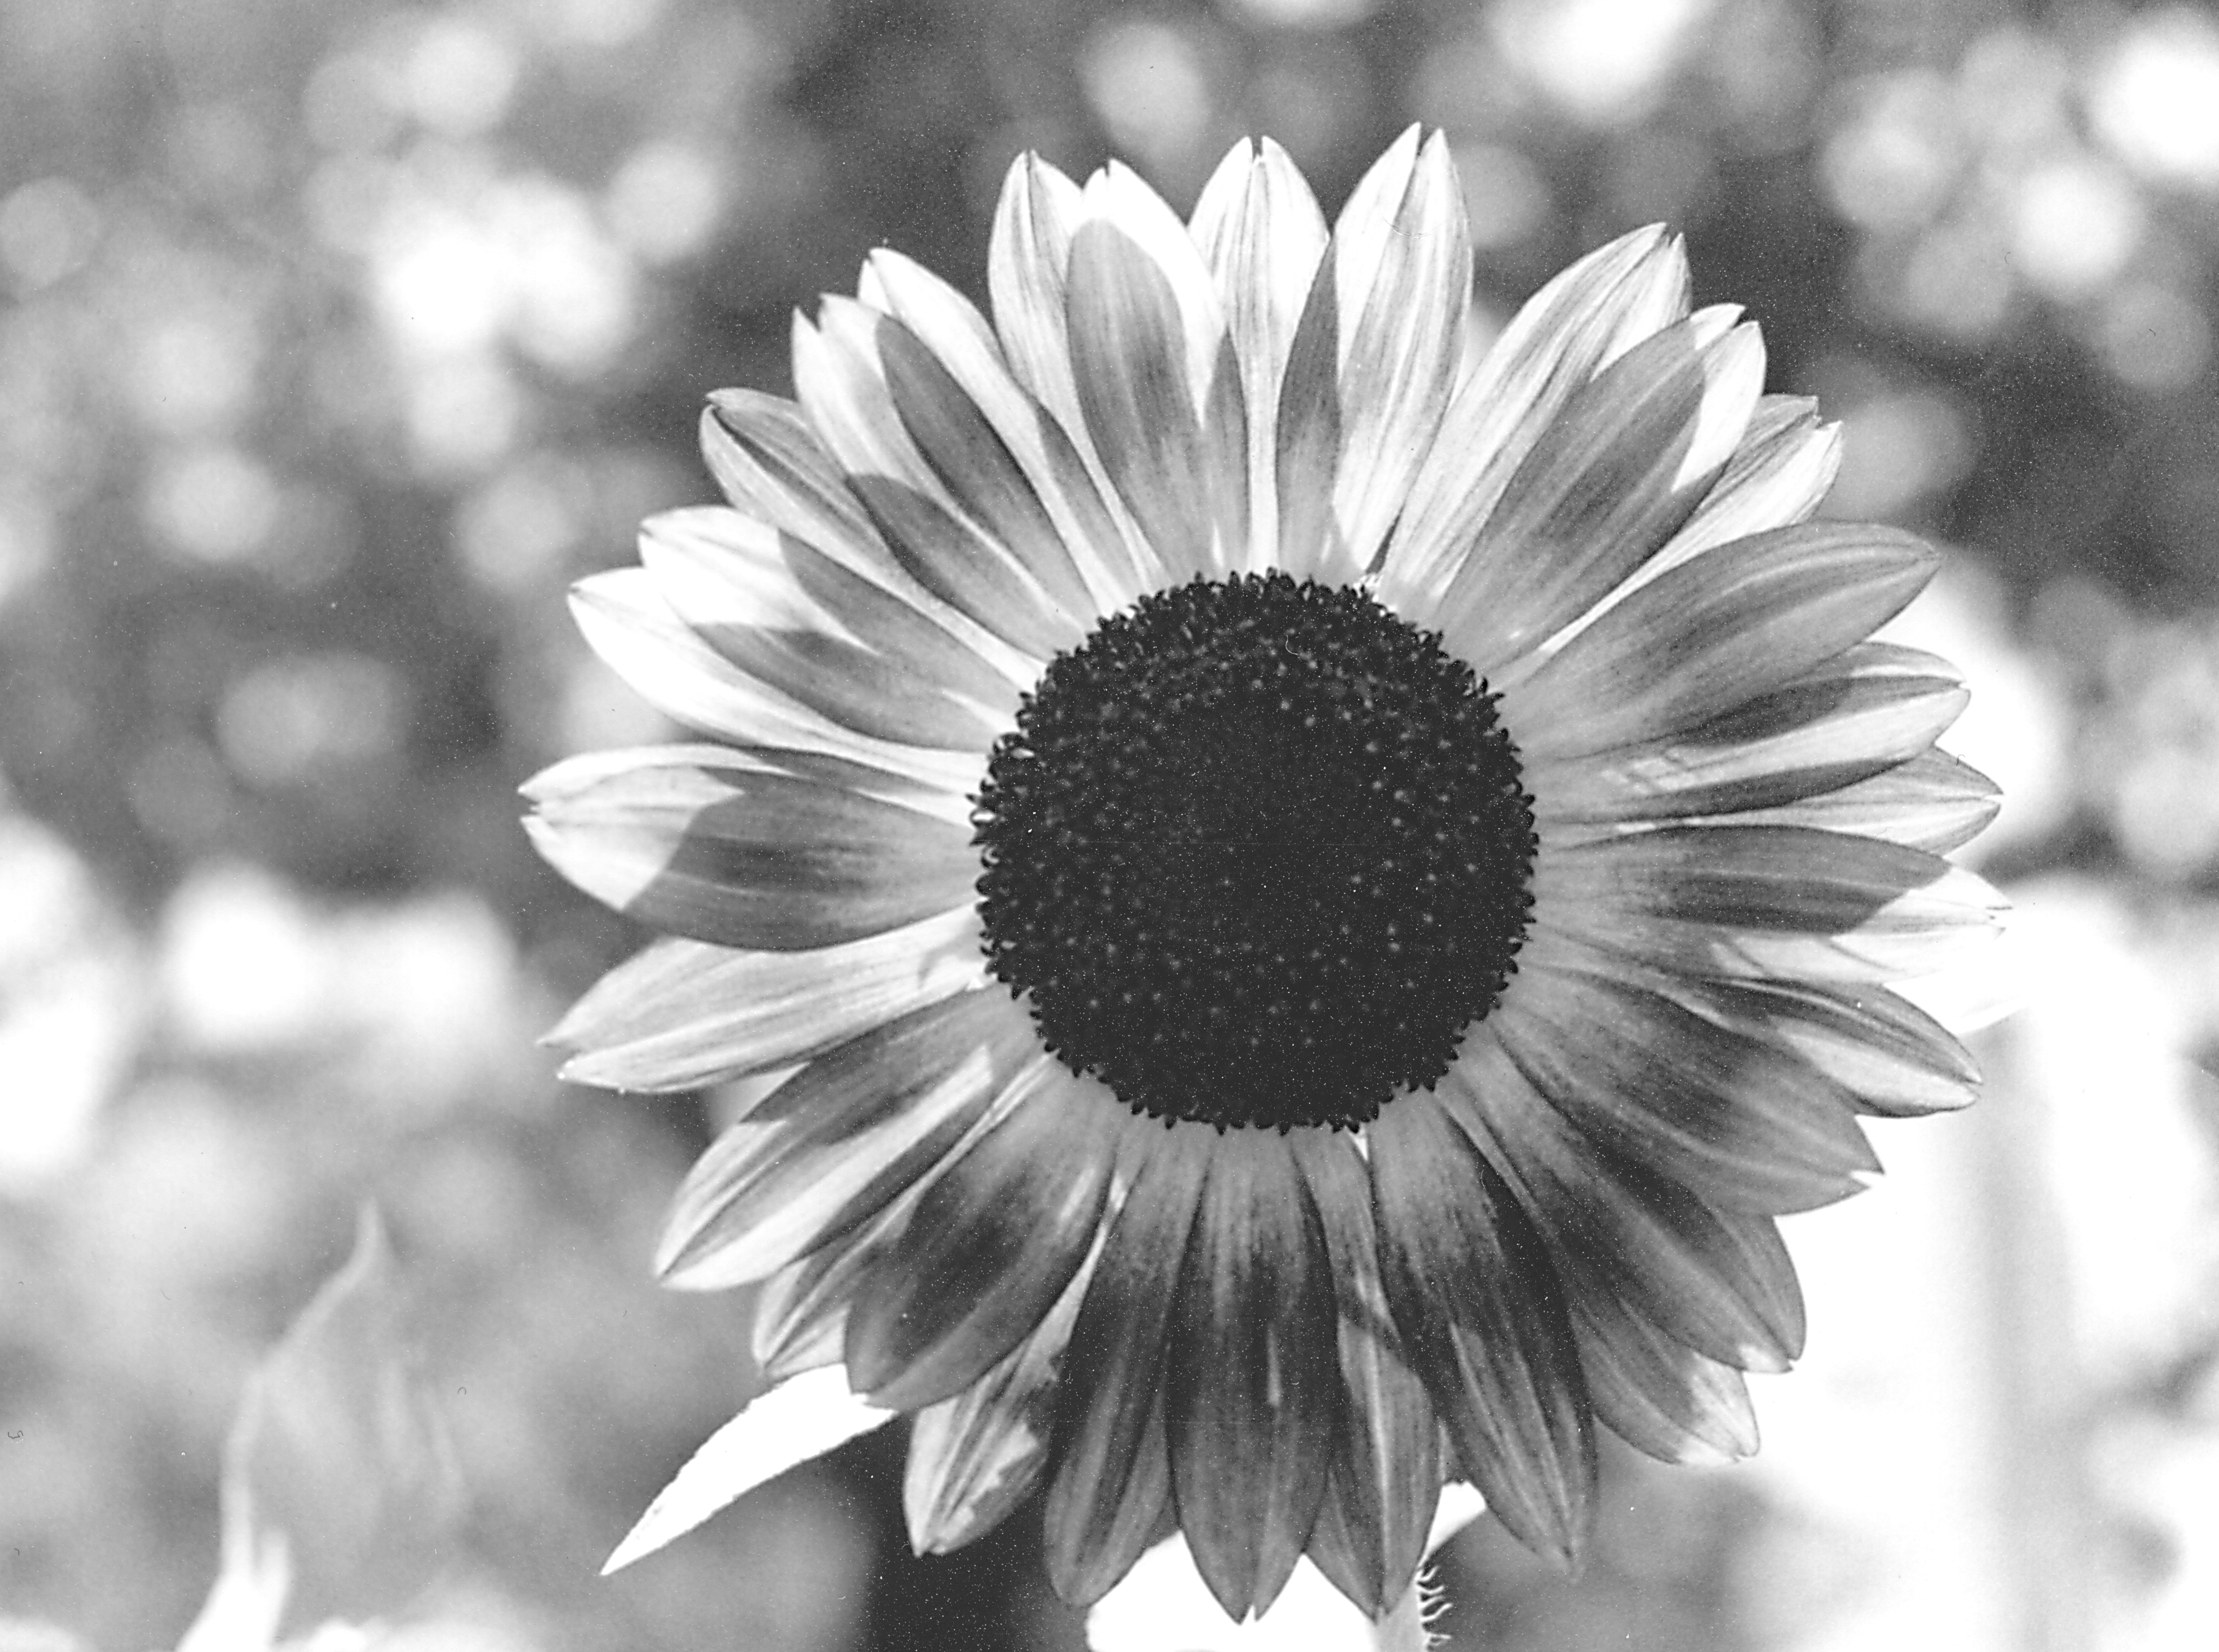
Shooting outdoors I had a chance to play with sunlight – sometimes with better results than others. I’m finding that instead of seeking out high contrast subjects, that I need to make sure a black and white image has lots of mid tones.

Backlit Sunflower - Historic District - Eureka Springs, Arkansas

Backlit Sunflower – Historic District – Eureka Springs, Arkansas

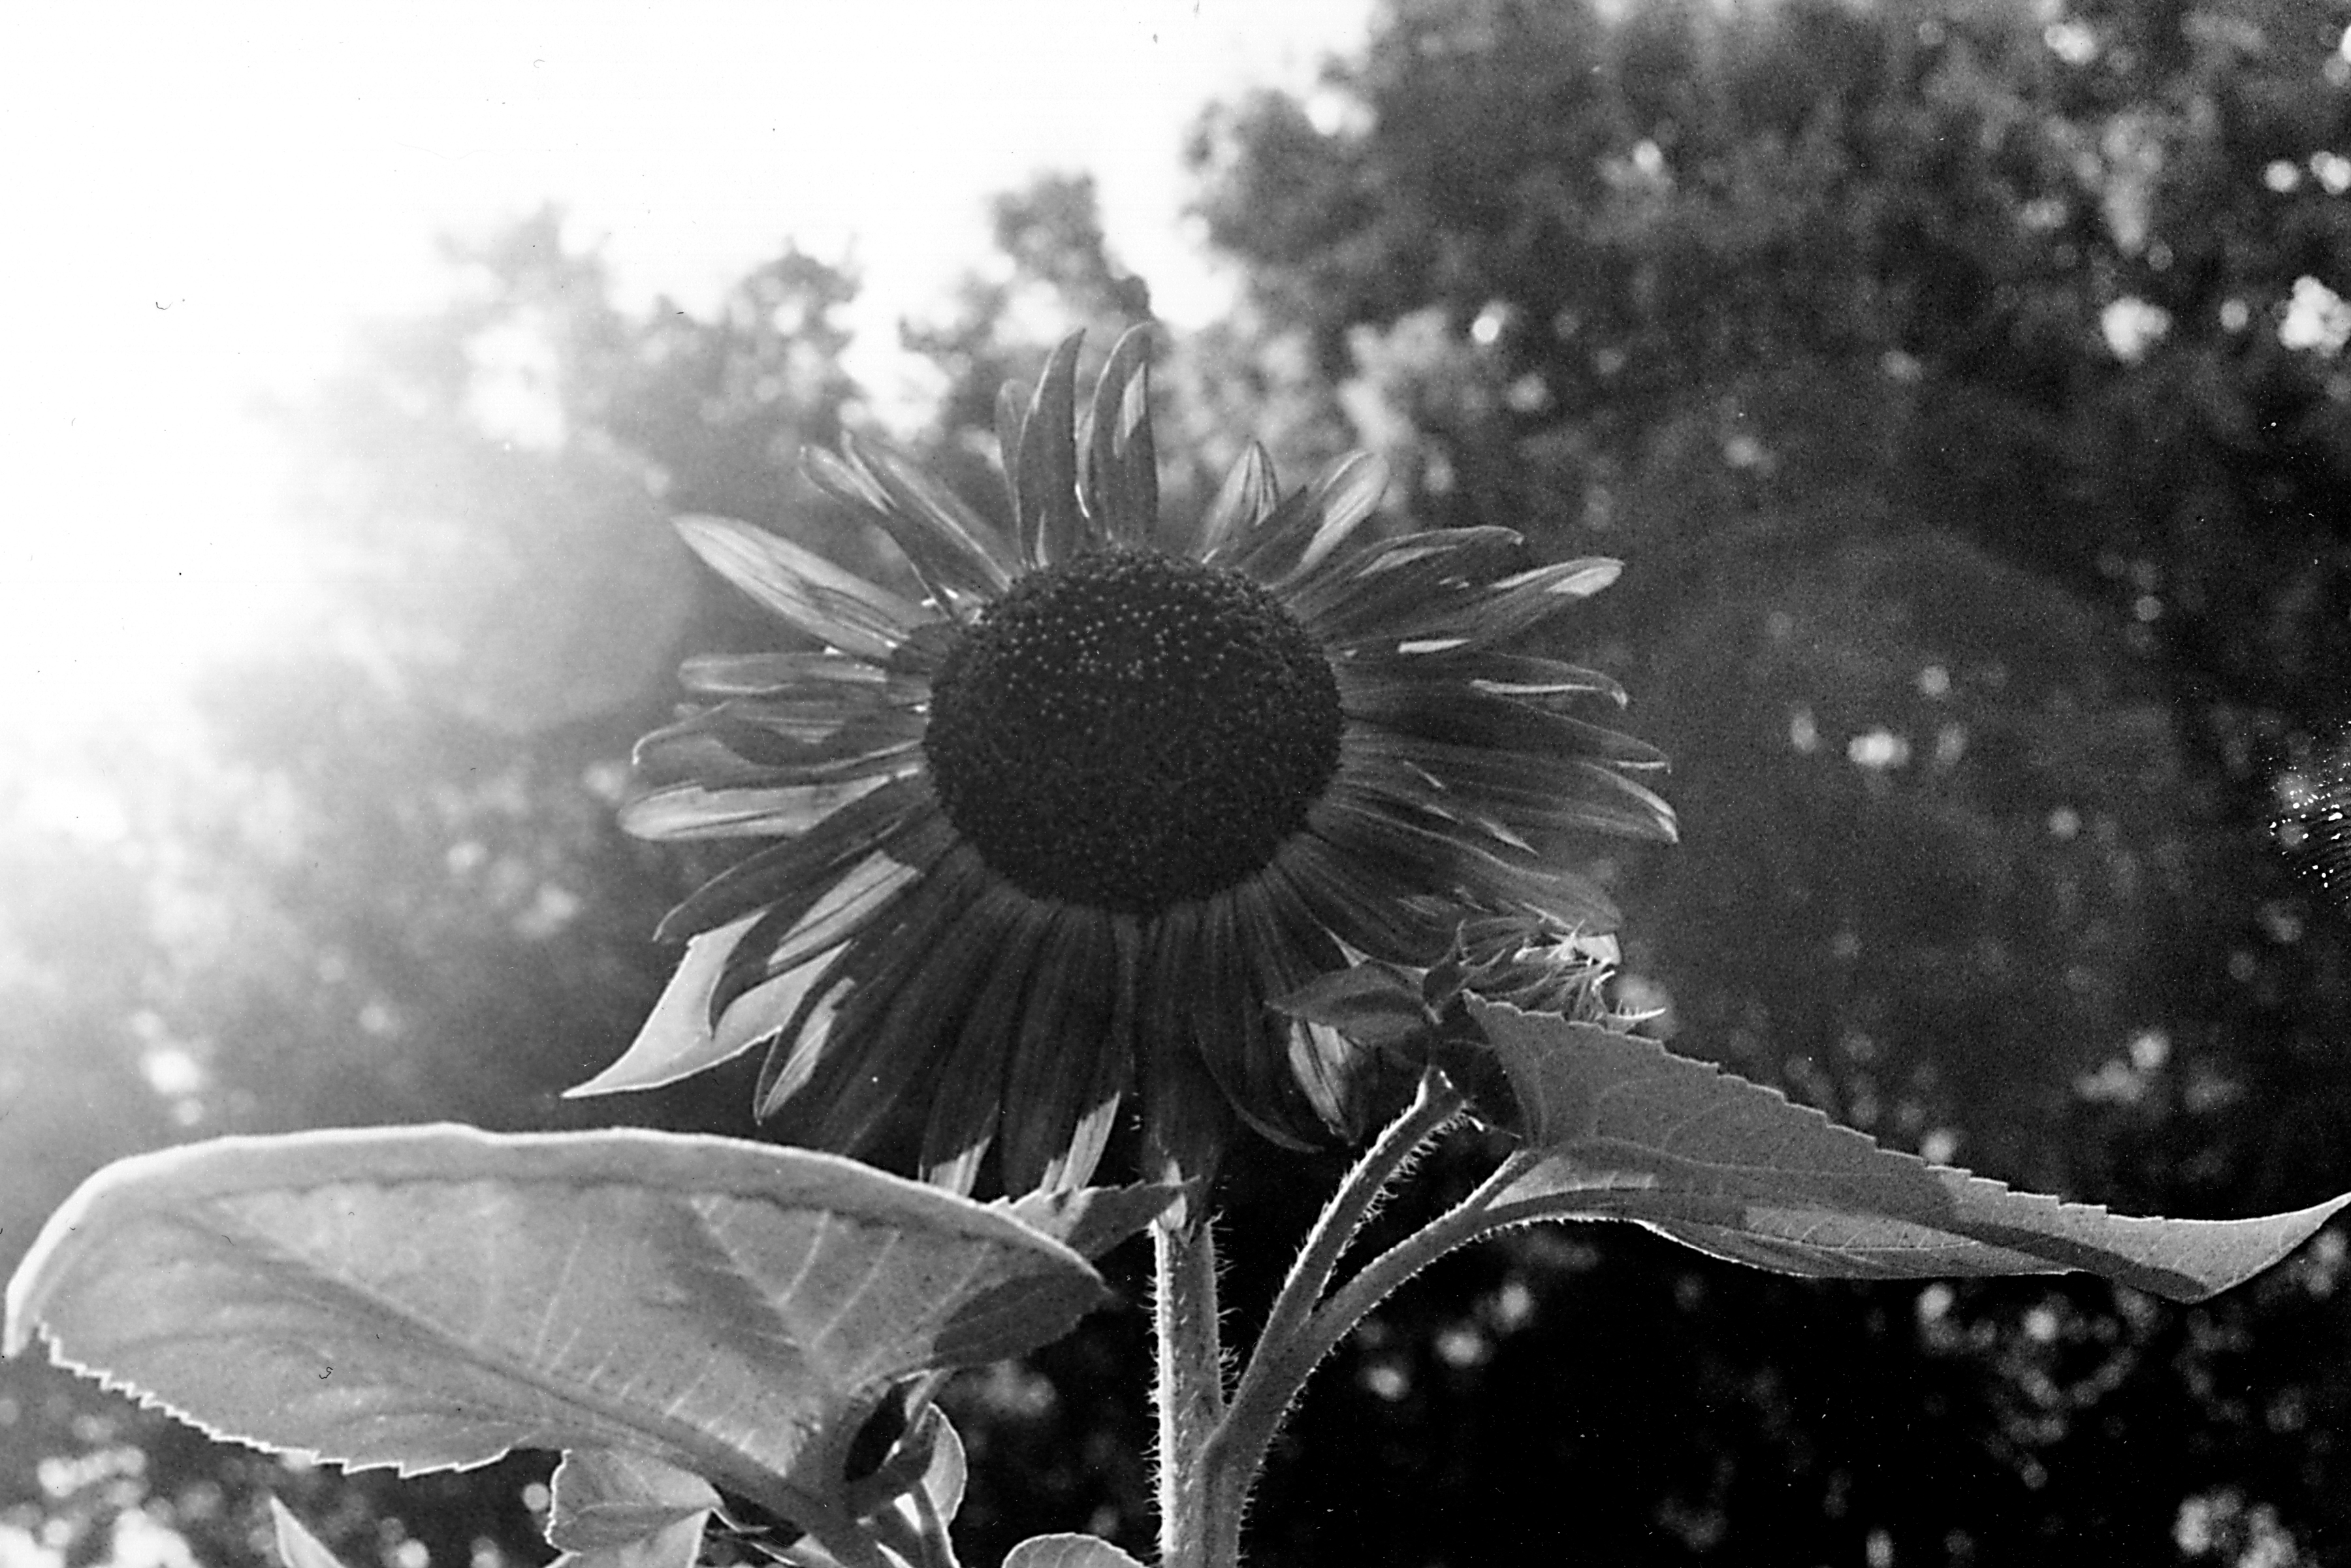
While the shot above shot worked exactly as I imagined it – the next shot I’m not completely sold on – I like the bokeh and the light on the leaves – even the sunspots, but I wish I had more detail in the sky.

Soaking up the Sun - Historic DIstrict - Eureka Springs, Arkansas

Soaking up the Sun – Historic District – Eureka Springs, Arkansas

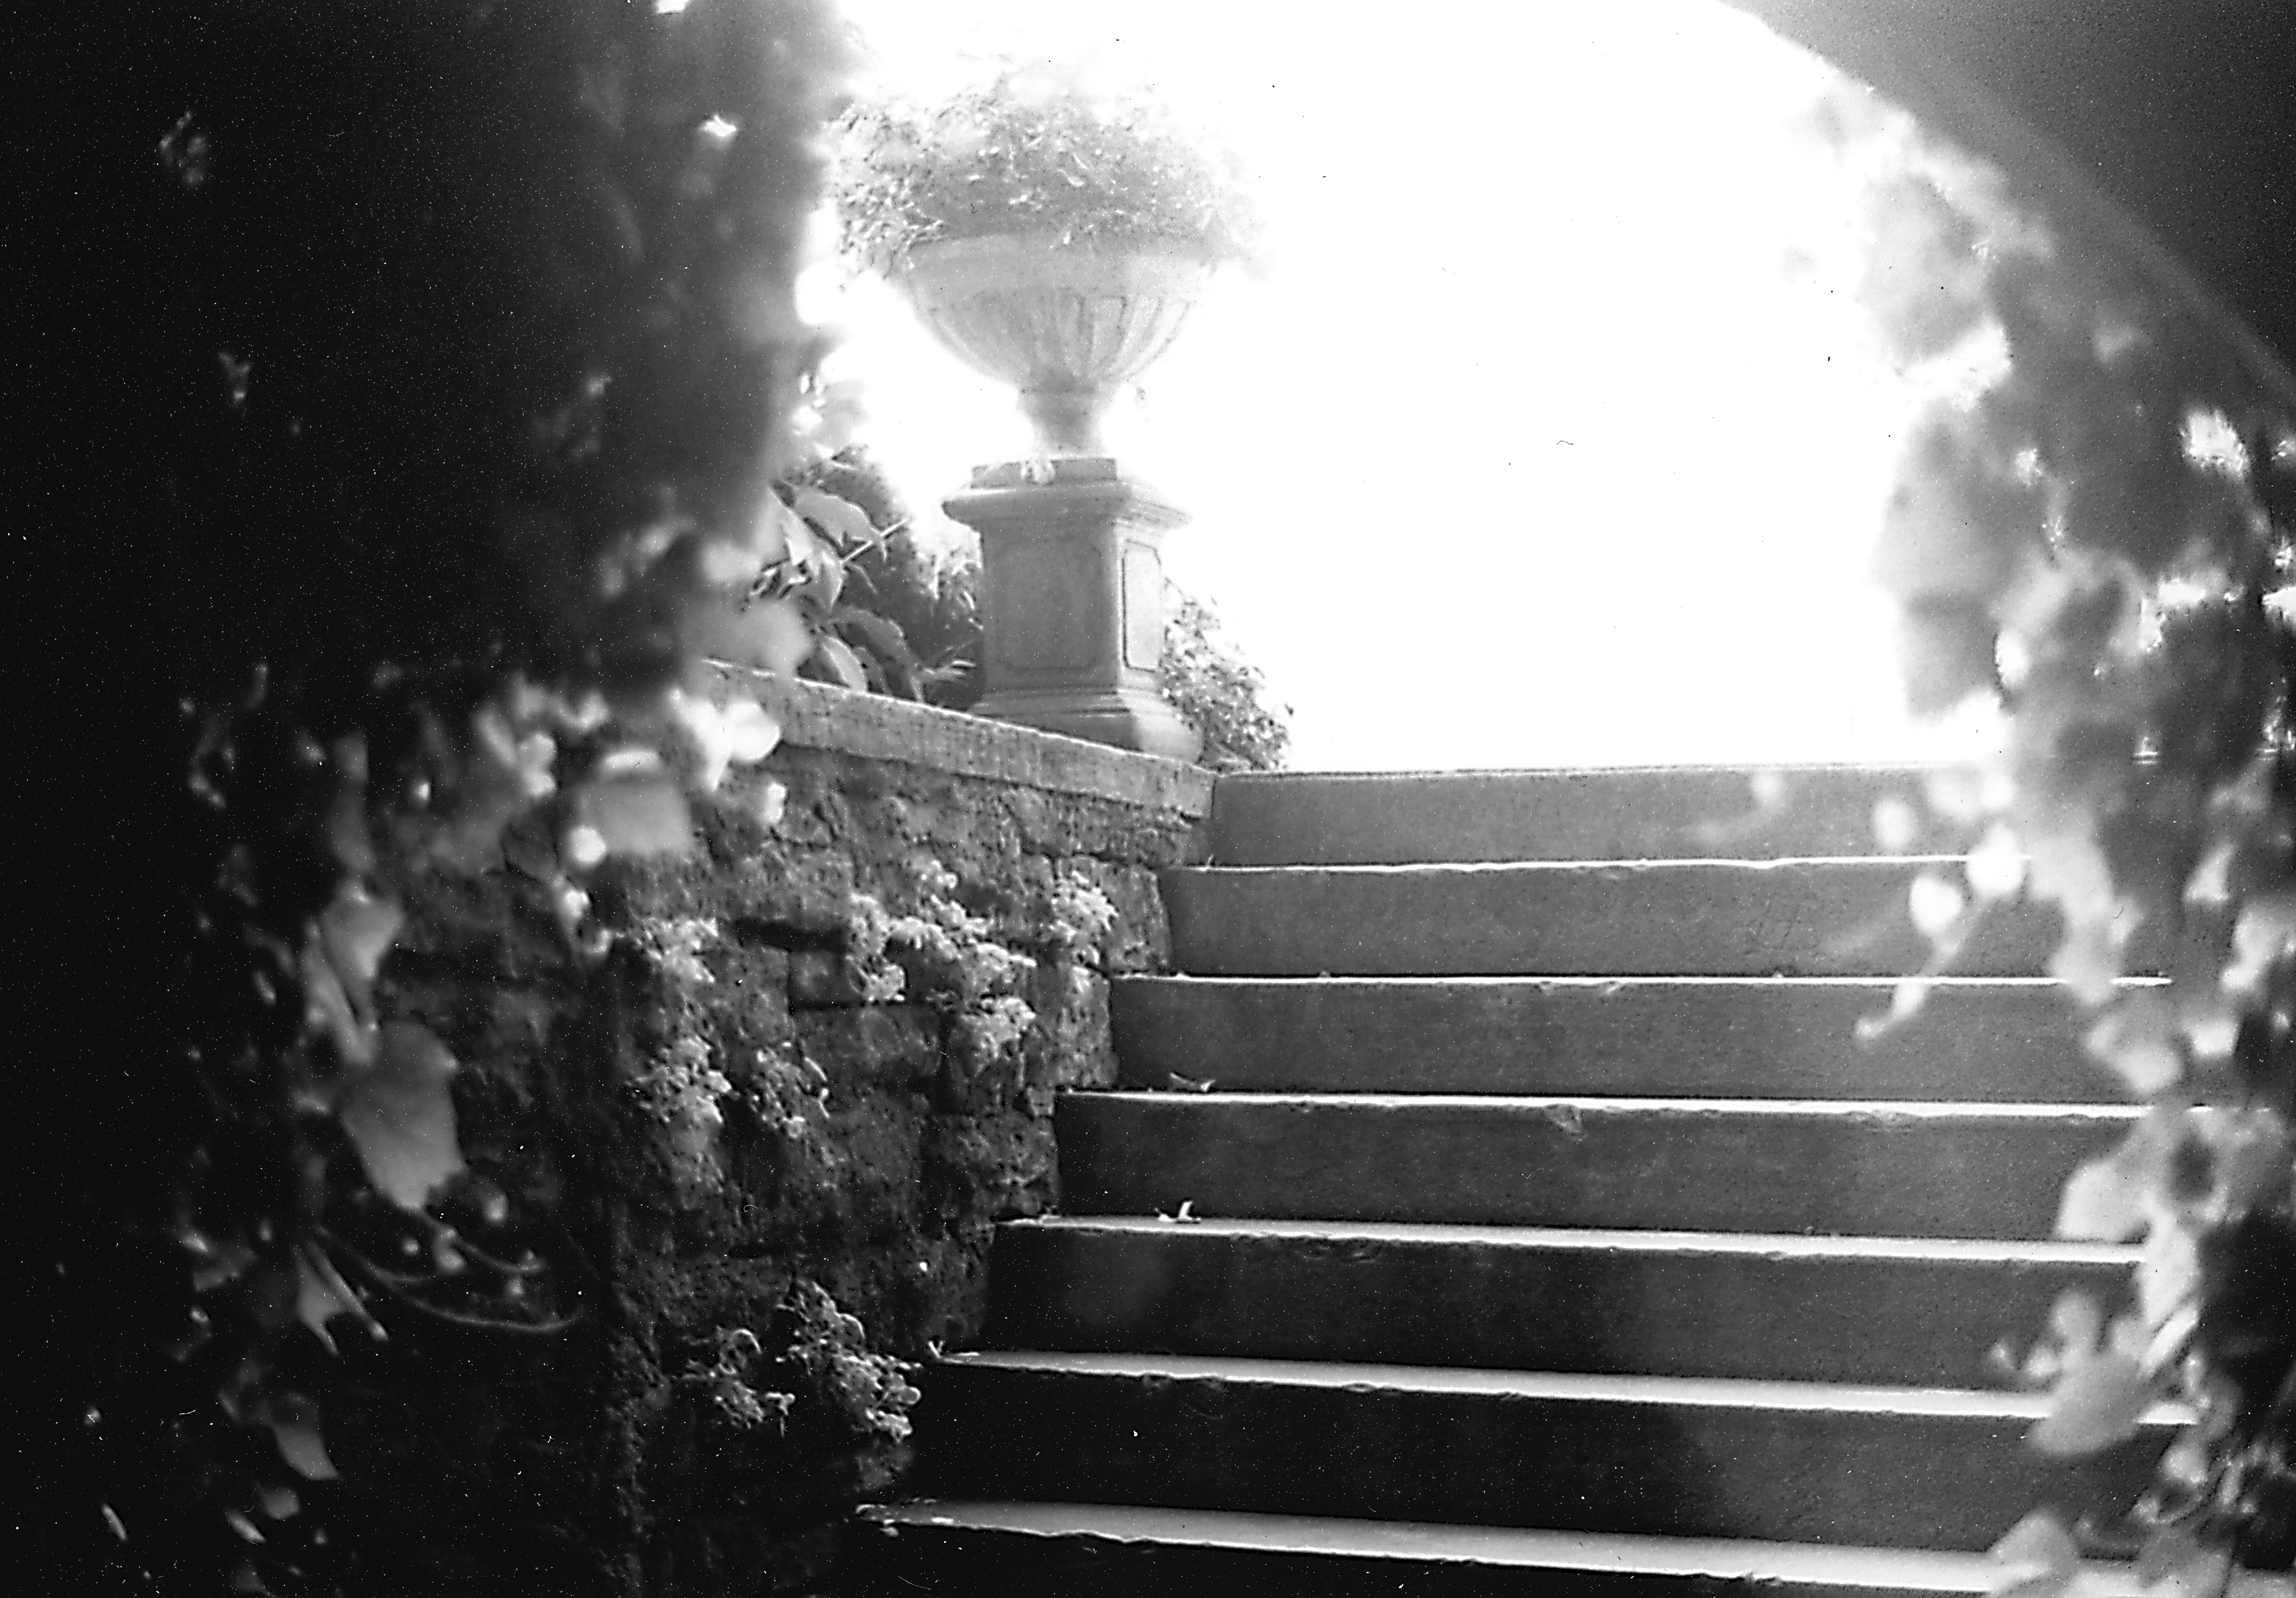
There is a spot I love to shoot – I’ve never really mastered it but I know that someday I will get the shot I’m imagining there. It’s an underground grotto that surrounds a natural spring. I want to get a shot from inside the grotto in the fall capturing all the color in the distant hills – these are not those shots, but I kind of like them. The feel historic to me.

The View from Inside the Grotto - Grotto Spring - Eureka Springs, Arkansas

The View from Inside the Grotto – Grotto Spring – Eureka Springs, Arkansas

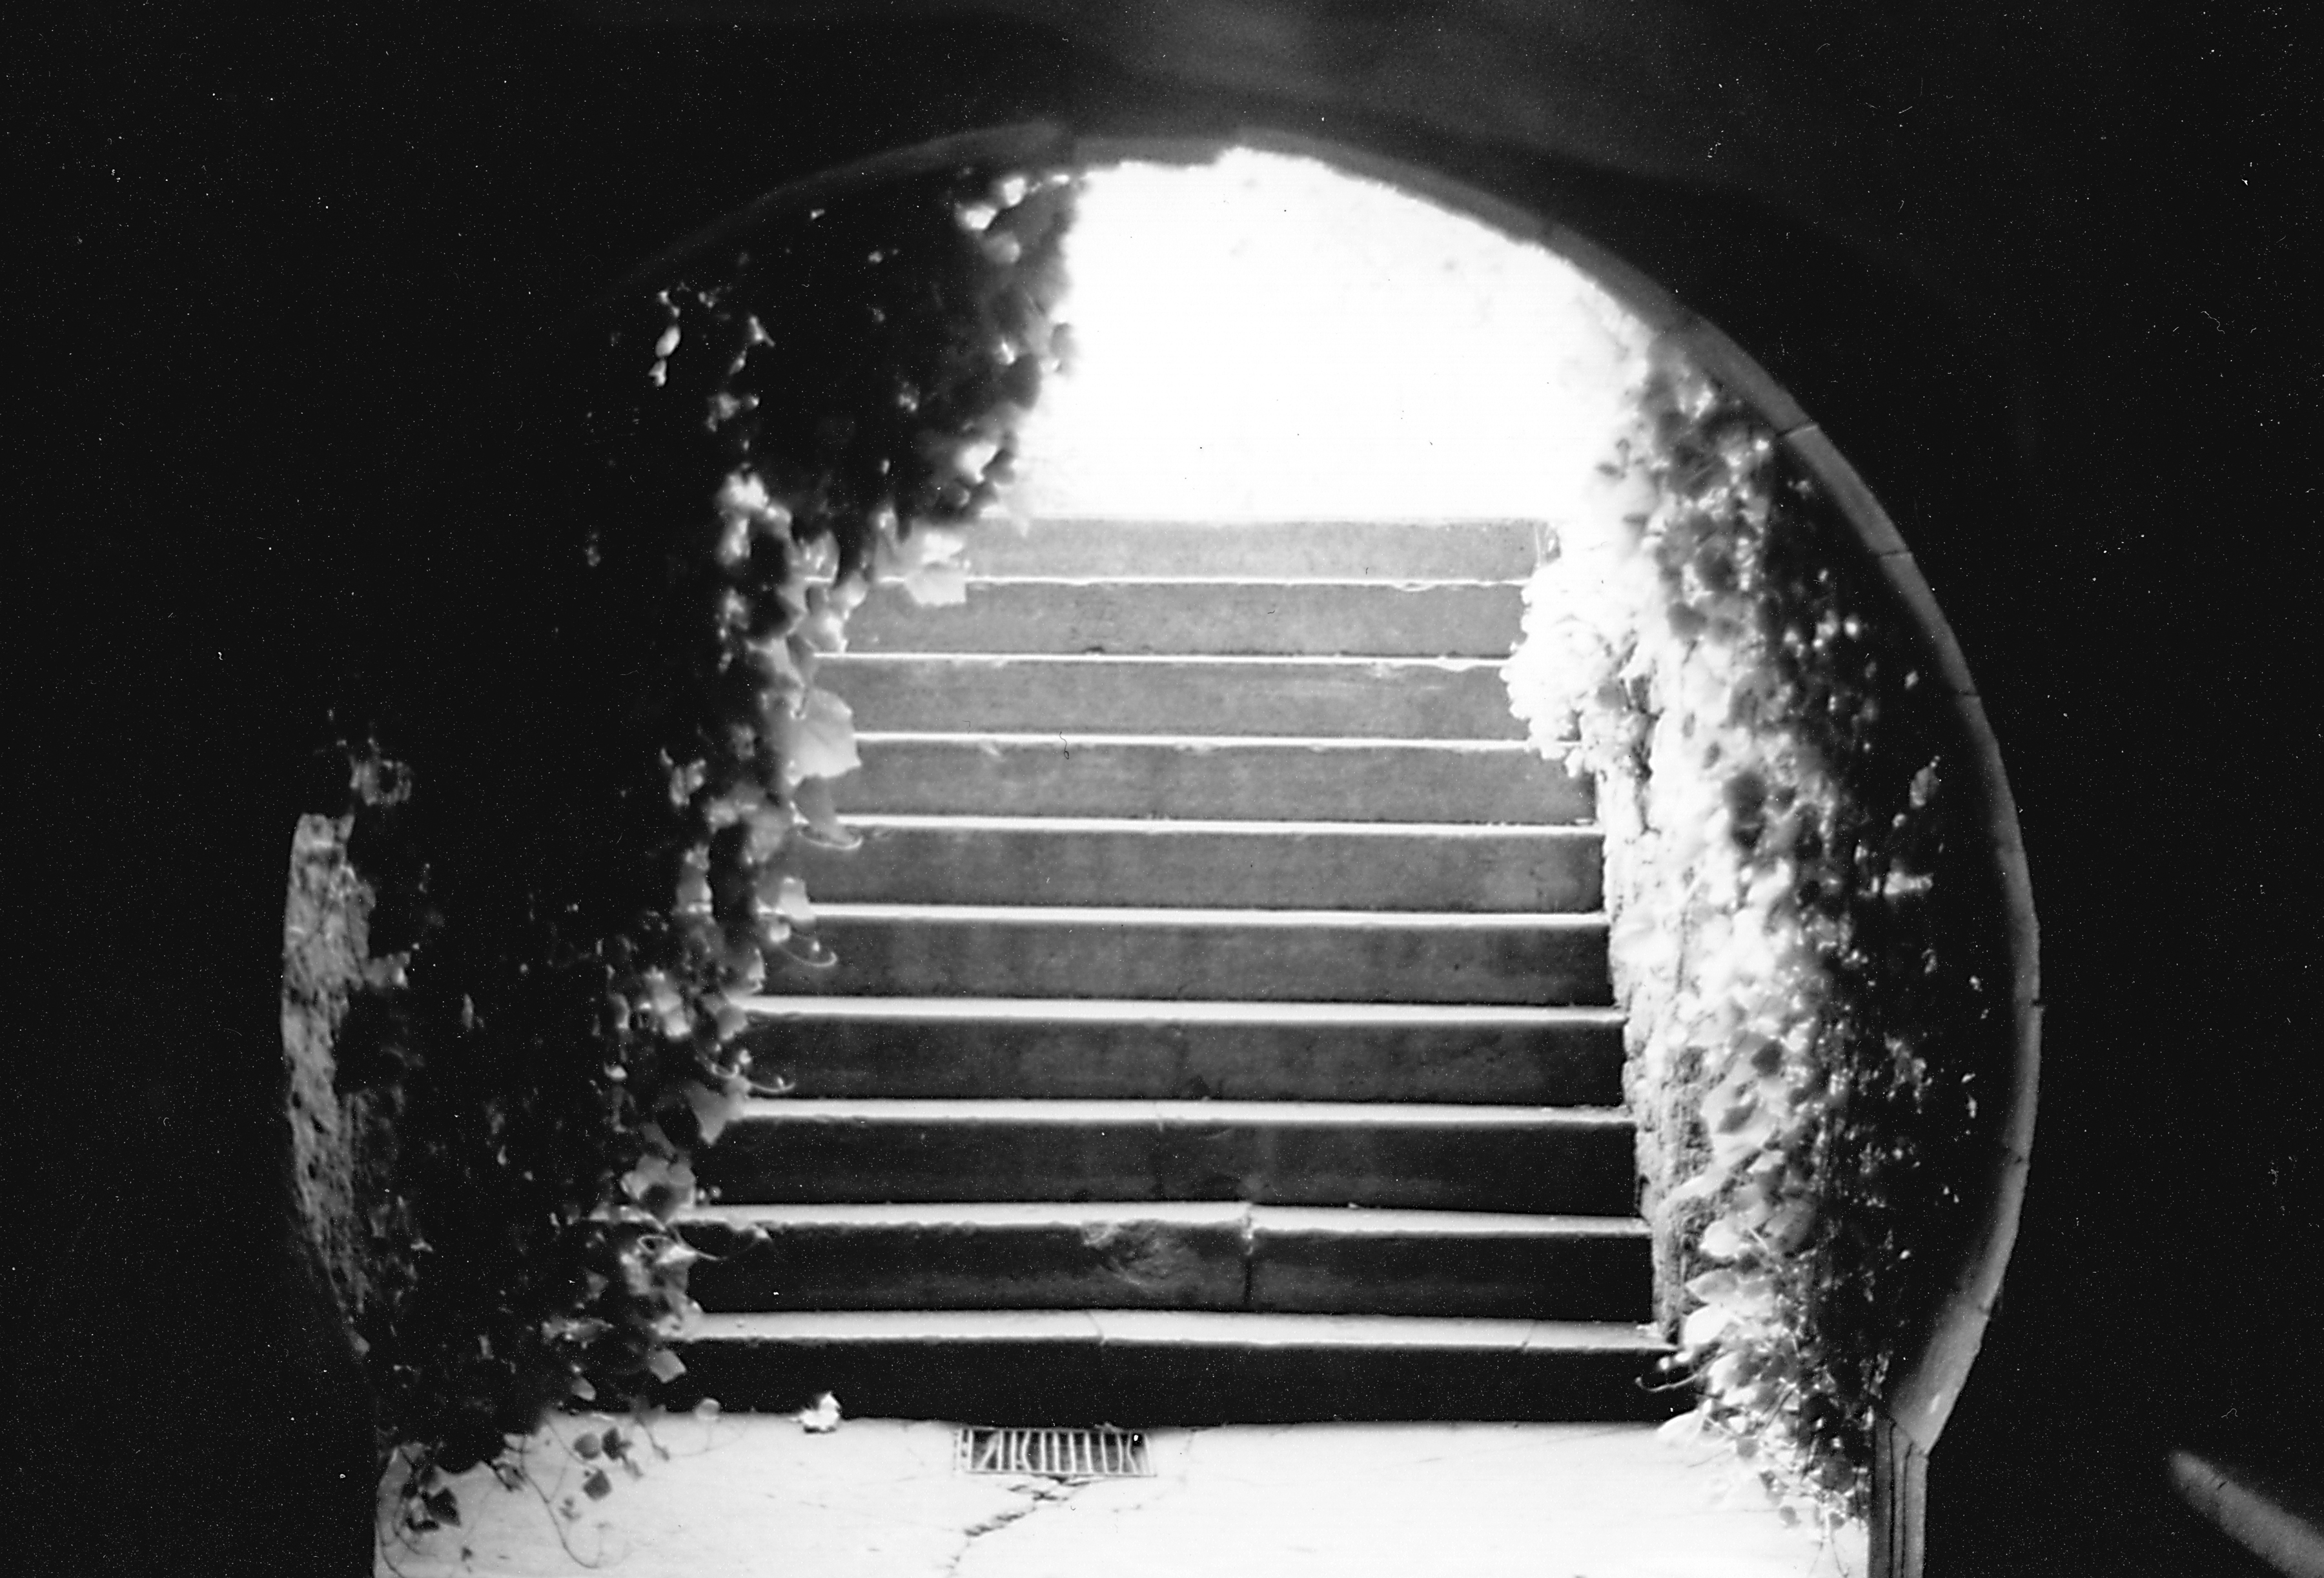
The shot above is from the center of the grotto – on most days sunlight overwhelms this view, but the detail before you leave the stairs works fairly well. The blown out sky does give you the sense of sunlight pouring in.

Shooting into the Sunlight at Grotto Spring - Eureka Springs, Arkansas

Shooting into the Sunlight at Grotto Spring – Eureka Springs, Arkansas

Next I tried an angle – it lets the texture of the limestone stairwell come alive, this one feels more like the experience of being underground and looking up into the light.

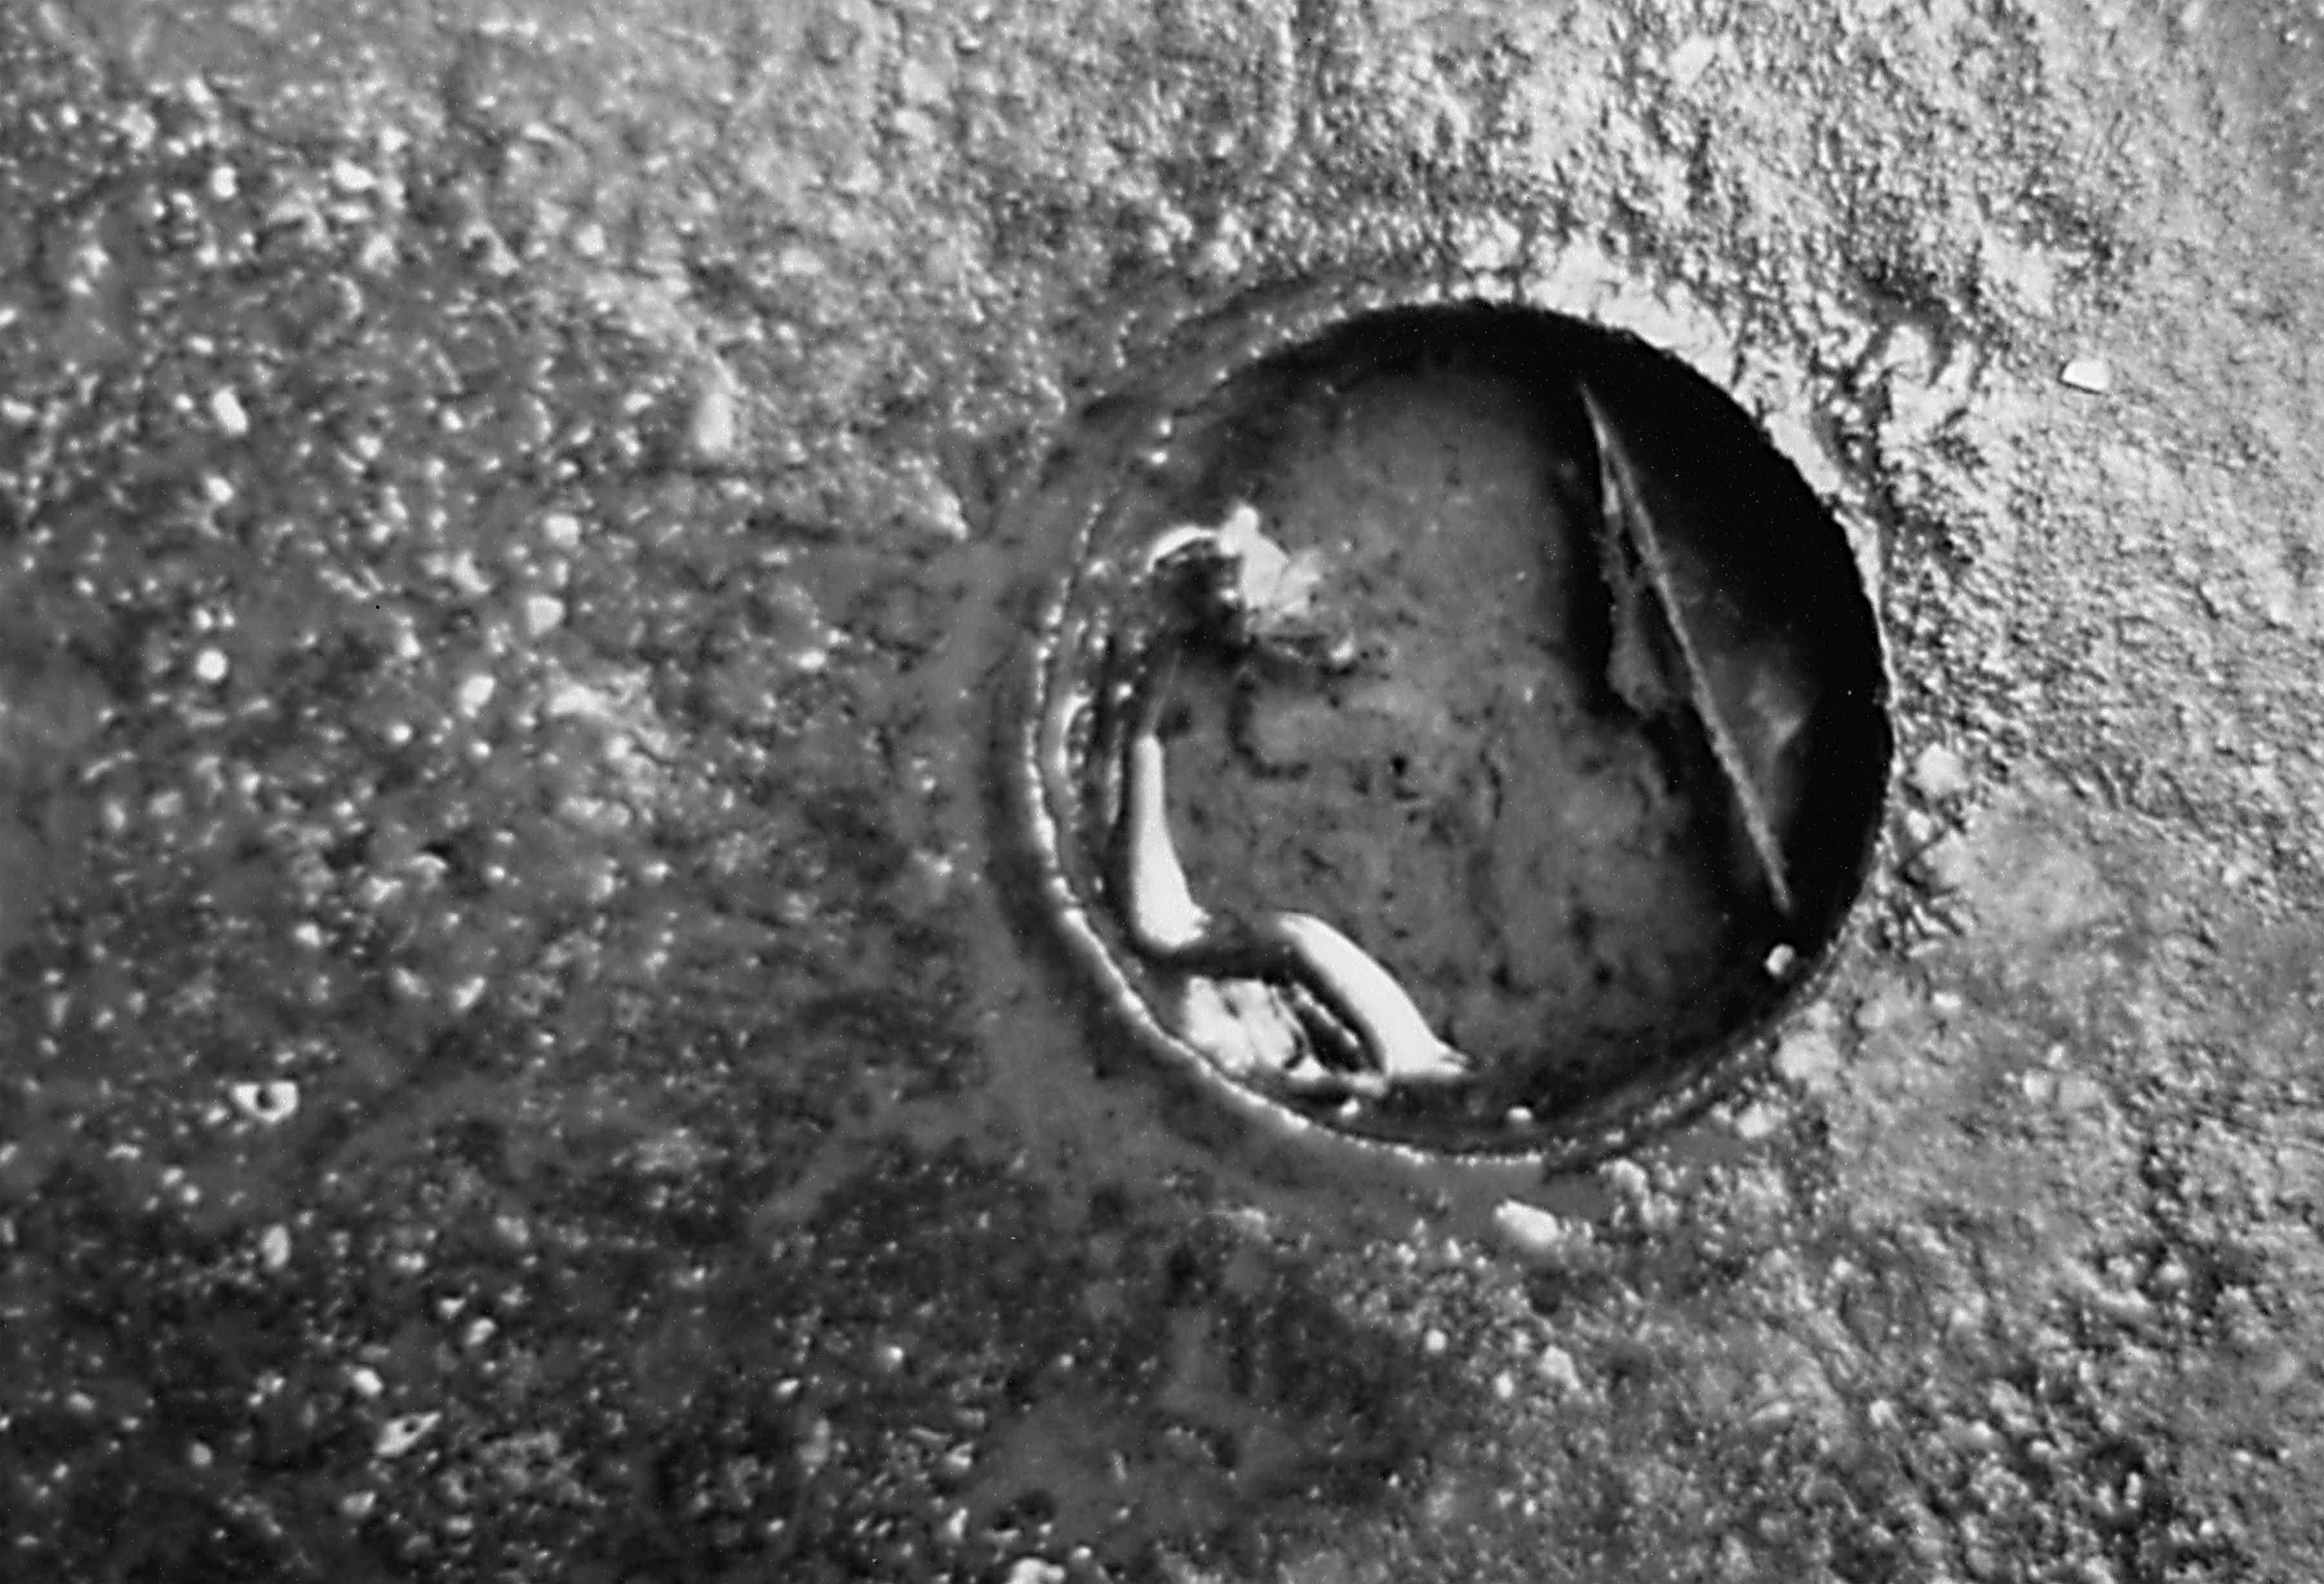
While I was inside the grotto, a small circle on the ground caught my eye – it’s a perfectly round hole in the surface of the limestone step – a stair railing must have been here at some time…

Rail Base - Grotto Spring - Eureka Springs, Arkansas

Rail Base – Grotto Spring – Eureka Springs, Arkansas

The surface of the stone gave me some of those mid tones I have been searching for. The deep shadow and the highlight on the water give me the full tonal range I have been hoping to achieve with my black and whites.

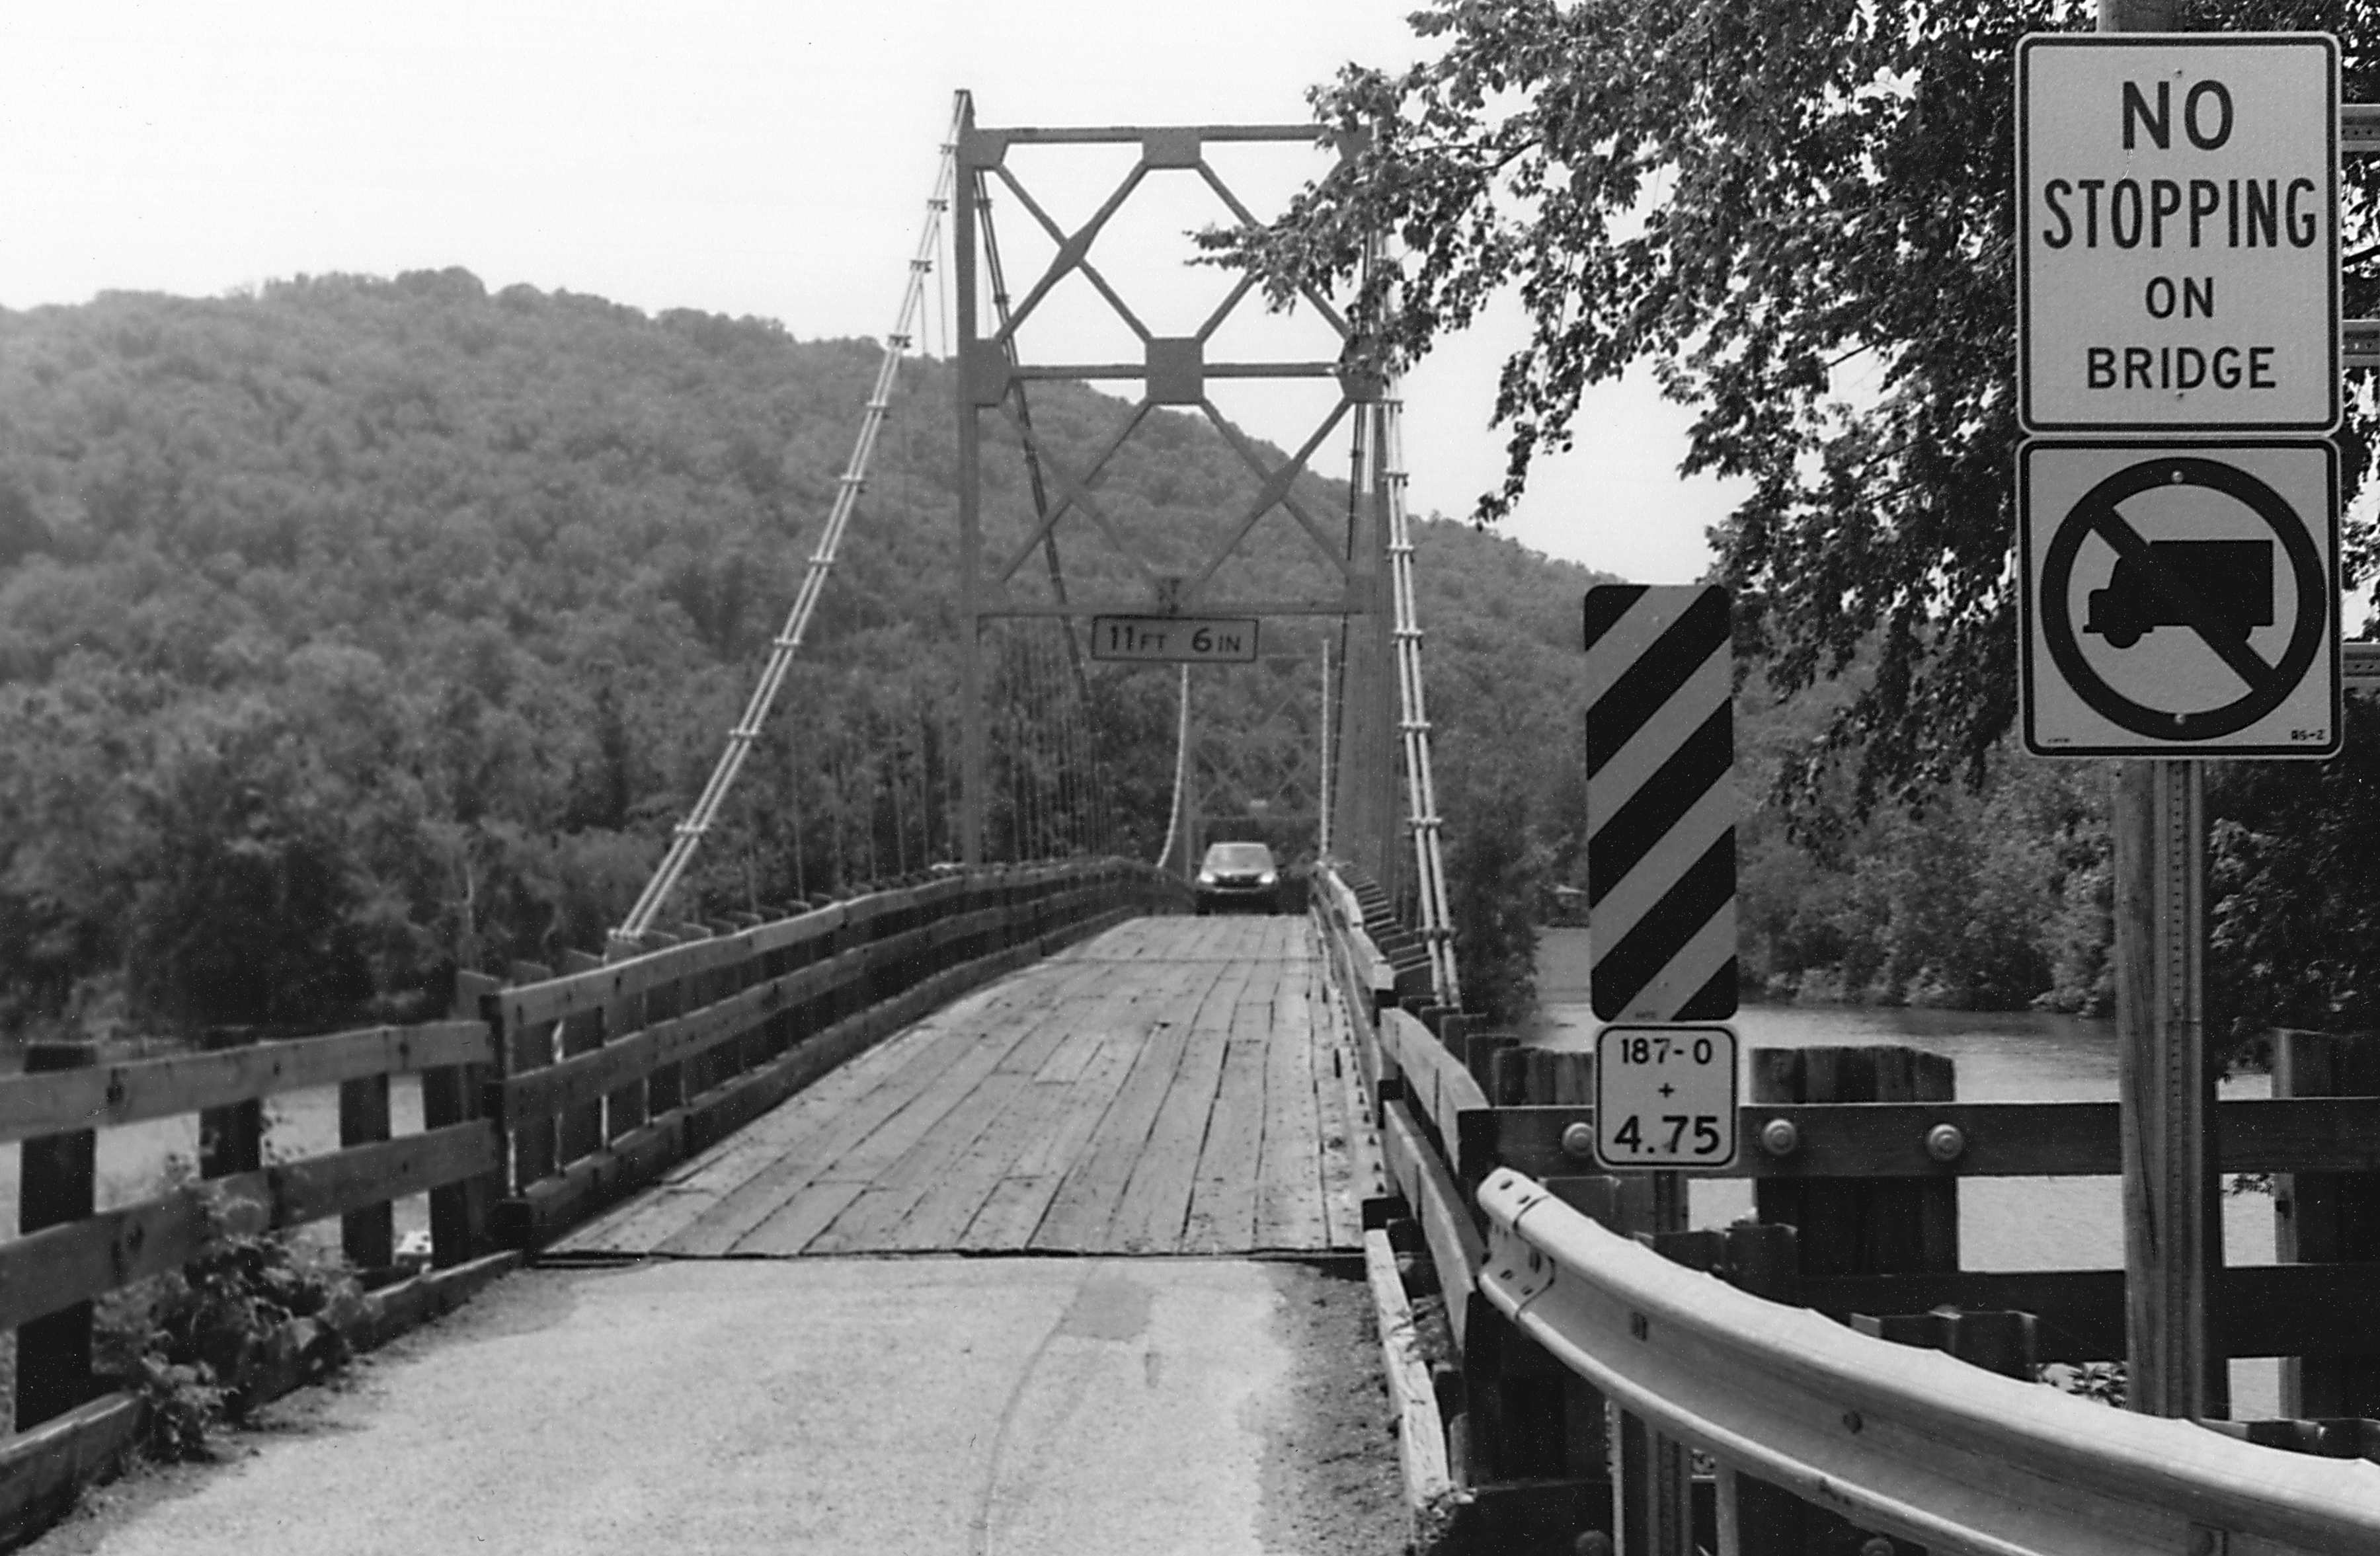
I have been reading a lot about leading lines in hopes of improving my landscape skills – this historic bridge gave me some lines to work with…

The Beaver "Golden Gate" Bridge - Beaver, Arkansas

The Beaver “Golden Gate” Bridge – Beaver, Arkansas

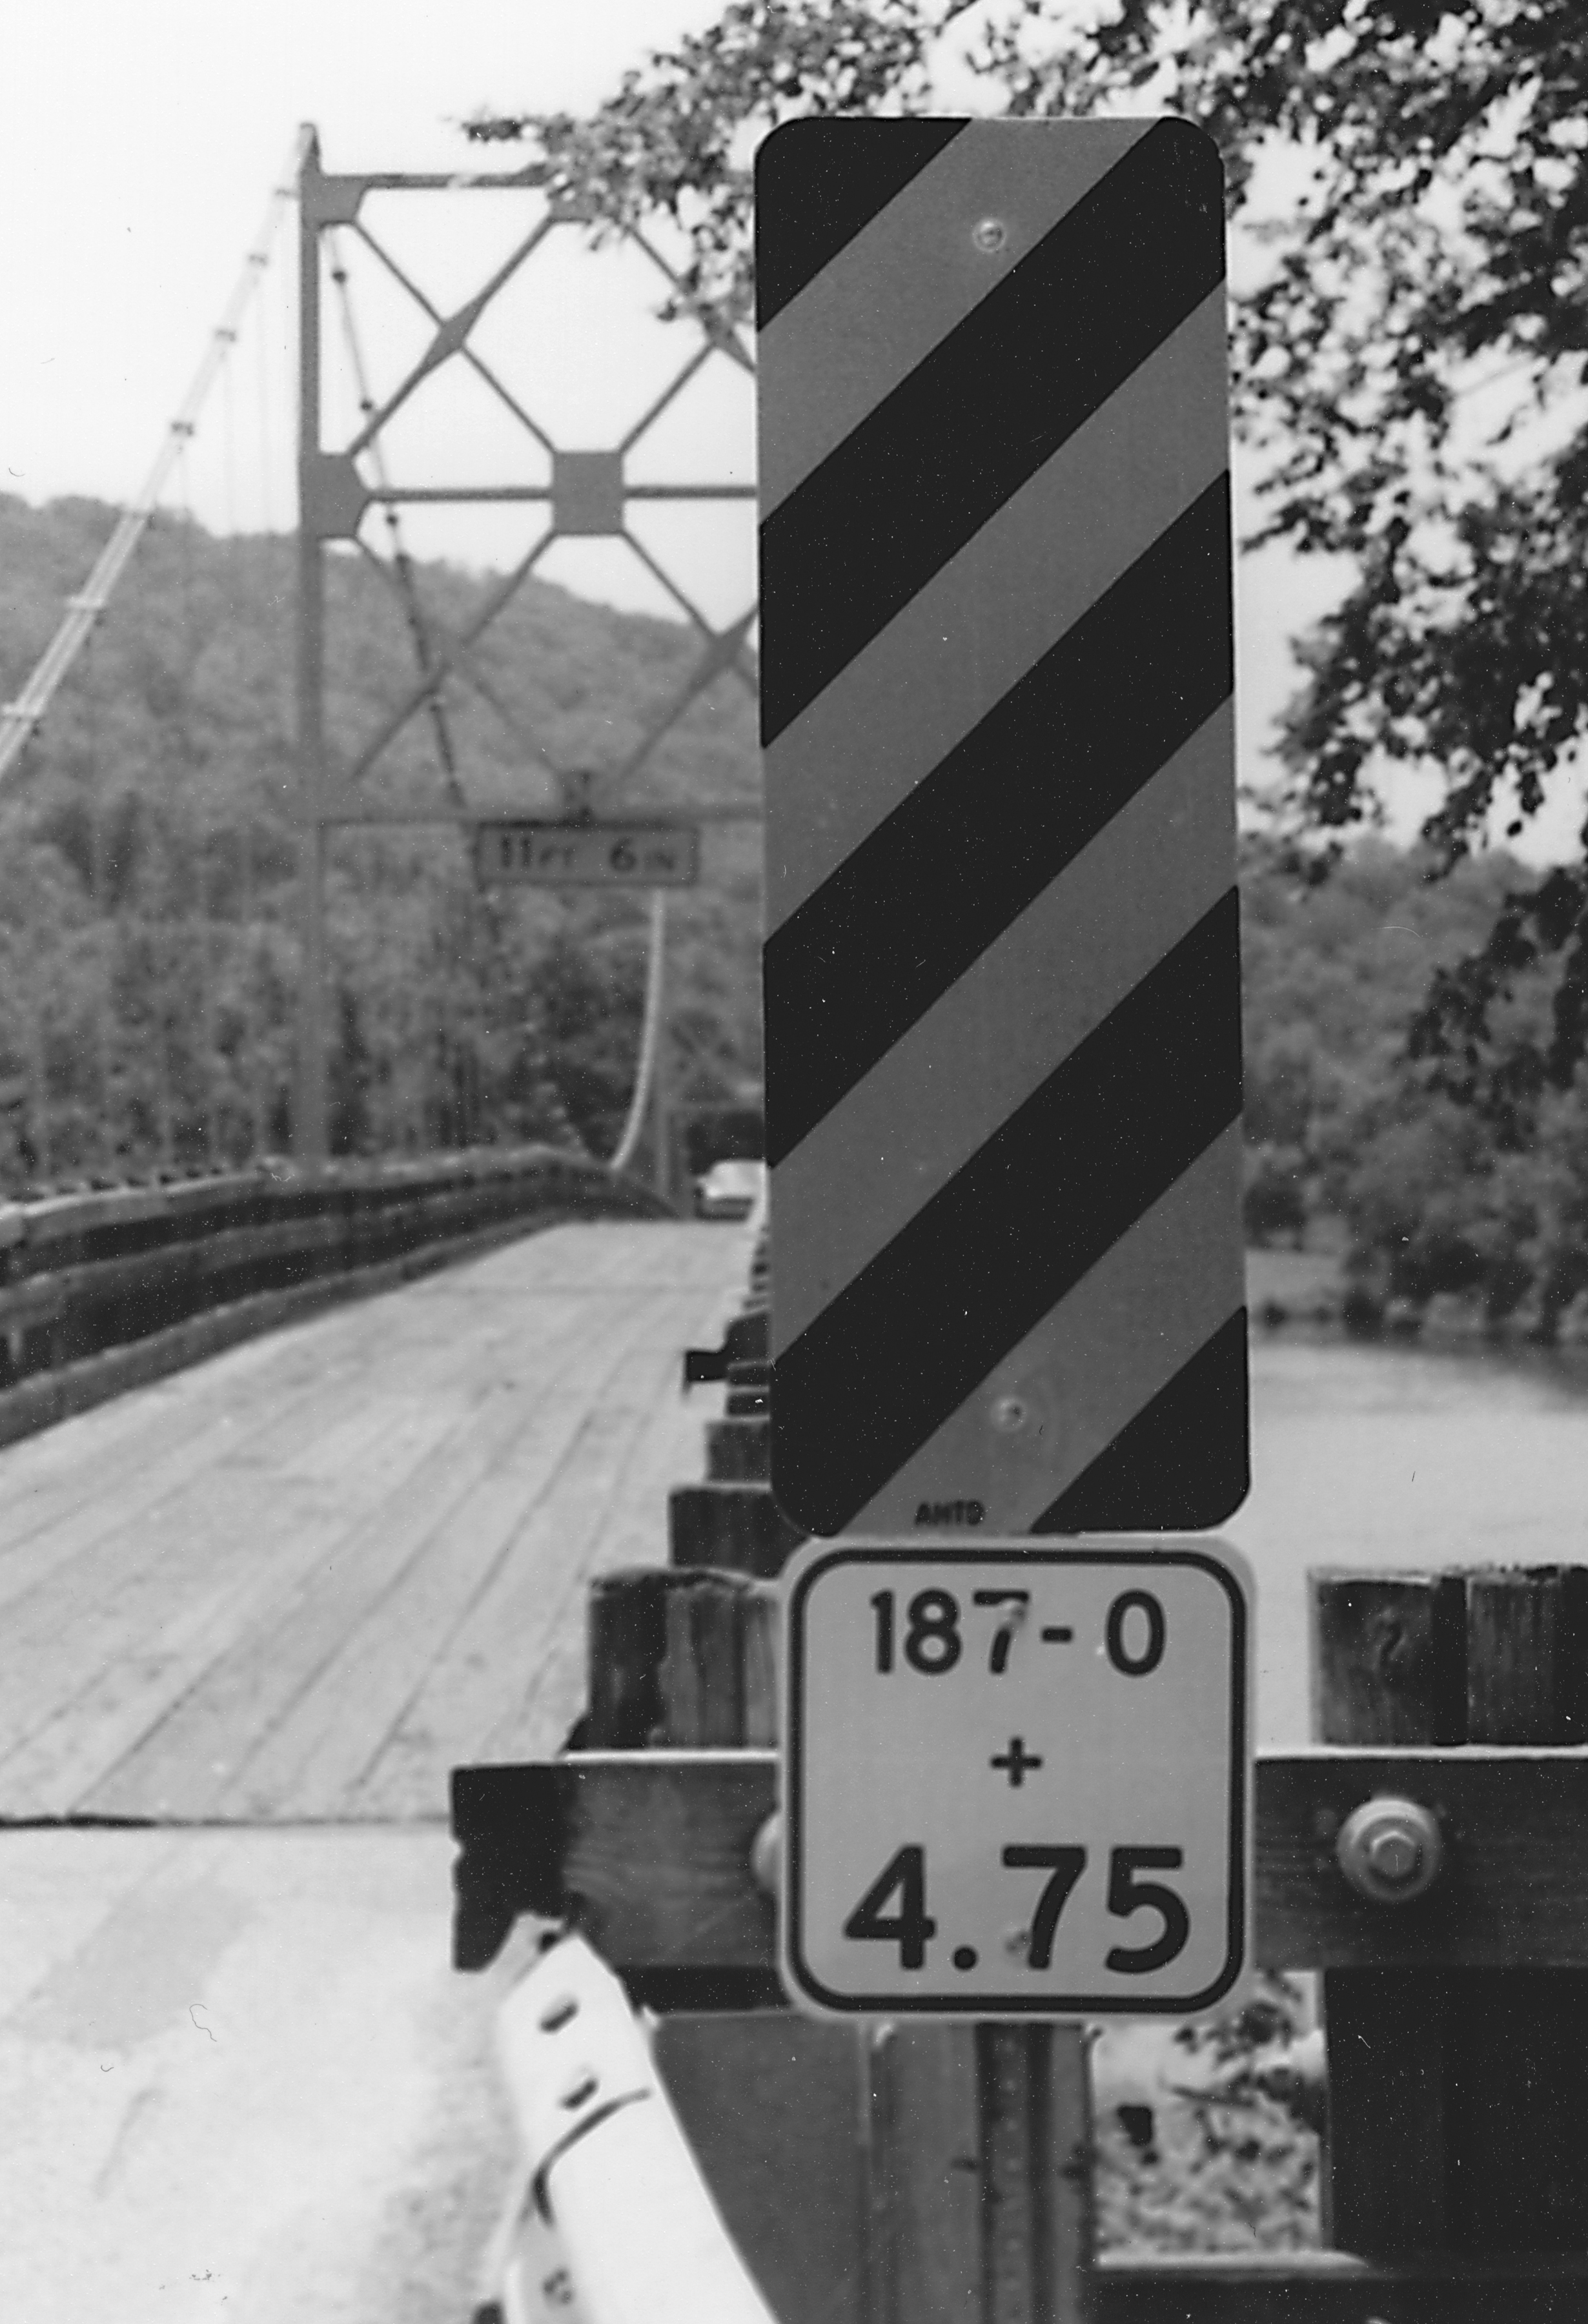
This is the Ozarks very own “Golden Gate” bridge – the towers are actually painted yellow – it’s a one-lane bridge so you have to take turns crossing it. I have shot it many times in color and have a photo by a local artist in my home – I resisted the temptation to shoot it straight on and vertical – I see that done a lot here. For the second view I decided to make the diagonally striped sign the focal point – I have never known what that sign means…

Diagonal Stripes - Beaver Bridge - Beaver, Arkansas

Diagonal Stripes – Beaver Bridge – Beaver, Arkansas

The “fast fifty” lens lets me get sweet details in the foreground, like the bolts to the right of the signs – and lets the details in the distance soften.

Shooting the manual camera has been a challenge – you need longer exposures in many cases to capture detail, but it is very difficult to keep the camera still enough. In college I shot my moms Vivitar Cosina – the one I gave Laura. It has an Auto setting that is basically a primitive Aperture Mode. You set the aperture and the light meter tells you the shutter speed. I would adjust the aperture until the shutter speed was about 125. The Olympus is completely manual with a built-in light meter. You have to adjust both the shutter and the aperture until you get the needle centered on the light meter. In some cases there is just no room to shoot at 125 – there isn’t enough light.

Solar Lanterns - Sweet Spring - Eureka Springs, Arkansas

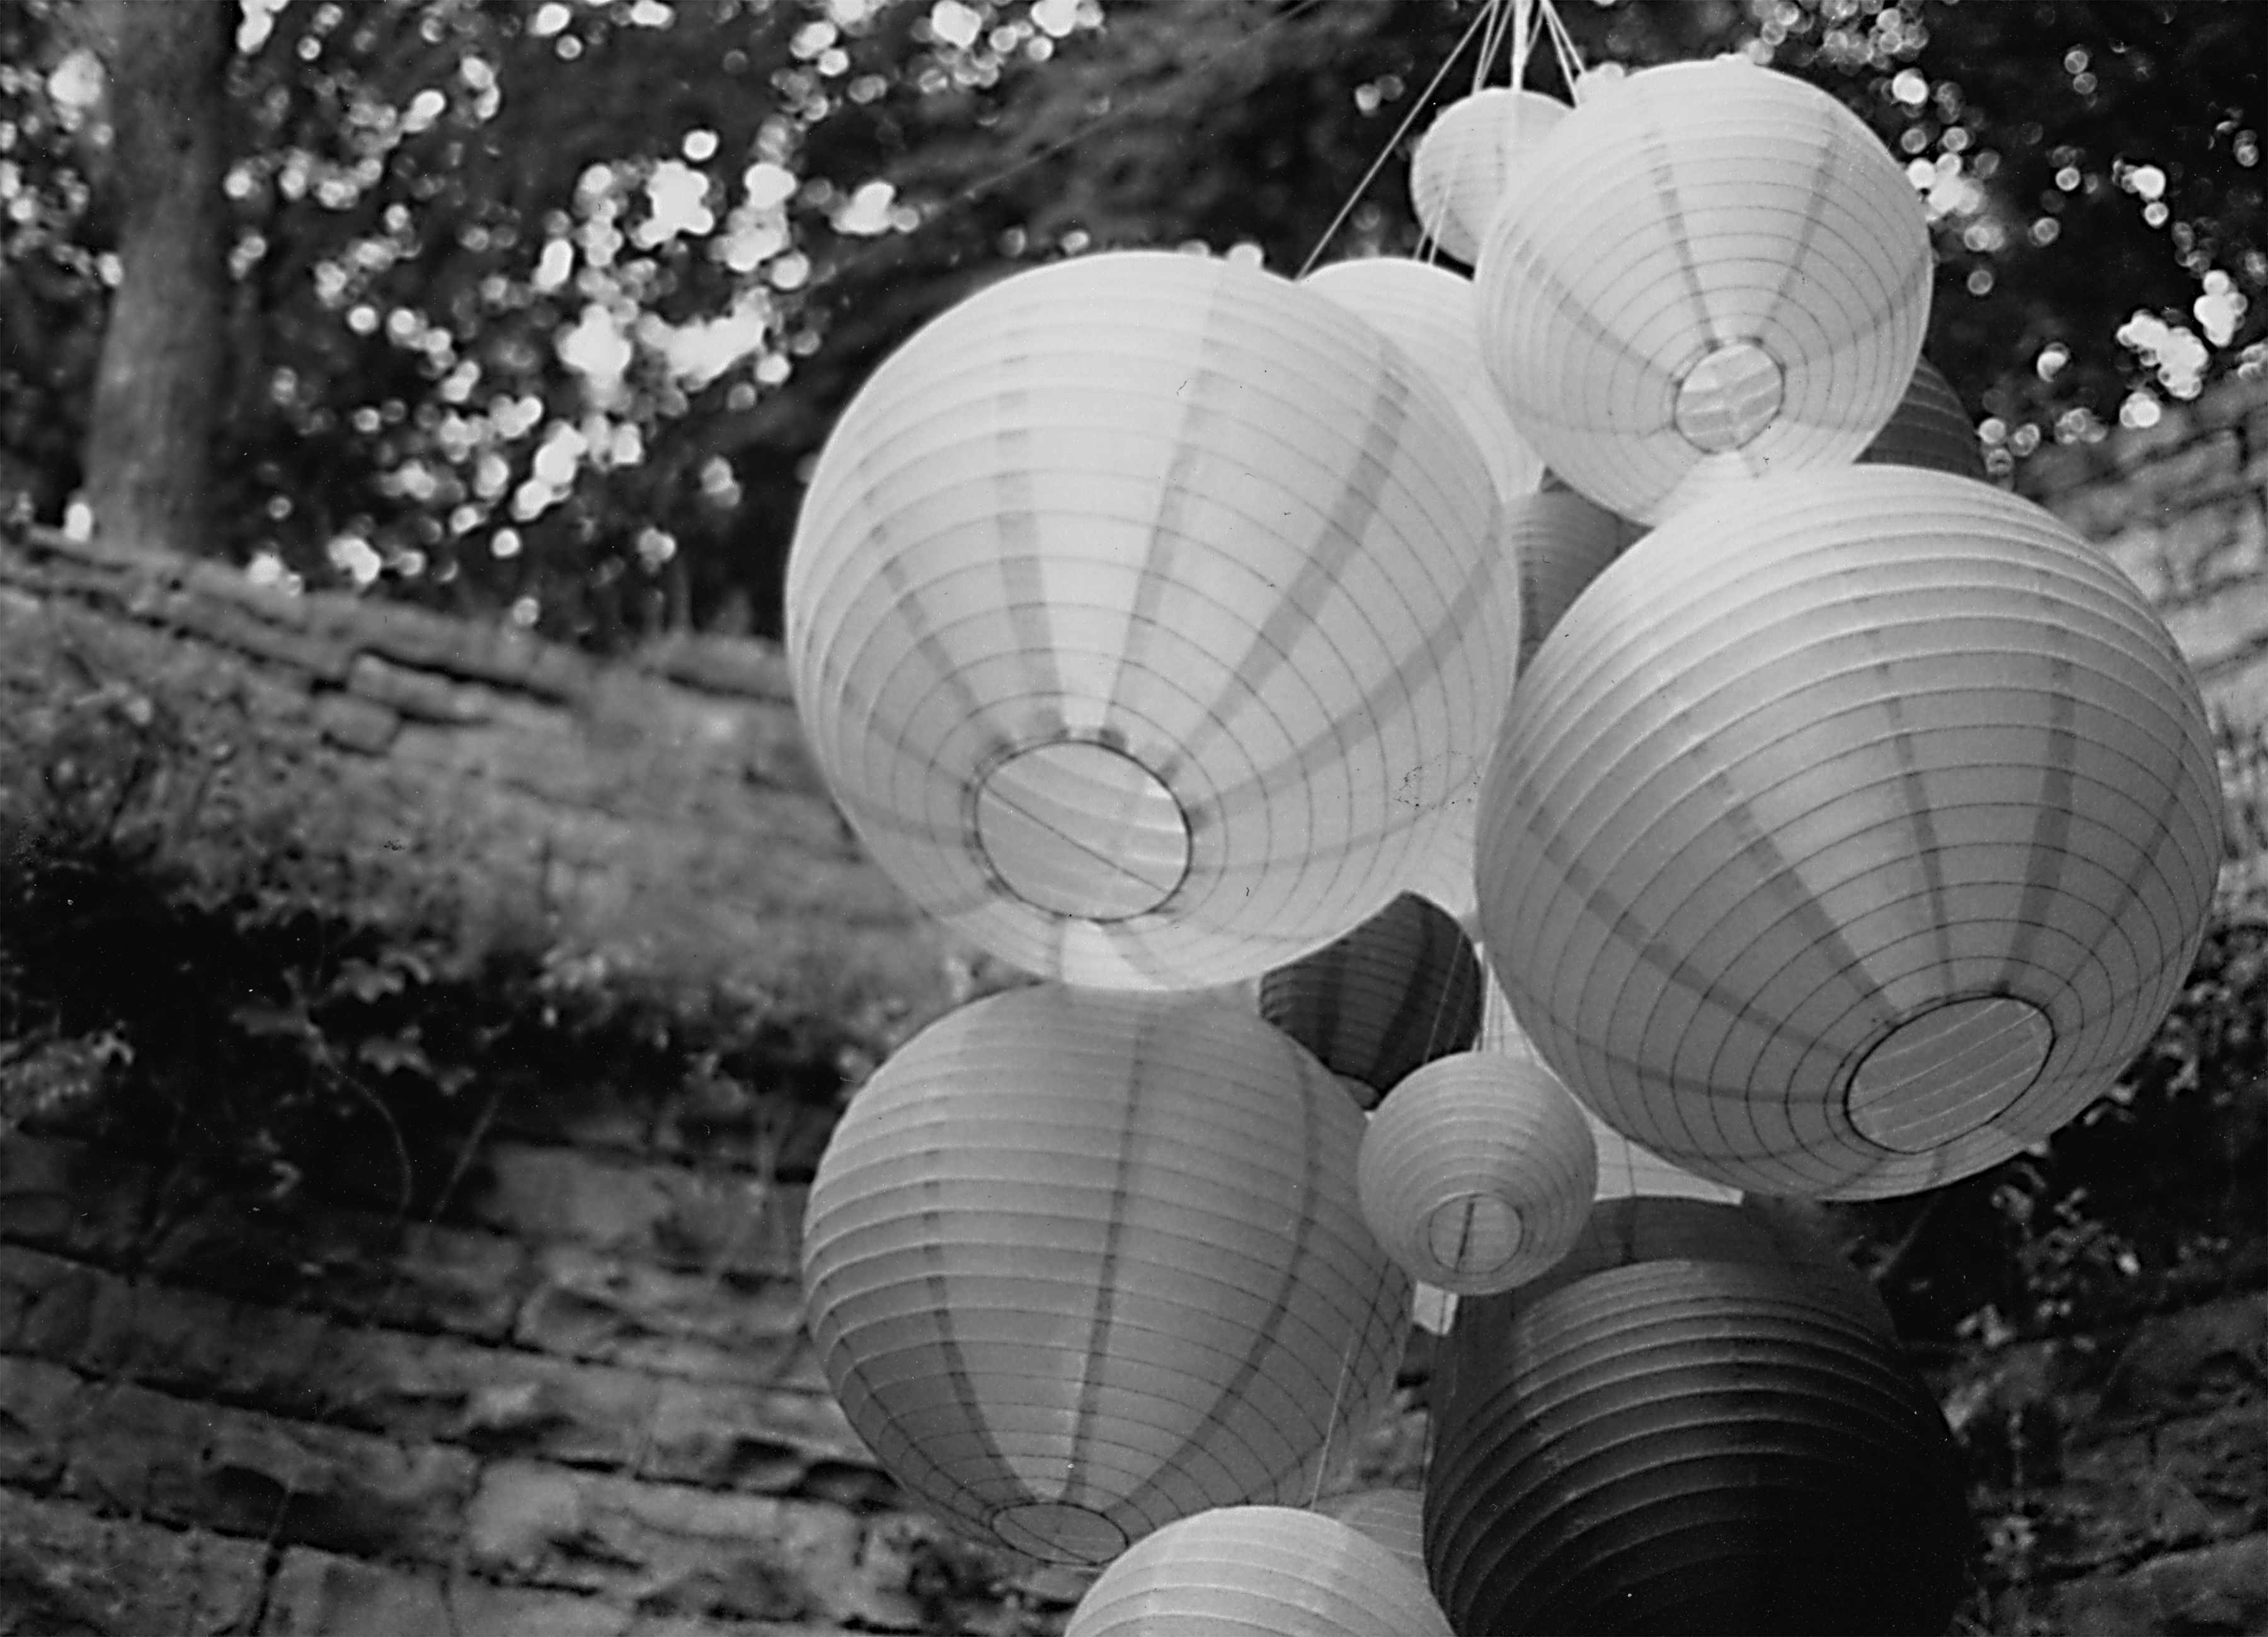
Solar Lanterns – Sweet Spring – Eureka Springs, Arkansas

More good mid tones – I shot this with the aperture close mid way down – this let me capture details in the balloons and in the limestone behind them – it was bright enough to still get a decent shutter speed at about f/11.

Laura Focusing her Pentax - Eureka Springs, Arkansas

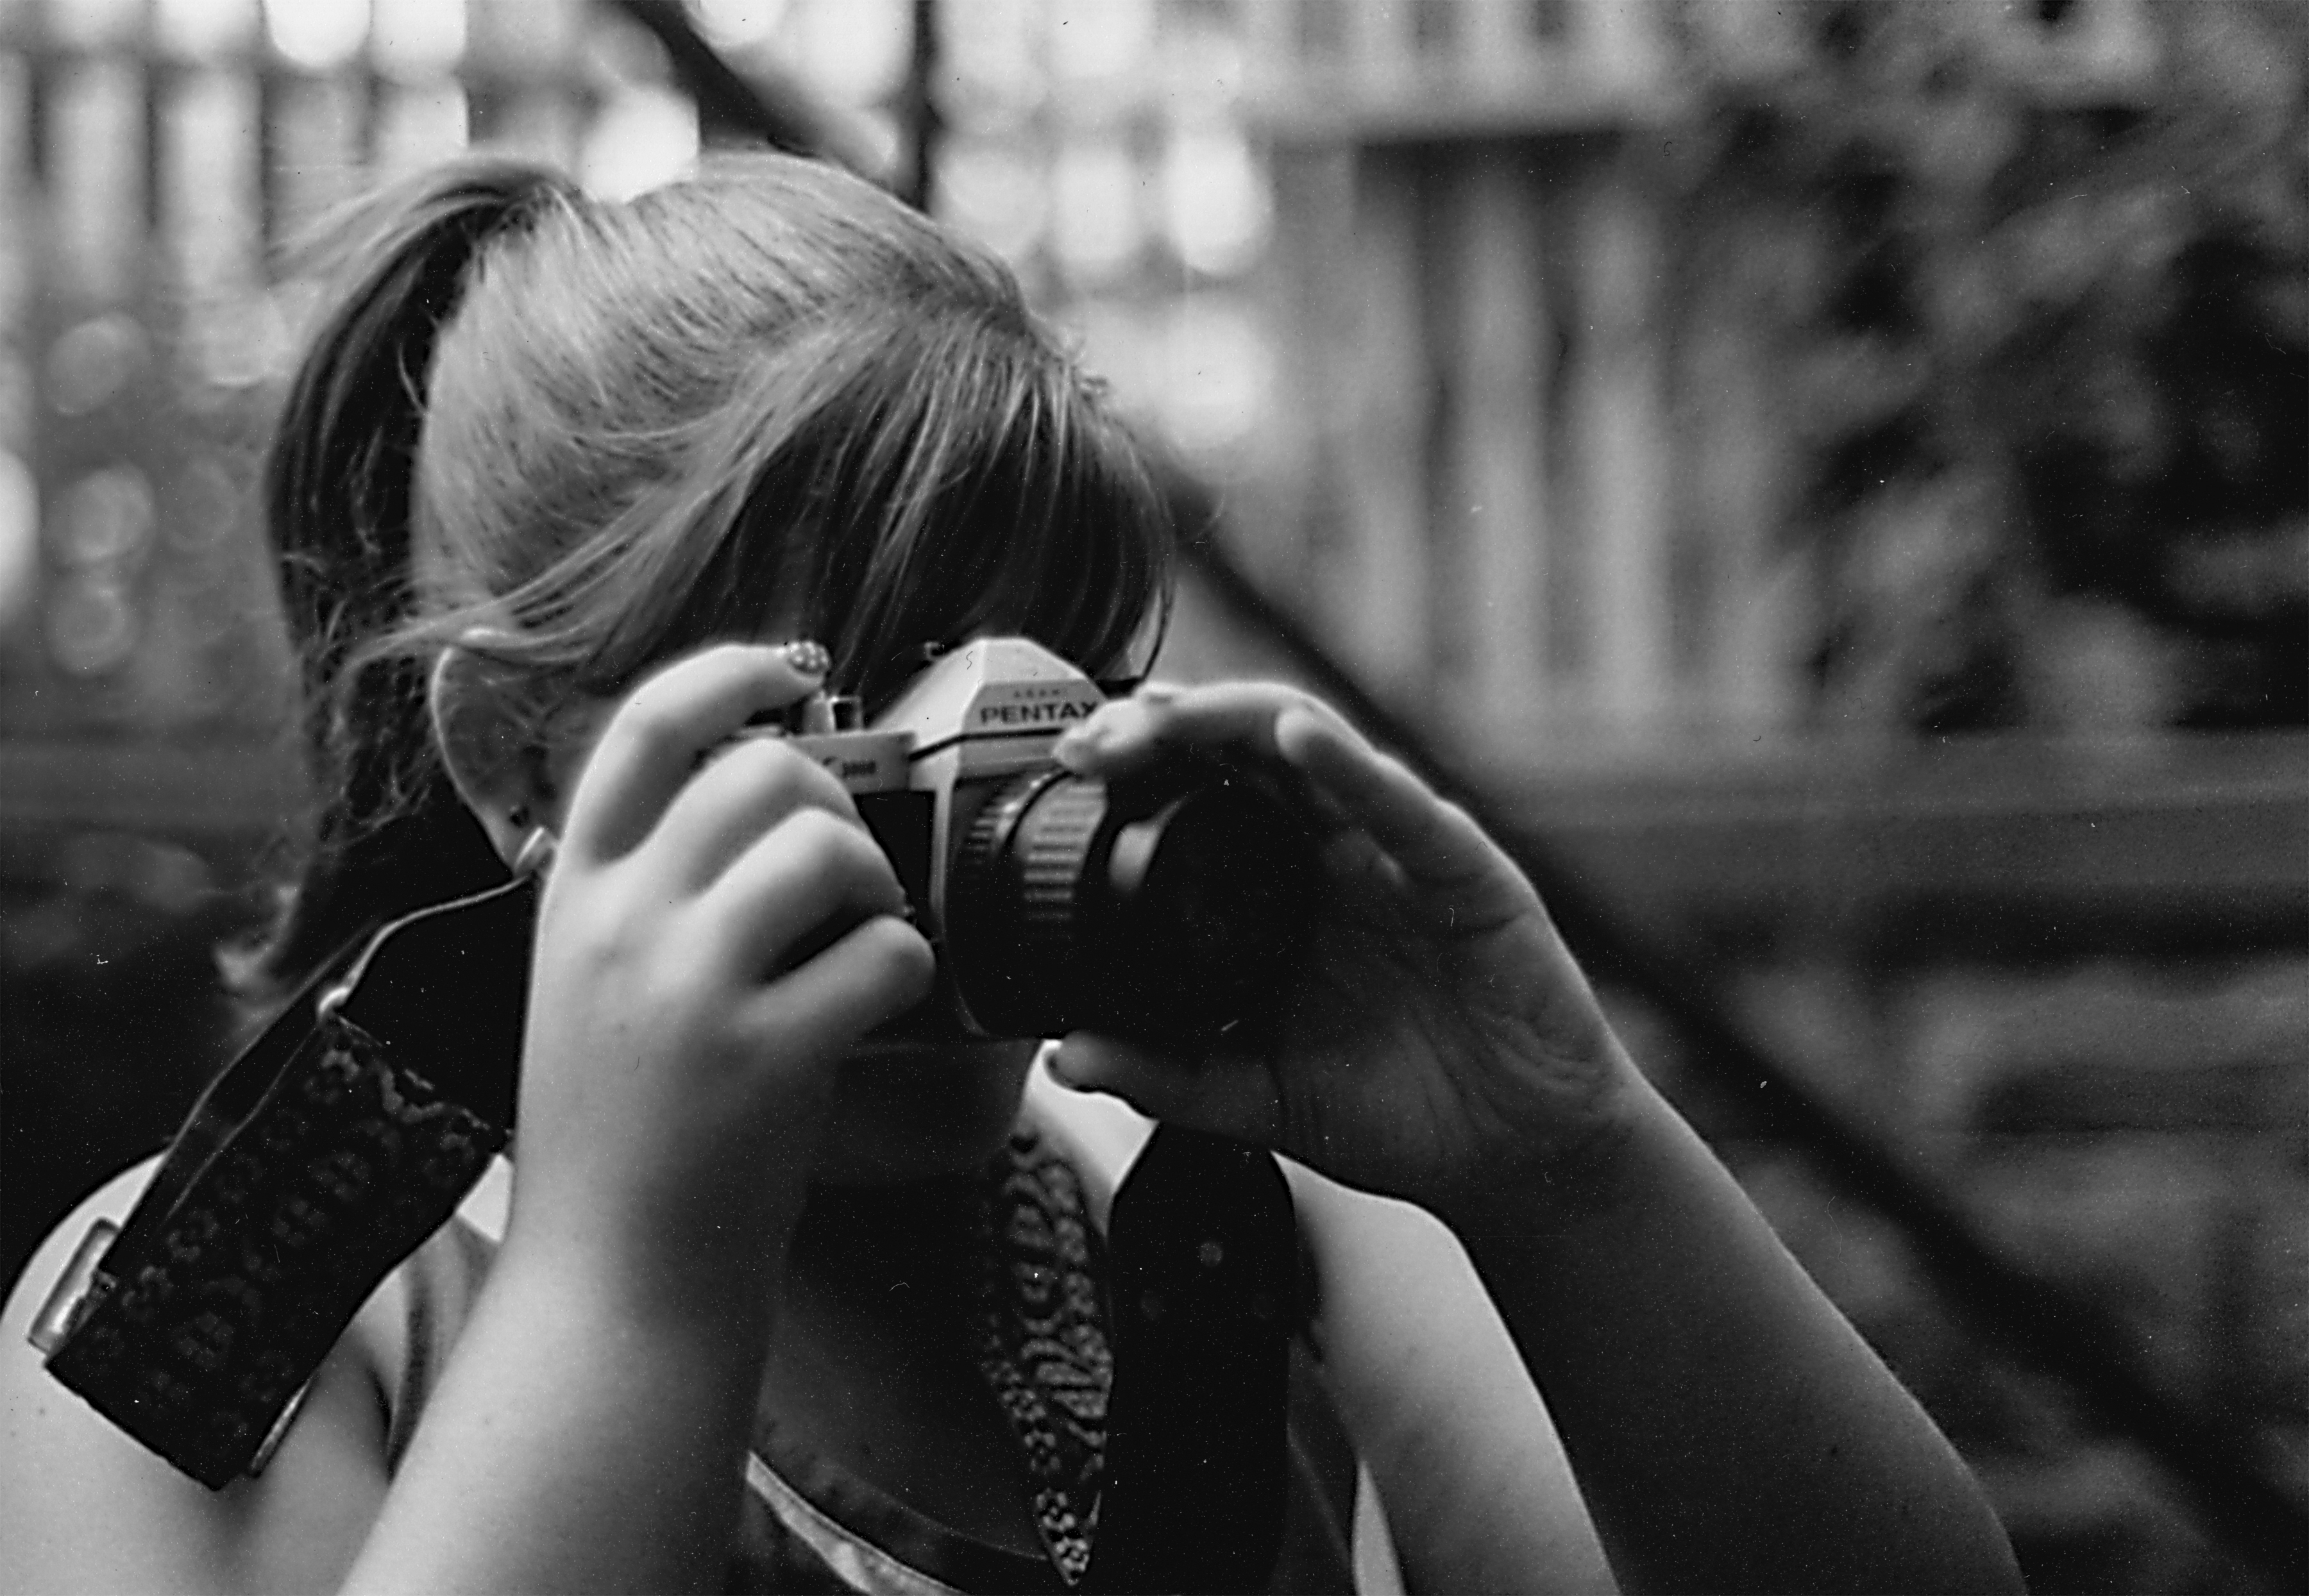
Laura Focusing her Pentax – Eureka Springs, Arkansas

This shot of Laura was taken with the aperture wide open – I focused on her camera. The DOF is very shallow. I love the bokeh created by the picket fence behind her.

Lavender flowers at Sweet Spring - Eureka Springs, Arkansas

Lavender flowers at Sweet Spring – Eureka Springs, Arkansas

I used the same setting to capture these flowers, Laura was actually shooting these when I was shooting her.

Log Cabin with Cedar Log Rails - Eureka Springs, Arkansas

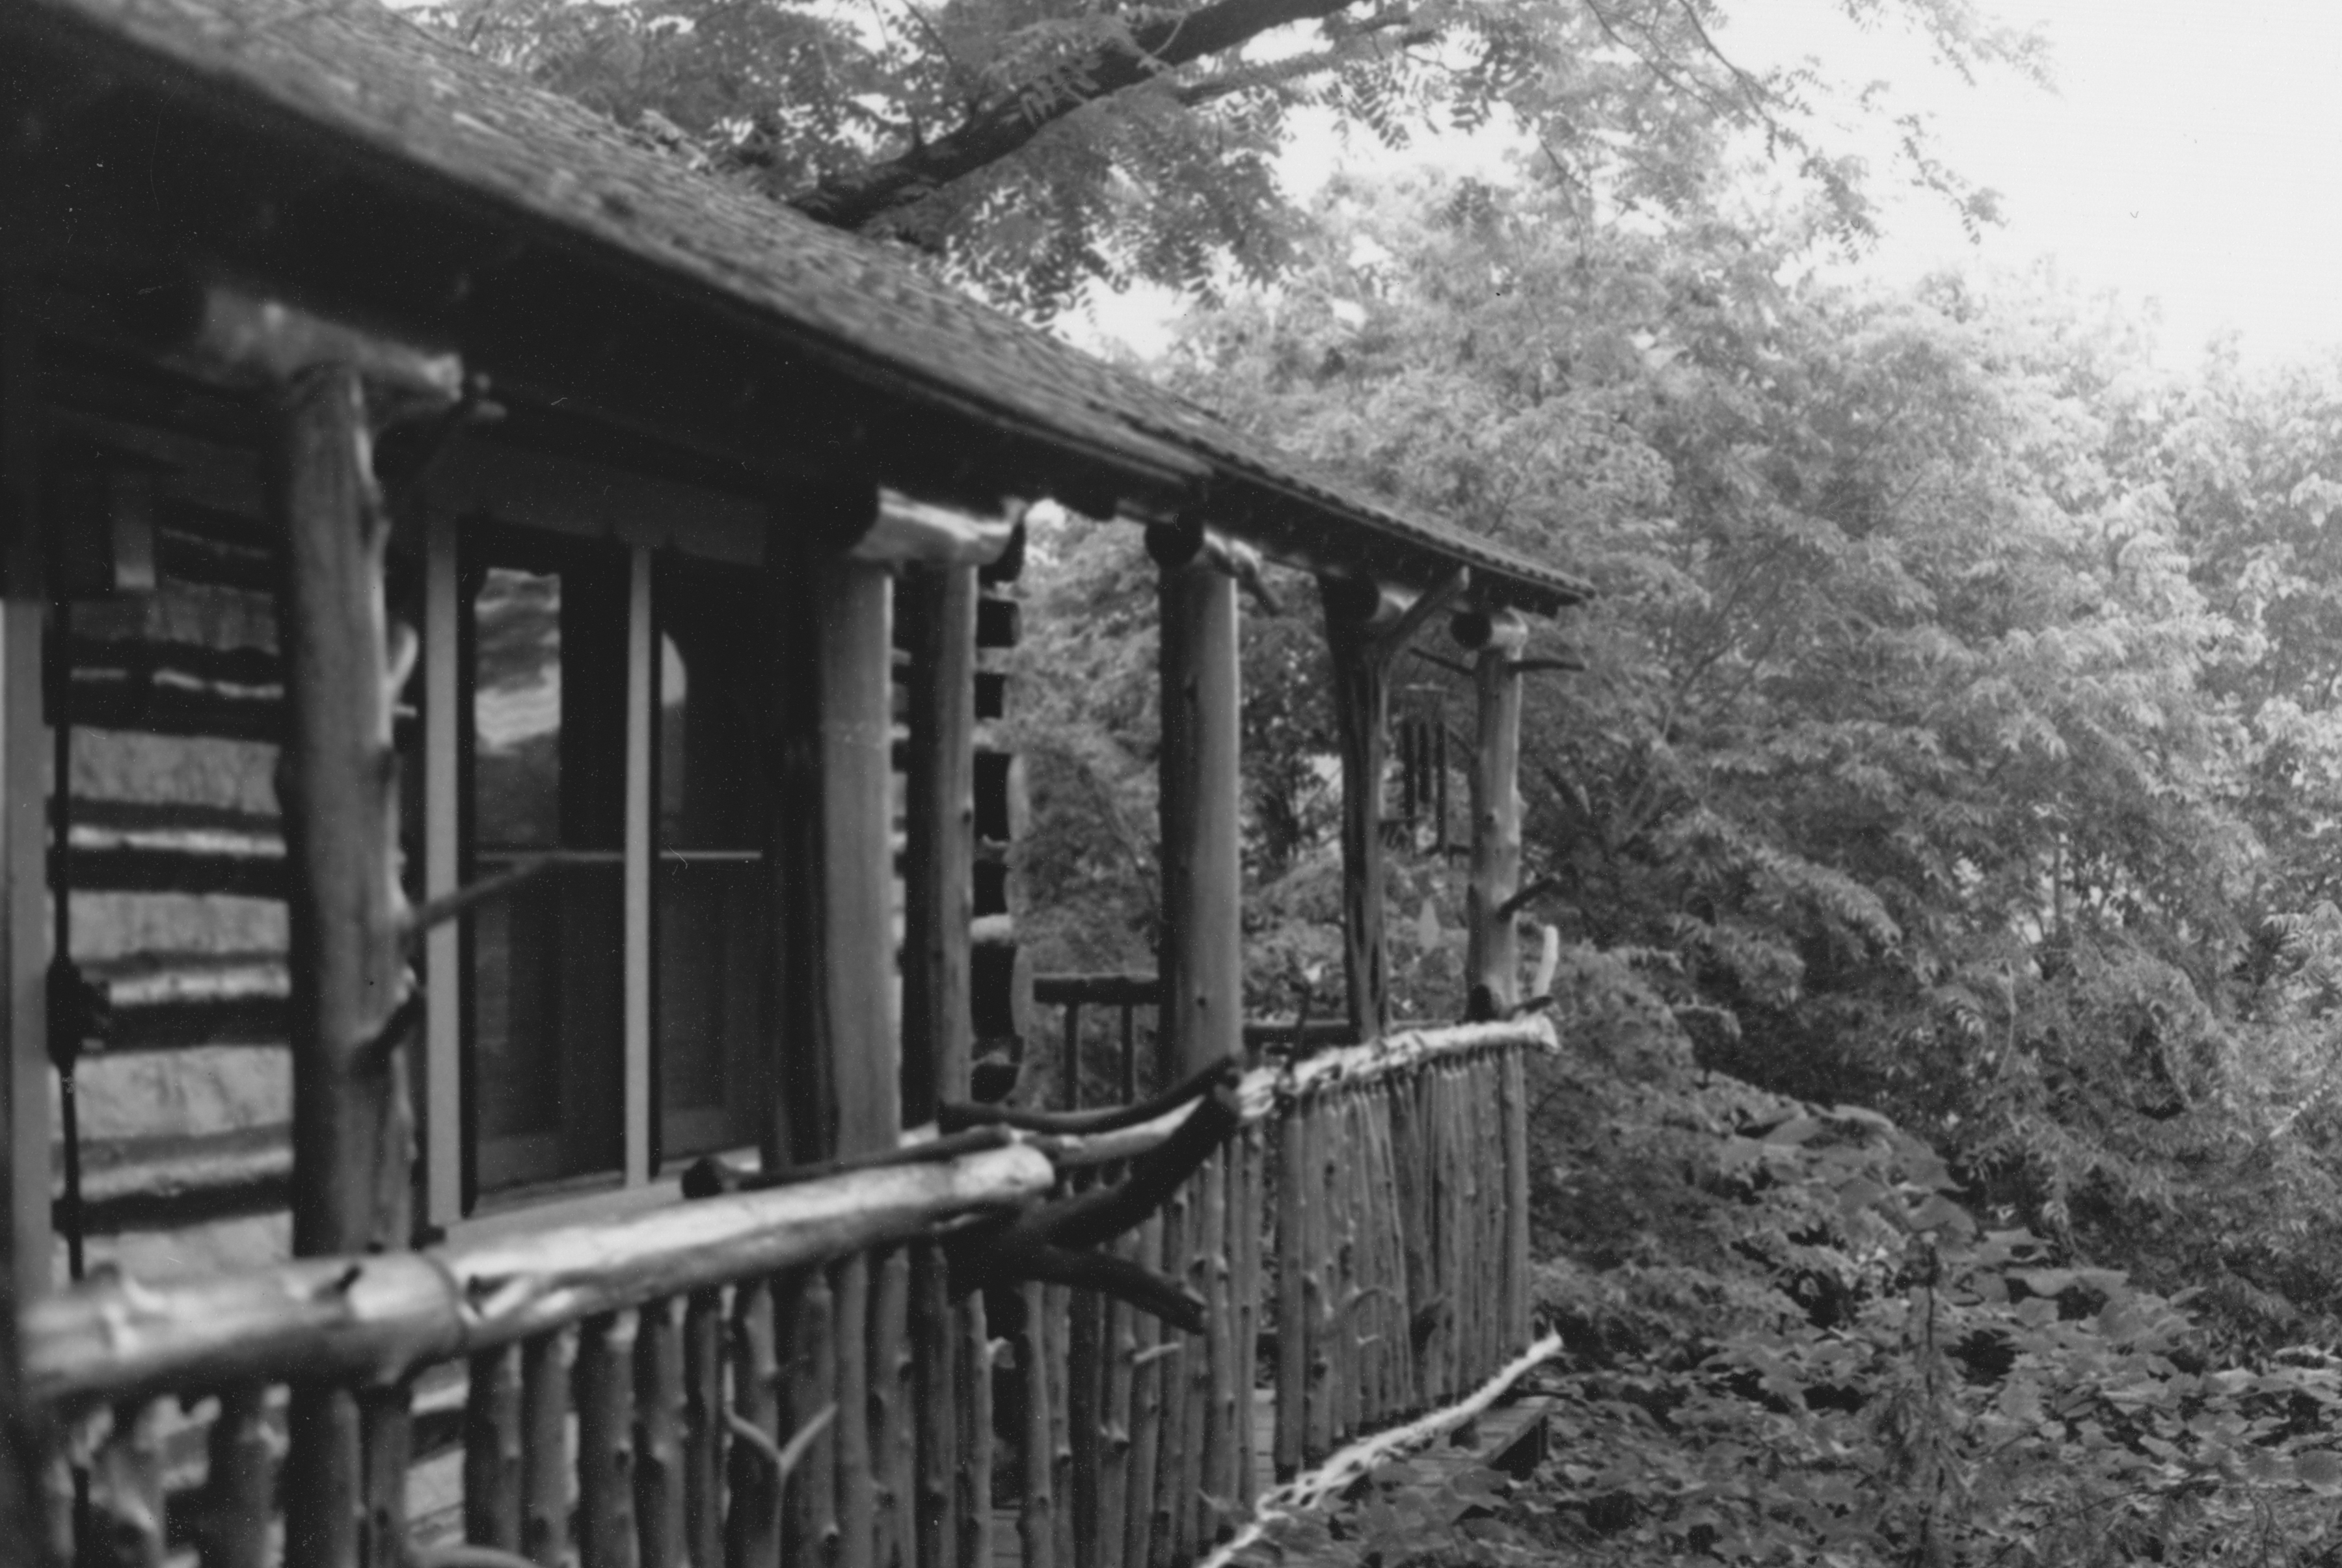
Log Cabin with Cedar Log Rails – Eureka Springs, Arkansas

This log cabin is on Spring Street in Eureka Springs. It hangs out over a hollow in the middle of town. There are trees near the sidewalk, so you have to find a way to peek through them to get a shot of it with the hollow visible. My first instinct was to shoot it straight on from the street – but I thought about the leading lines and decided to get a view at an angle.

Crystal Spring Seen Through a Curved Window - Crystal Bridges - Bentonville, Arkansas

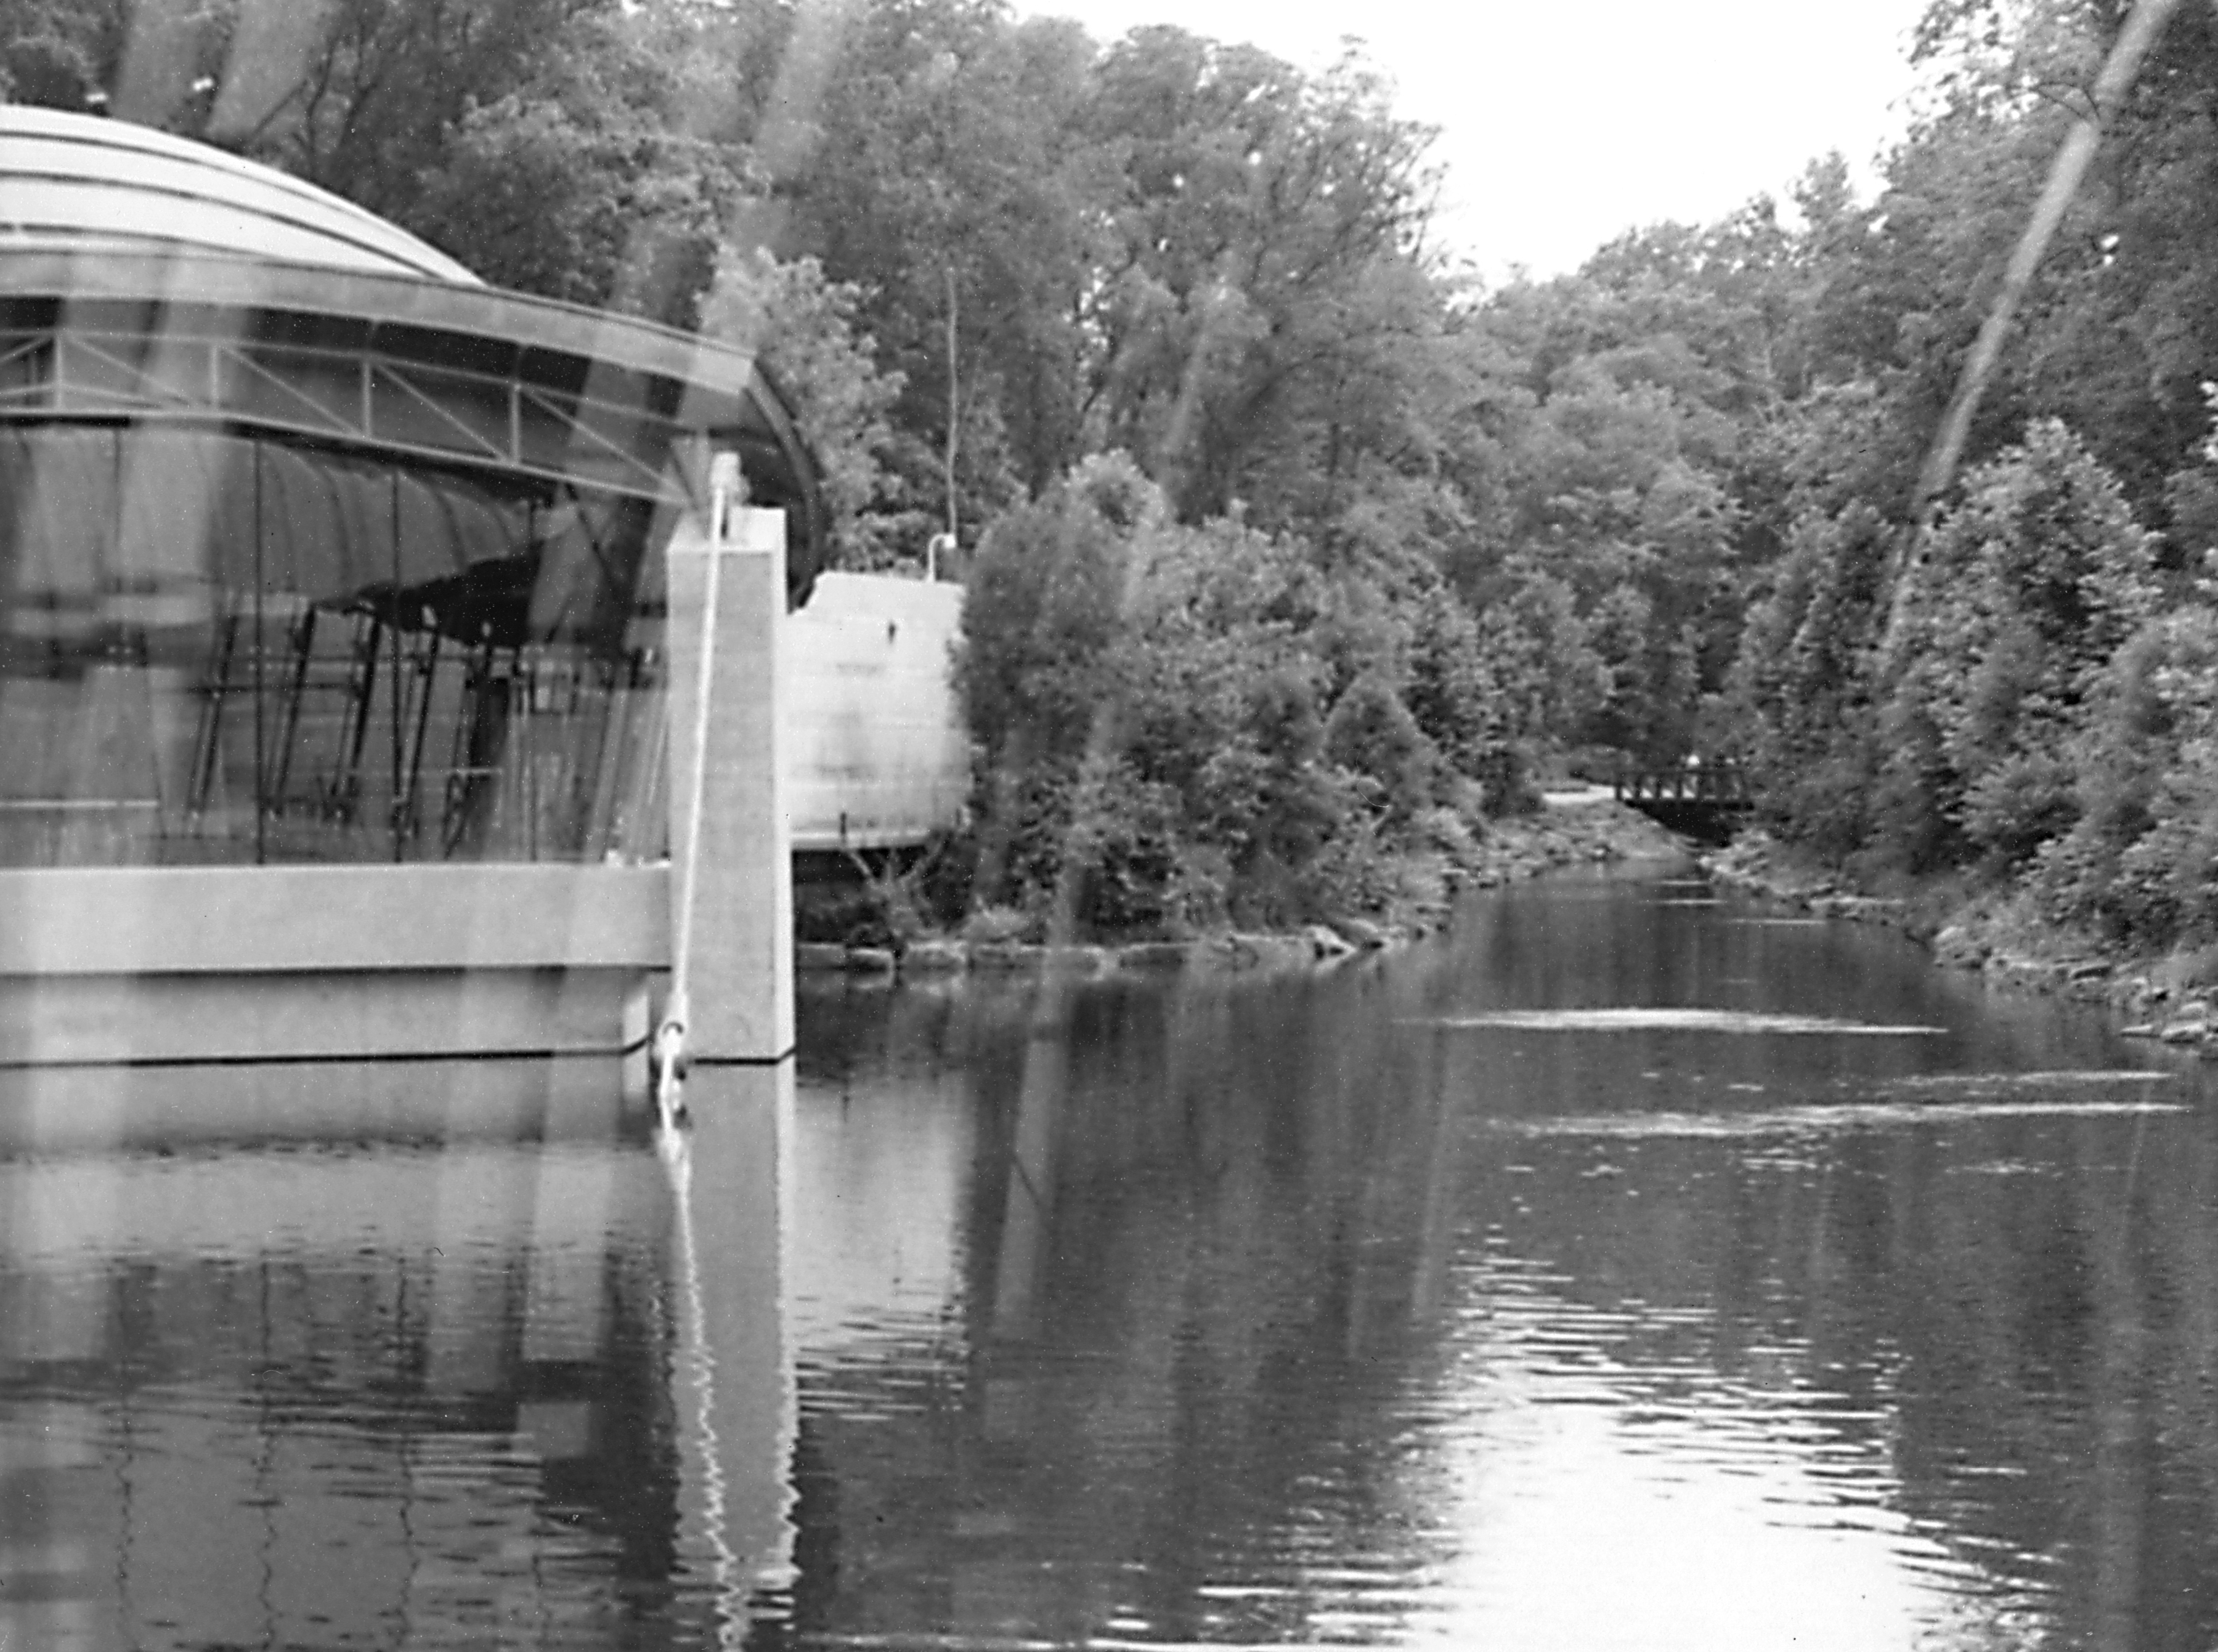
Crystal Spring Seen Through a Curved Window – Crystal Bridges – Bentonville, Arkansas

Now for something a bit more modern – this is a view of the Spring at Crystal Bridges Museum – through a curved glass window. I was curious to see how the curved reflections would play on the image. I close the aperture down to about f/11 in this shot – the DOF is pretty deep.

Brushes at the Norberta Filbert Gallery - Bentonville, Arkansas

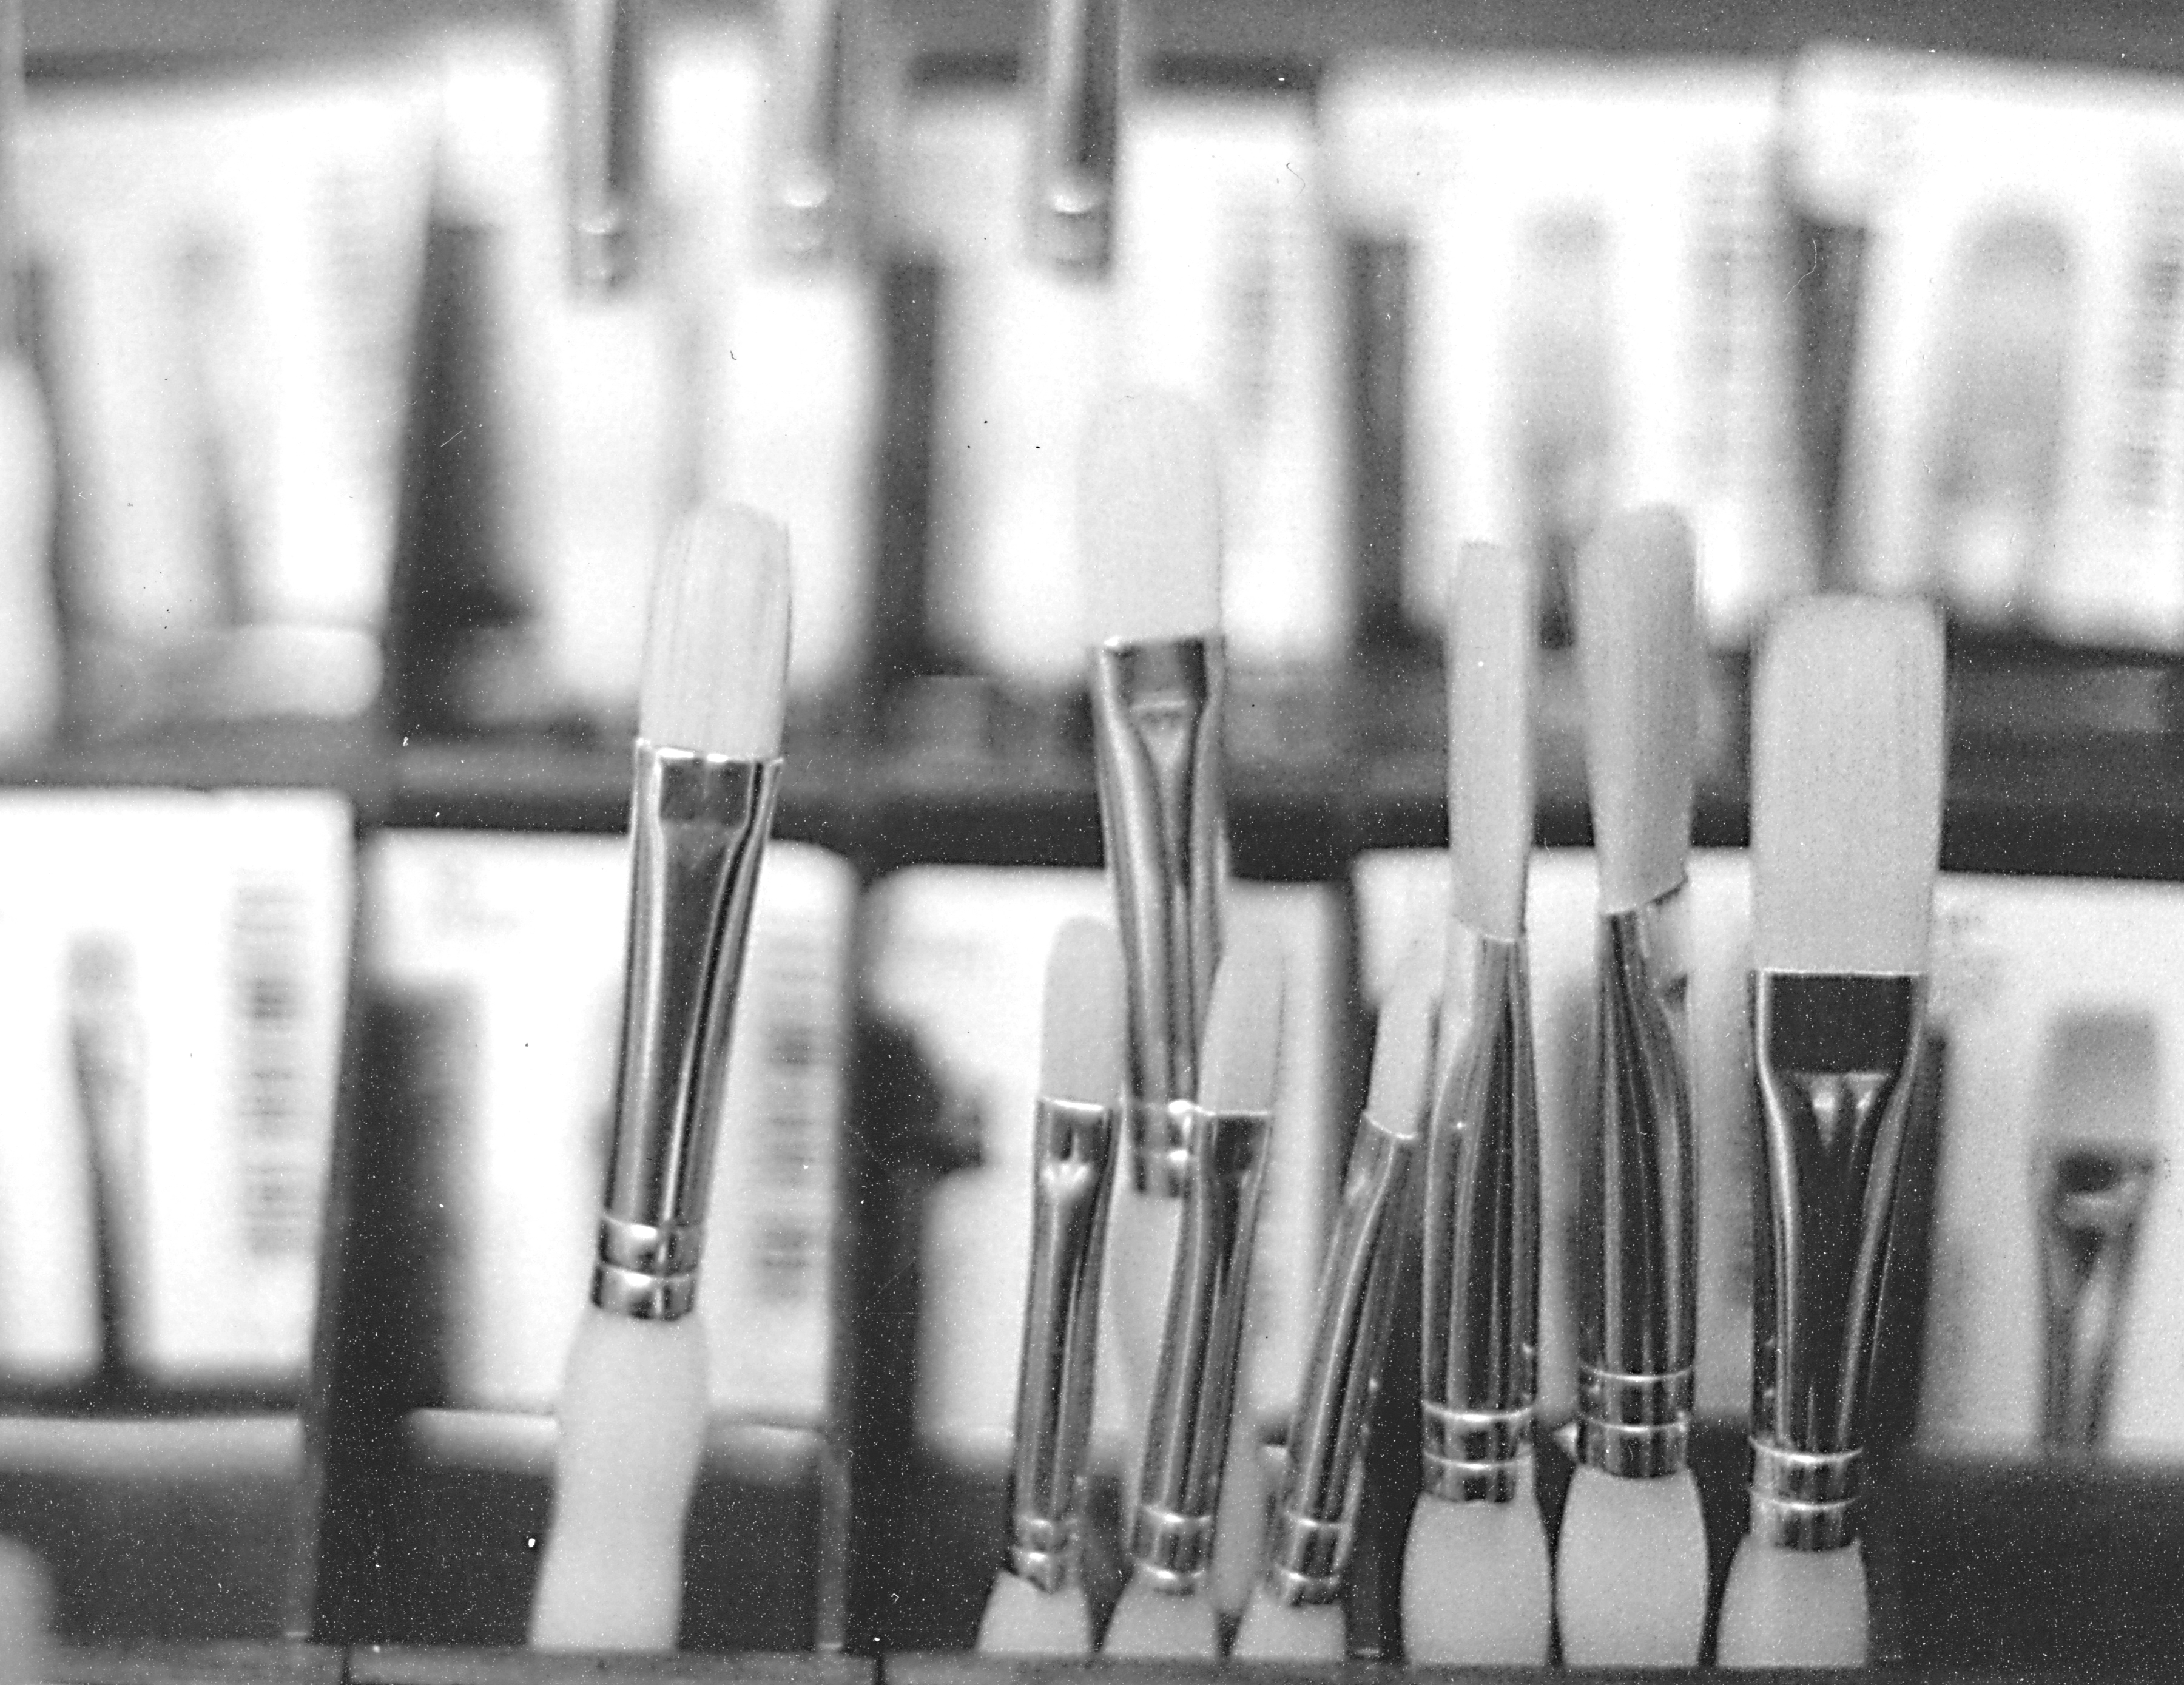
Brushes at the Norberta Philbert Gallery – Bentonville, Arkansas

When I had a chance to shoot still life, I tried to shoot with the aperture wide open – aiming for a very shallow DOF.

Steampunk Balloons by Tangled Metal - Norberta Philbrook Gallery - Bentonville, Arkansas

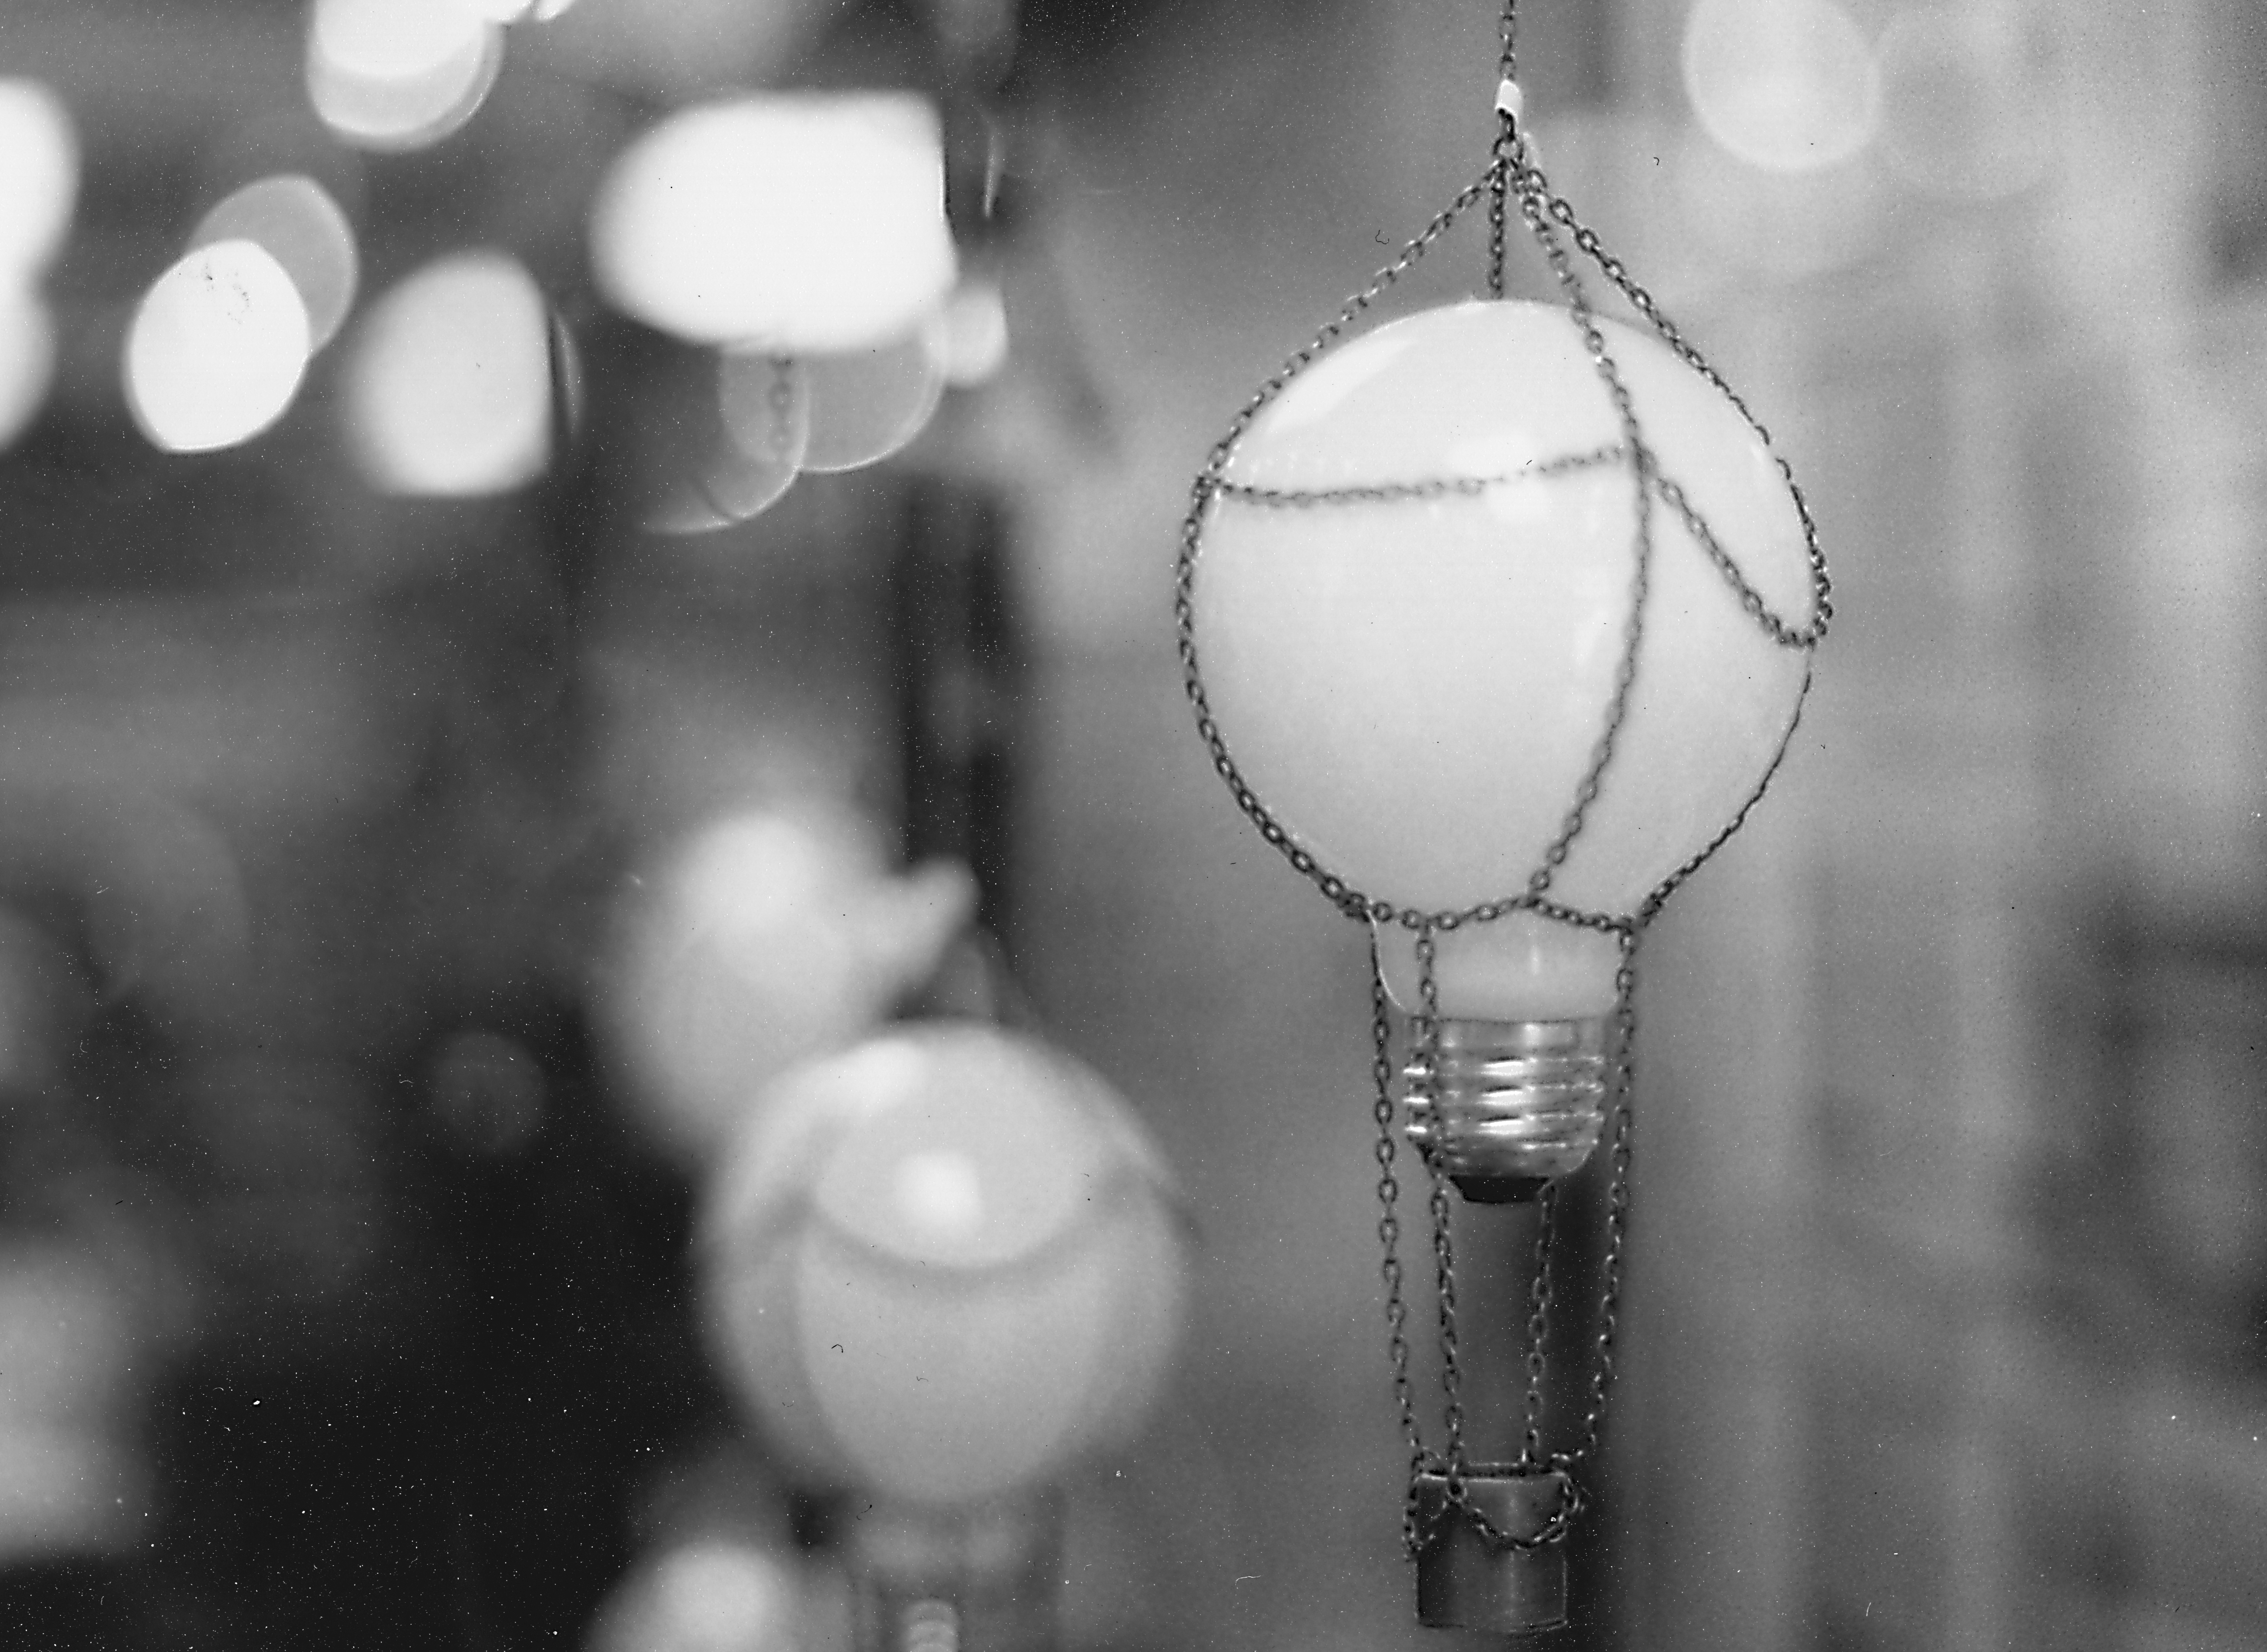
Steampunk Balloons by Tangled Metal – Norberta Philbrook Gallery – Bentonville, Arkansas

I loved these – I also like the shallow DOF – but think I could have closed the aperture down a stop. A local artist creates these from repurposed lightbulbs and clock parts. I shot several of these shots at a great gallery in Bentonville Arkansas located very close to Crystal Bridges.

Rademacher Leaf Vase - Norberta Philbrook Gallery - Bentonville, Arkansas

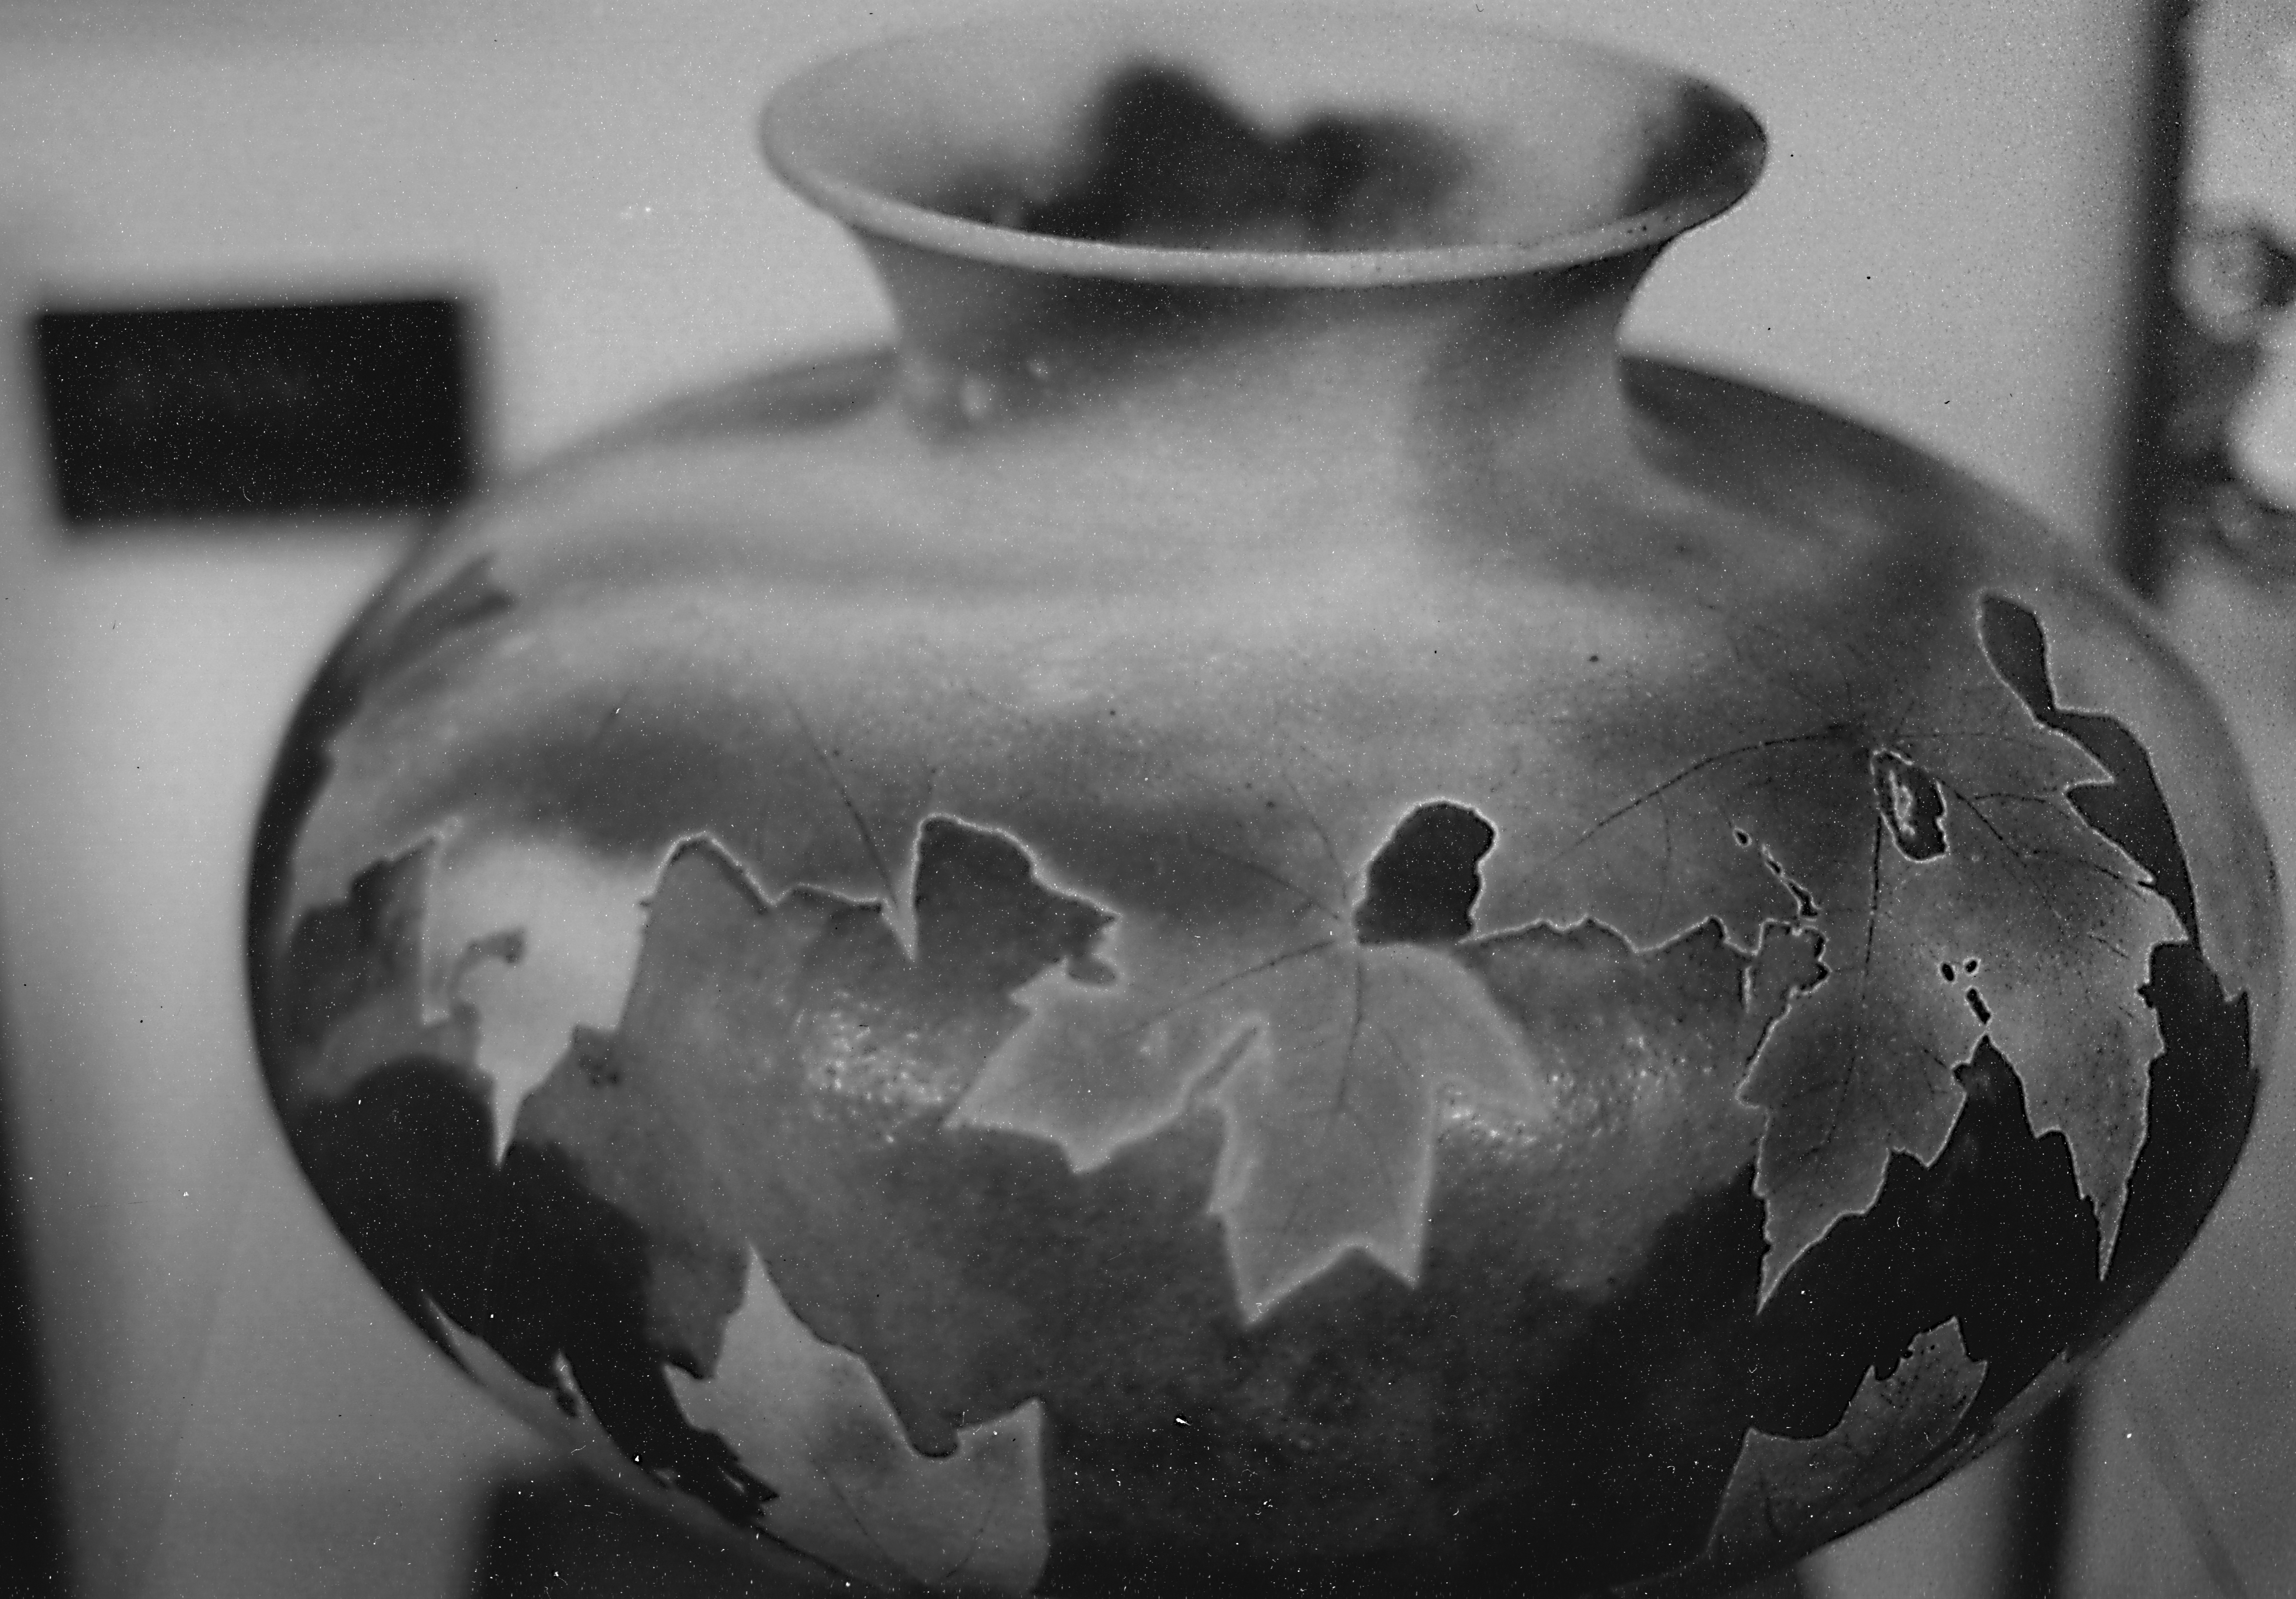
Rademacher Leaf Vase – Norberta Philbrook Gallery – Bentonville, Arkansas

This vase is by a local artist – he fires pieces with leaves pressed into the clay – I have one of his bird feeders and love the look of it.

Rockwell's Rosie - Crystal Bridges - Bentonville, Arkansas

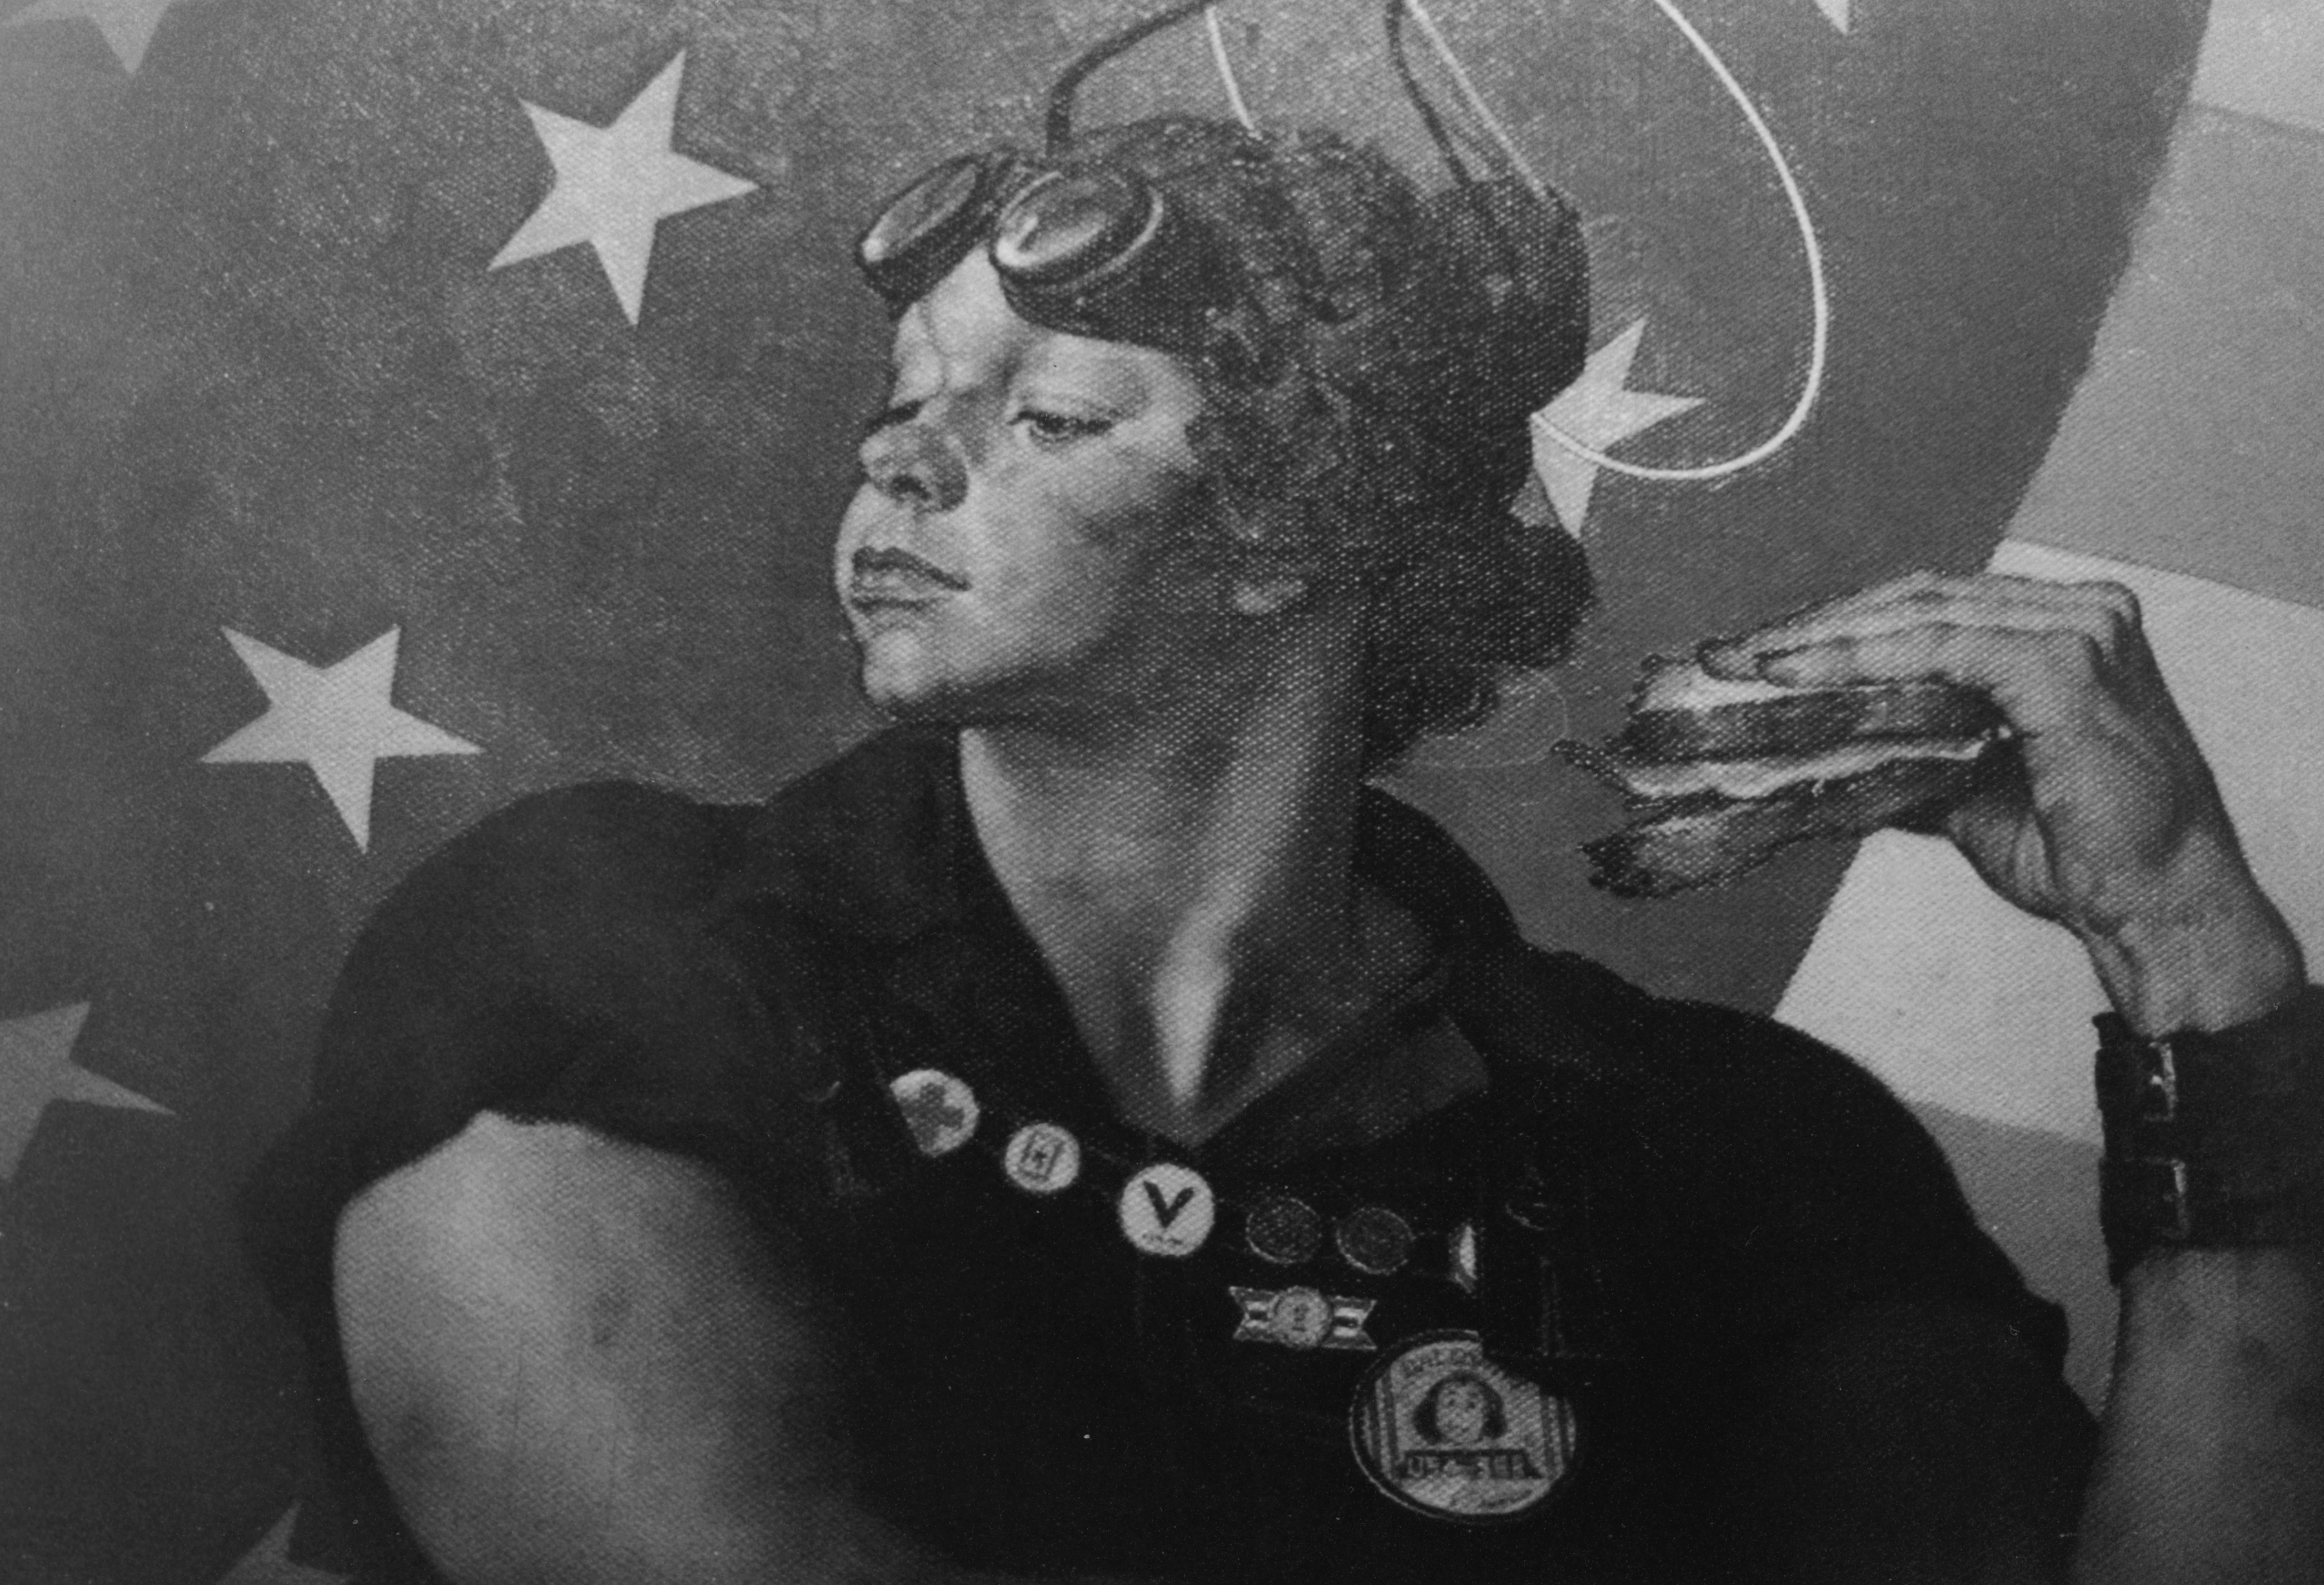
Rockwell’s Rosie – Crystal Bridges – Bentonville, Arkansas

I can’t go to Bentonville without checking in with Rosie – my goal with this shot was to capture a bit of the sheen of the paint on the canvas – it’s subtle but it’s there. It’s very interesting to look at something known for its color in black and white.

Newspaper Machines - Jasper, Arkansas

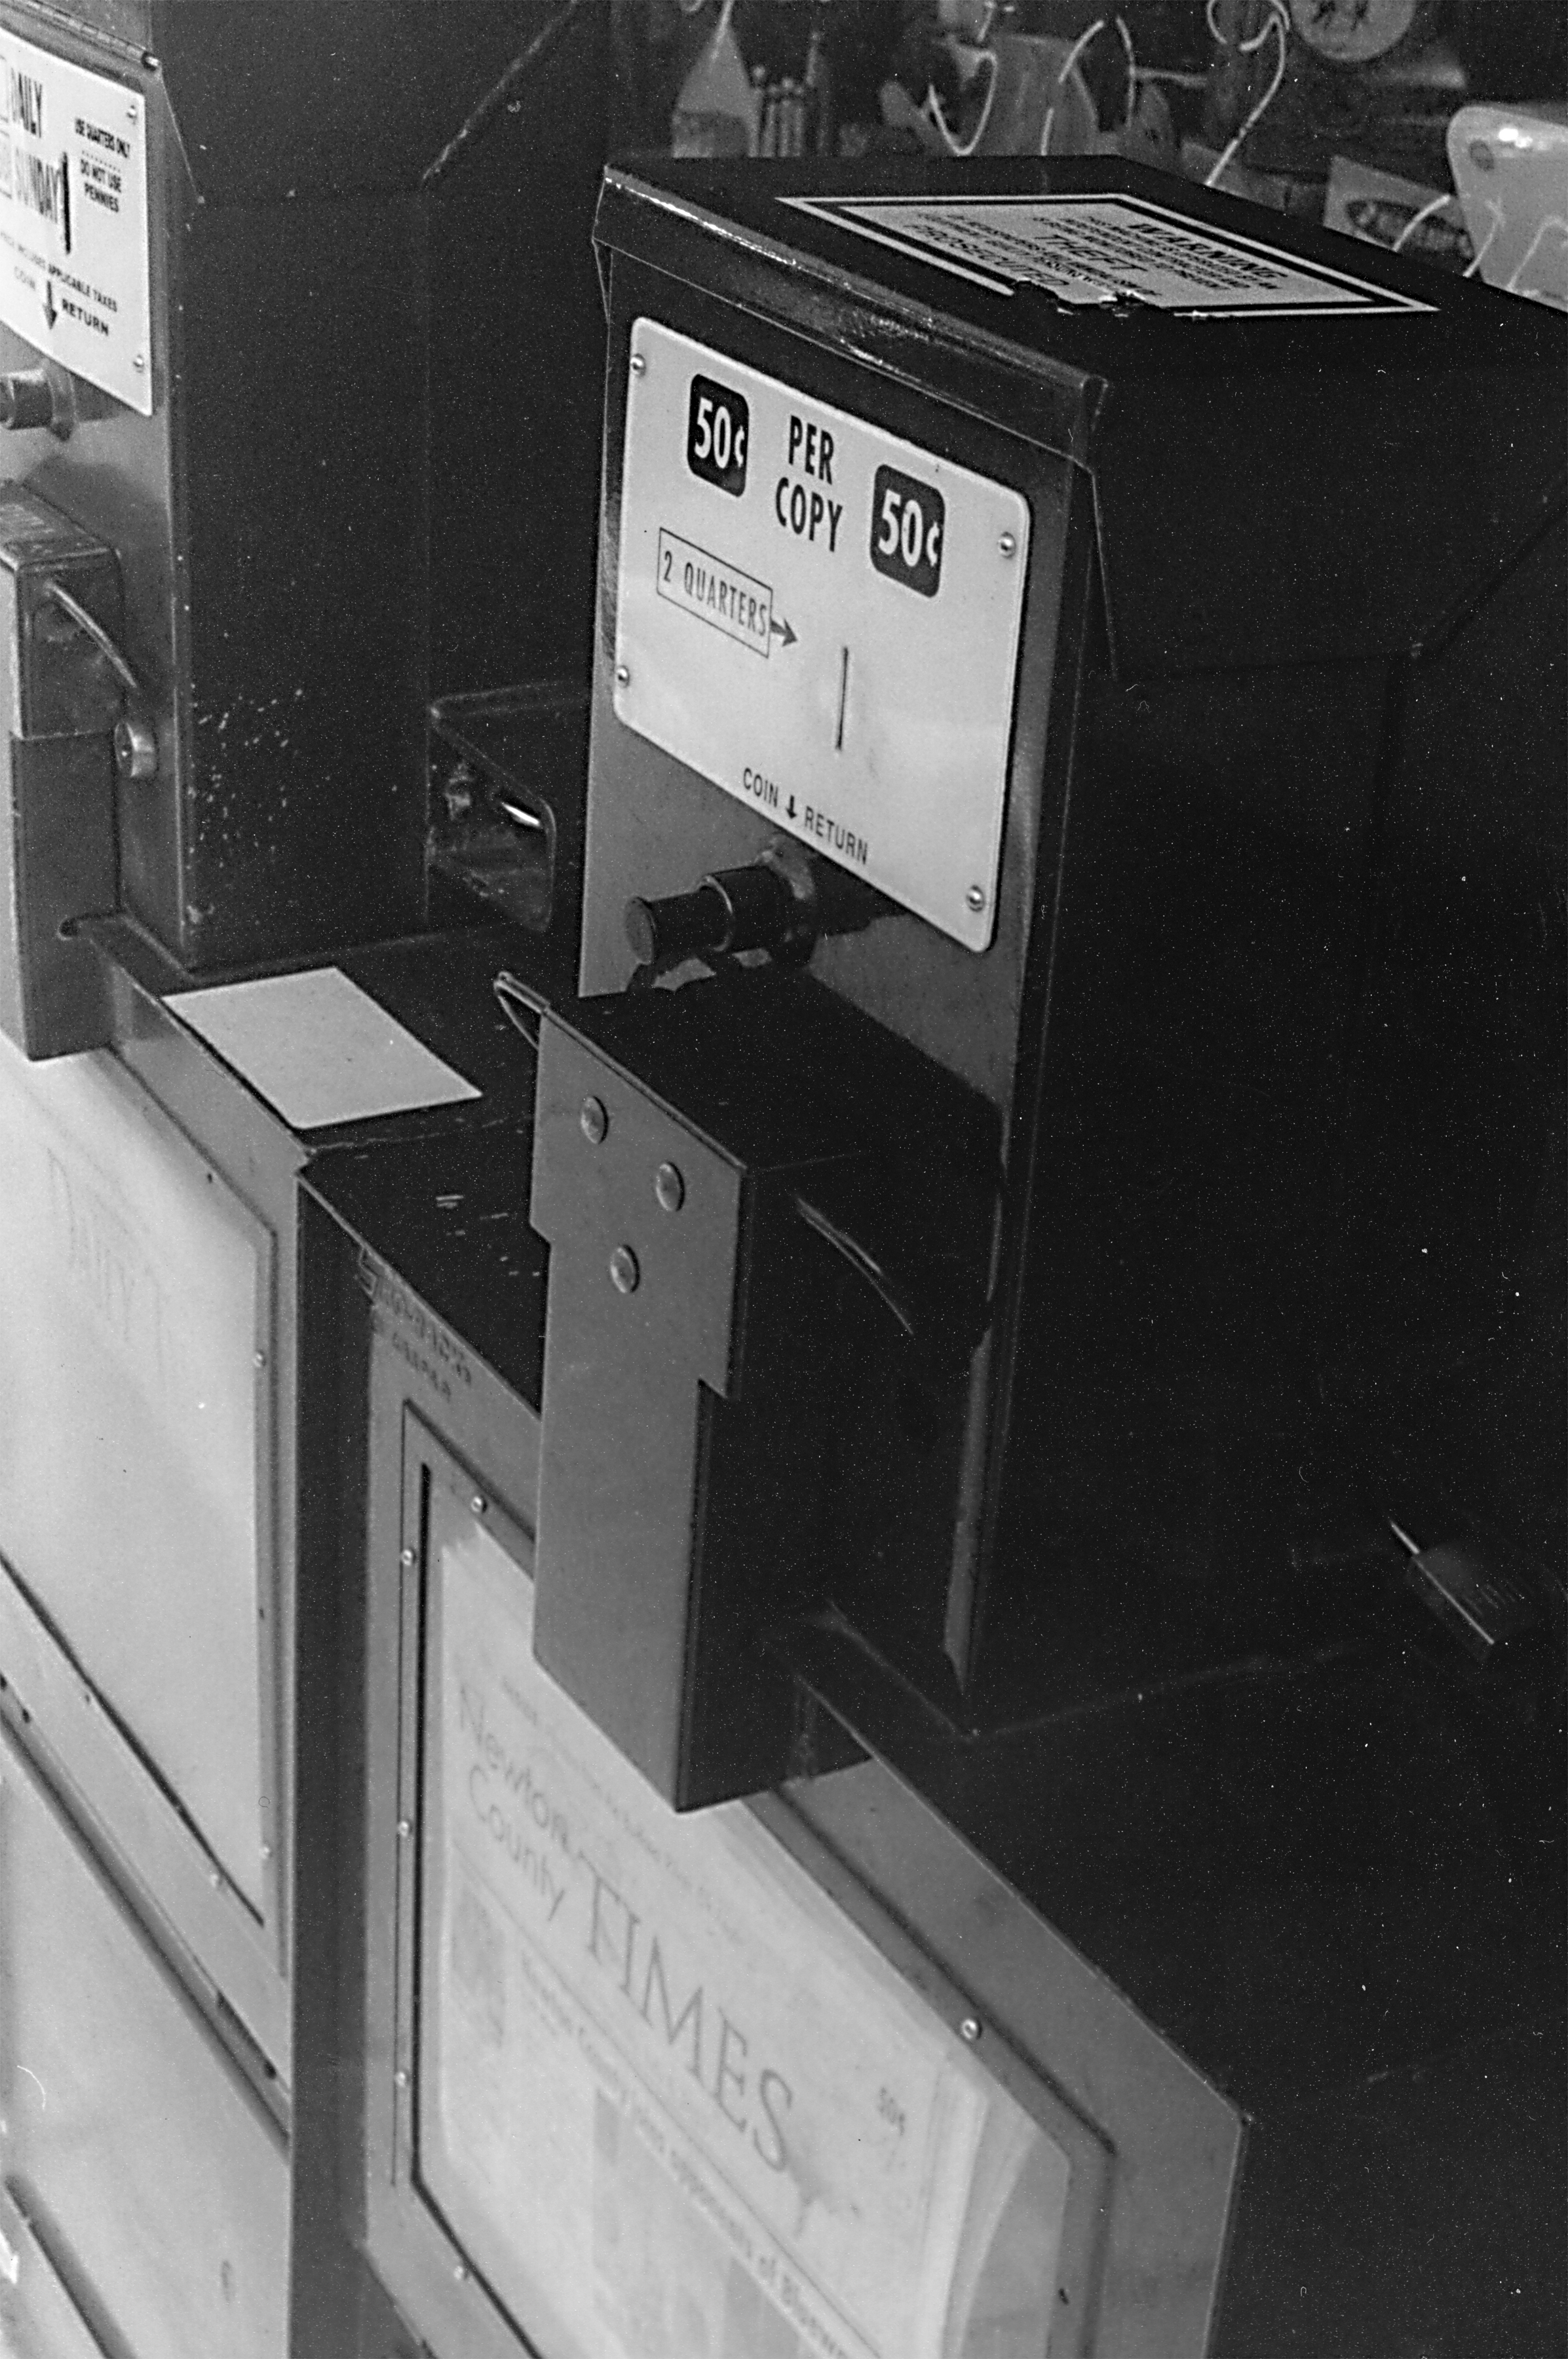
Newspaper Machines – Jasper, Arkansas

These old newspaper machines gave me another chance to play with leading lines – the diagonals draw you into the image. I like the surfaces on these – they were a vivid blue.

Kayaks Loaded - The Stone House - Oak Hill, Arkansas

Kayaks Loaded – The Stone House – Oak Hill, Arkansas

I shot this image of the jeep with the aperture fairly wide – the DOF is shallow enough to isolate the subject, but not so shallow that you lose the depth of the image.

So – my thoughts on this project 5 rolls in? Well, I’m getting more keepers per roll and I’m taking a lot fewer shots of each subject – on this roll I only shot a few subjects more than once. Showing Laura the area kept me moving so I shot lots of variety. I also took my film camera everywhere except kayaking. Having it with me gave me lots of opportunities. I stared the next roll at Crystal Bridges in the gardens – I am anxious to see how those worked out. I’m shooting 100 speed now, so maybe I’ll get some sharper images in the mix.

If you would like to catch up with my project, here are the links for the other posts in the series:

Roll #1

Roll #2

Roll #4

Where is Roll 3? Well, it’s in the trash because I didn’t pay attention to the light meter.